Showing posts with label Make:. Show all posts

Saturday 4 June 2022

Boardgame Rescue - My Next Project - Warrior Knights

The next in my Rescue Mission series is going to be one of my two copies (if not both) of Games Workshop Warrior Knights circa 1985.

Warrior Knights is a great medieval wargame designed by Derek Carver who alsodesigned Blood Royale which was similarly released by Games Workshop two years later as part of their Bookcase Games range.

I have played Warrior Knights a handful of times but it always stood out as a great game with lots going on for each player both in their turn and in others as you strive to capture cities across the board, wage war and try to put your pretender on the throne.

To Pimp or Not To Pimp

That is the question.  There is limited scope for pimping the game as it comes with a huge amount of cardboard tiles for all manner of item , however, there are some options including:

Strongholds and Cities - The most notable game piece on the board are the stronghold counters which come in three flavours:

  • Stronghold - x1 - This is your barons home
  • City Control Marker - x14 - Some city walls to surround your
  • Improved Control Marker - x6 -

Noble Markers - As you can see from the photo below these generic shields just look cheap and nasty and mine have even changed colour!!

Warrior Knights - Nobles, Strongholds and Cities
Warrior Knights - Noble pawns, Stronghold and City Control Markers

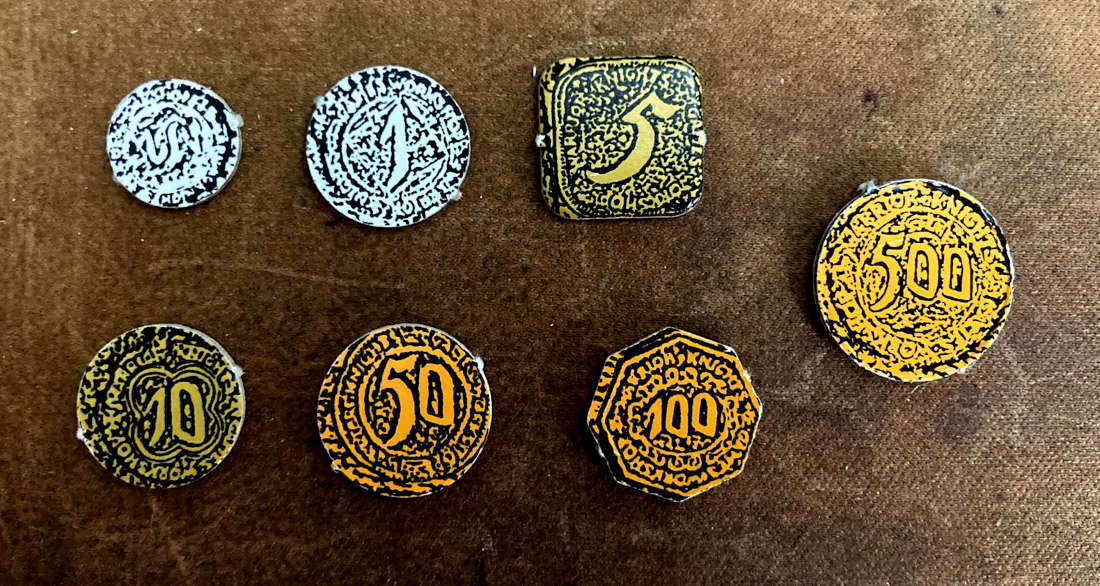
Money - It makes the world go around and you end up playing with these tiny little tokens throughout the game.  Much better to have some nice plastic tokens that don't blow away if someone coughs.

Warrior Knights - Money
Warrior Knights - Money - Who has time for 1/2 crowns these days!!

Trade ships - There is an exploration element to the game represented by the 4 colonies in the corners of the board.  These work in the same way as the cities on the main board and can be captured and fought over.  Getting there requires a vote in the council and the ship's progress is represented by a small cardboard counter.  This could easily be replaced by a tiny sailing ship.  

Wish me luck

Sunday 29 May 2022

Pimp My Game - Curse of the Mummy's Tomb

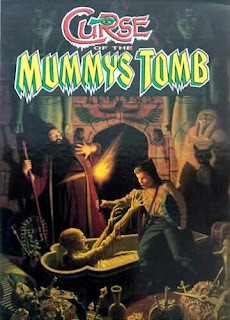
Back in the midst of the Corona Curse, I went about restoring one of my favourite Games Workshop boardgames from the 1980s, Curse of the Mummy's Tomb.  

I was never truly satisfied with the result and the ultimate goal was to have a pimped out copy of this vintage classic.

A prayer to the eBay Gods and an incomplete copy of the game was soon in my hands for the princely sum of £20.  Why, you might ask, would I part with good money for an incomplete game?  Well this one had all 5 of the original minis.  

Curse of the Mummy's Tomb Minis

These are much sought after "oldhammer" minis from the Night Horrors set and bought individually carry a hefty price tag of between £15 and £20 each.  All 5 minis for the price of 1 is what I call a bargain! If only I could find my originl minis...

The Pyramid of Khonsu    

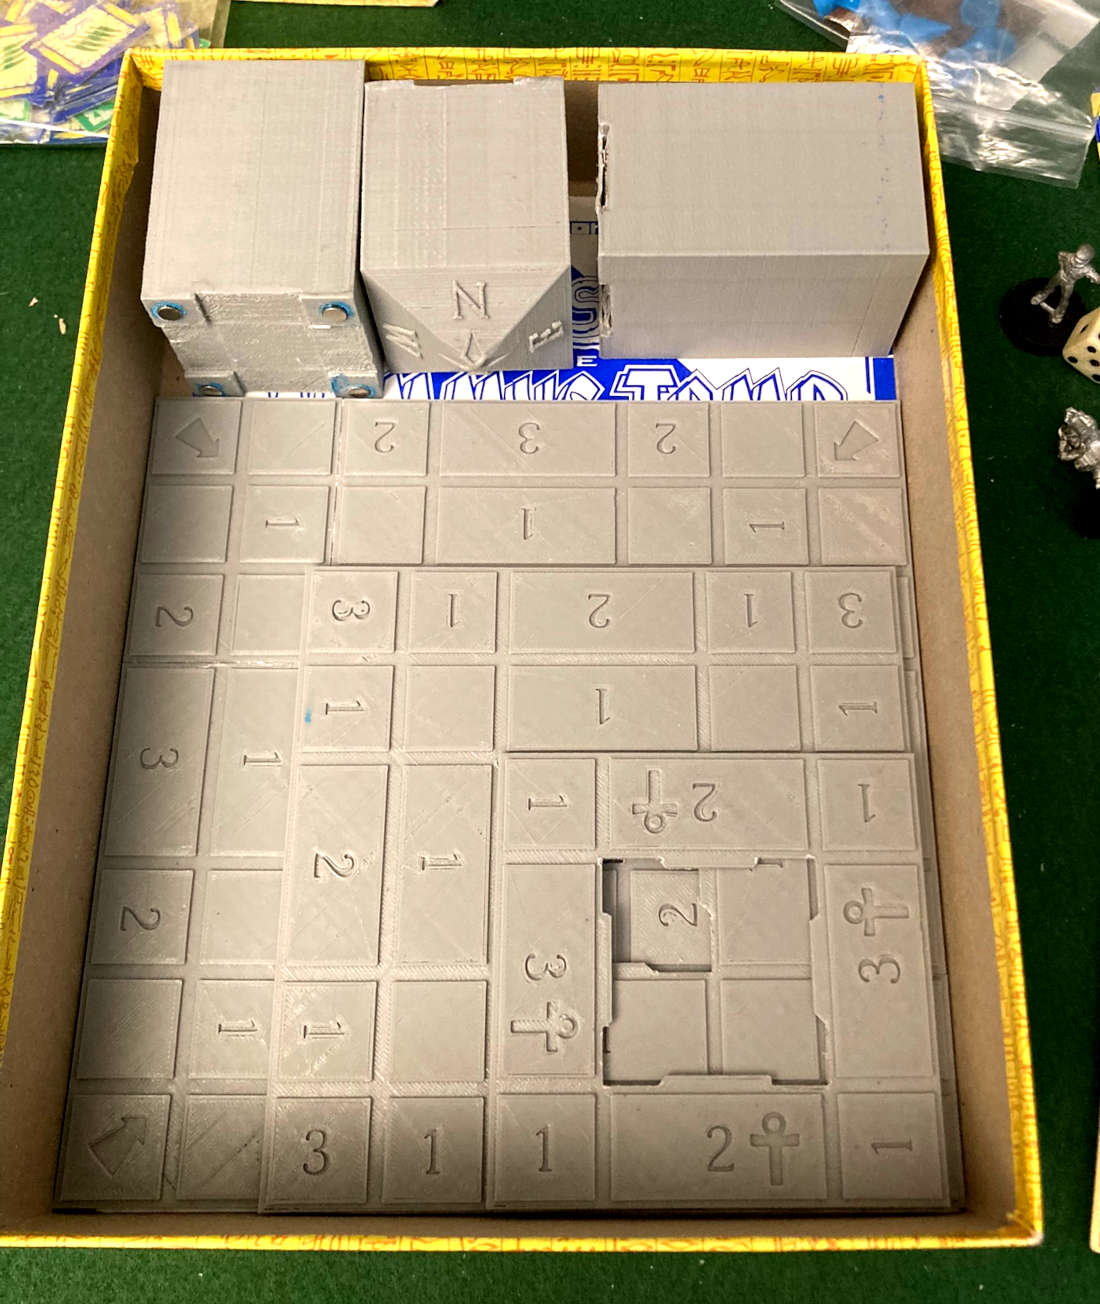
Both my original and this copy had horribly warped boards and an even worse central column.  I therefore took it upon myself to model and print a new sturdier version on my 3D printer.  I modelled this in Sketchup including all the important game elements such as the start arrows, encounter numbers, pharoahs heads, ankhs and compass, leaving the way too complicated hieroglyphic frescos to someone with better modelling skills than myself.

The Pyramid of Khonsu

The goal here was to balance printability (must fit on my print bed), functionality (must fit together and store in the original box) and playability (must have all the major functions of the original).  The middle and top floor plates all fit on the bed of my printer but the ground floor needed to be cut up into 4 segments and printed in batches.  I've seperated these out as individual models so you can play around

With a bit of trimming on the tabs it goes together easy enough.  

In order to print it on my FDM printer I split the central column into 3 pieces and magnetized each piece (16 Magnets in total) with readily available 5mm neodynium magnets. 

Curse of the Mummys Tomb Pyramid 3D Print - 1
Pyramid of Khonsu - The Floors

Curse of the Mummys Tomb Pyramid 3D Print - 2
The Floors and Columns click together

Curse of the Mummys Tomb Pyramid 3D Print - 3
Floors stacked with the help of magnets

Curse of the Mummys Tomb Pyramid 3D Print - 4
It all fits neatly back inside the original box

If you want to print your own Pyramid of Khonsu you can download the STL files for free from thingiverse

Tana Leaves

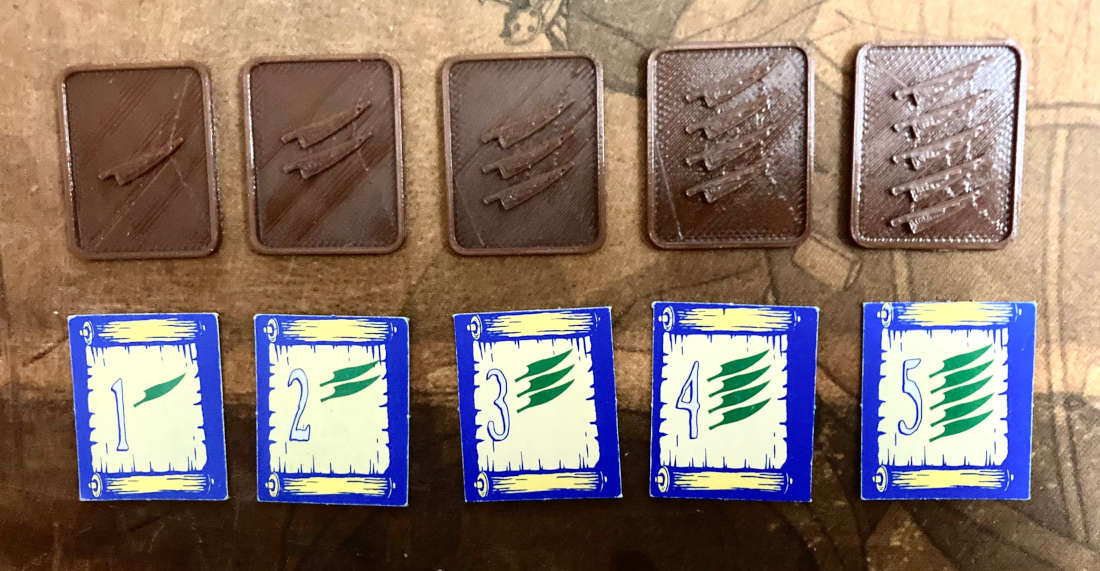
The quality of card stock in these 80s GW games would give the team at Fantasy Flight nightmares. It is so shockingly thin (10 thousands of an inch thick), I imagine you could use it to accurately set the tappets on a vintage car or level the bed of your 3D printer.  The tana leaves get a lot of handling during the game and so were another candidate for the 3D printer.  Given their size and relatively low number it was not too much of a chore to design and print 55 of the little blighters. 

Tana Leaf Tokens
Download your own replacement tokens for free from Thingiverse - Tana Leaf Tokens.

Attribute Cones

This new copy came with a few cones missing.  I could have purchased some replacements from eBay, or tried to find some replacements from boardgamemaker.com, but a pretty good alternative is available on thingiverse - Cone Game Piece (Games Workshop style)  They are the ubiquitous game tracker pawn used in many GW games of this era such as Cosmic Encounter which used them to represent the ship tokens.

Attribute Cones - Classic GW Style


The first outing for the game was as a special finale finale to my recent Judge Dredd campaign.  I'll write up the rules for this in a seperate article


Thursday 18 March 2021

Jessie's Prints - Episode 13 - The Chardalyn Dragon

This week, I are mostly been printing...

The Chardalyn Dragon - Migeul Zavala - Shapeways

At my regular Friday night roleplay club Dragons Keep we often have at least one Dungeons & Dragons game running and at the moment this is Icewind Dale: Rime of the Frost Maiden.

SPOILER ALERT: One of the big bad beasties you are probably going to encounter is the Chardalyn Dragon, a monstrous metallic magical construct which Wizkids have made available as an Icons of the Realm miniature

Wizkids Chardalyn Dragon
Wizkids Chardalyn Dragon - Buy one here


However, if your pockets aren't deep enough to afford that one, 3D miniature modelling guru Miguel Zavala (aka MZ4250 on Thingiverse)  has made his own for those of us who are lucky owners of 3D Printers.  You can download this for free on Shapeways.

Printing

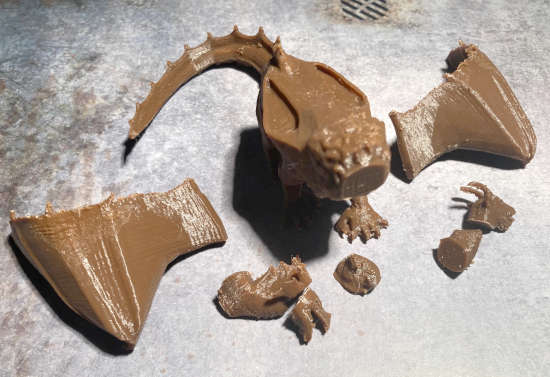
This comes as a two piece model, a dragon with outstretched wings and a seperate flying base.  Great if you have a huge FDM printer.  However, if you are like me and restricted to a 200mm square build plate or a resin SLA printer you are going to need to cut this model up into smaller parts using meshmixer.

With the model cut into 4 parts, body, flying stand and two wings, I printed these in two batches at a fine 0.1mm layer height.  That's about 16 hours worth of printing.  I arranged the body on the bed with the legs pointing down.  From the players perspective they will be looking down on this miniature so having a metric ton of support lines hidden under the dragon was the way to go.  The wings were arranged vertically to minimise the need for support material.  

I don't know what it is with support material on my printer, it just seems to fuse itself to the model.  I don't know if this is a temperature thing, the filament I use always seems to want to print at the upper ends of the PLA temp range (200 to 220).  

I know that there is probably a setting in Cura that I can tweak, but if you have any advice please pop it in the comments below.

Assembly

I pinned the wings and glued them using 2 part epoxy.  Not my glue of choice for plastic miniatures but I had used up all my superglue on an exciting super secret mega project which I will reveal in due course when it is complete. I also opted to leave the flying base unglued so the DM can simulate a flying or landed version, the pose is a bit dual purpose unlike the wizkids version which is strictly ground based.

Note to self: when printing spindly objects with horizontal layer lines.  Remember they are fragile.  

The Kraken for King of Tokyo was exactly the same it had this bunch of octopus like leg tentacles.  They were an absolute nightmare to print and kept snapping.  Cura should invent a way to change the infill density for parts which are inherently week.  Something like and infill change at z-height or allow you to draw boxes round sections of an STL and change the infill.  

Anyway, the long and the short of it was that I broke the flying stand!!

A Chardalyn dragon in Poo brown PLA
Chardalyn Dragon in it's hot off the printer shade of brown

"Don't Panic" I thought "it was a bit short anyway" and so 10 minutes later it was sitting atop its new coat hanger wire stand.  This is a lot thinner and helps to give it that flying look which we were after in the first place.

Painting

This miniature was super easy to paint, "barely an inconvenience" a matt black primer coat and then a hit with a rattle can of "Wheel Silver".  This thing is supposed to be mechanical so I used a failed print of my 3D Printer control board cover to give it a subtle hexagonal pattern like mechanical scales.  I must invest in some fruit bags which would better conform to the shape and give a smaller pattern.

Hexagonal wing pattern
My attempt at a hexagonal wing pattern - too subtle?

The yellow details are not in the Miguel Zavala model but sometimes "You gotta fake it to make it" so I picked out the eyes and mouth in green and then overpainted in yellow to give it an alien looking vibe.

The flying base was shot in matt black as I have no idea what terrain the encounter will be using.

Chardalyn Dragon - Rime of the Frost Maiden
Chardalyn Dragon - Dungeons & Dragons - Icewind Dale: Rime of the Frost Maiden

Wednesday 10 March 2021

Jessie's Prints - Episode 12 - Chimera

This week, I are mostly been printing...


I can't believe that I've been collecting minis for 40 years and I've never owned a Chimera especially as it is a classic monster of Greek mythology.  Well that's sorted now
 
The Chimera was a bizarre fire breathing three-headed monster which ravaged the countryside of Lykia (Lycia) in Anatolia.

From Thingiverse to Painted model in 7 steps.


I am concious that some people don't know what is involved in 3D printing so here are the basics.

1. Find your model on a 3D model warehouse site like Thingiverse.  

2. Download the STL files.

3. Open up the STL files in your slicer, I use Cura.  Plan your print by arranging the models on the bed and fine tuning your settings like supports, brim size and infill.  Save the gcode file to a removable SD Card.

4. Pop the SD card into your printer, select your file and start the print.

Cross your fingers and a few hours later (depending on the model) you will have a plastic model.  This print took 4 hours at 0.1mm layer heights (the finest detail I can get without changing out my hot end nozzle from a 0.4 to something finer like a 0.2).

Usually you only have to watch the first layer go down and any issues can be nipped in the bud early to save on plastic.  This print had small parts which wouldn't stay put on the bed so I added an 8mm brim around each part which did the trick.

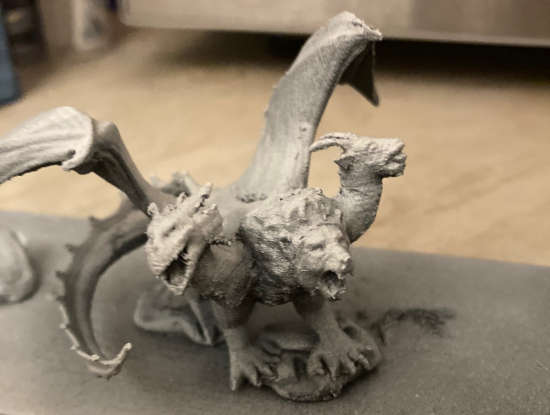
Chimera - Hot off the Printer
Chimera - Hot off the Printer with lots of support material

5. Strip off any support material you added with a handy dandy pair of side cutters.  I also run a lighter over the surface to burn off any stringy hairs.


Chimera - This model had 9 parts


Chimera - Parts Assembled
Chimera - Parts Assembled but this model has big old gaps which need filling

6. Sand, Glue, fill and prime your model.  I normally prime with matt black and then do a Zenithal Highlight with white to give it some shadows where the sun doesn't shine.


Chimera Primed with a Zenithal Highlight

7. Painting time.
 
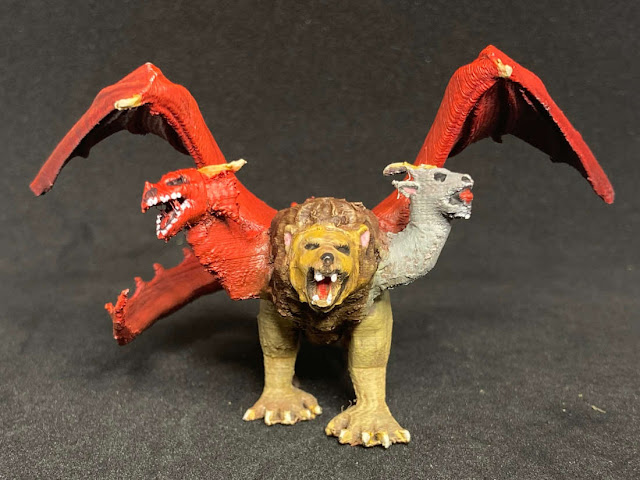
Chimera - Painted
Chimera - Painted and ready for the games table

3D Printing is not a mature technology yet and is a hobby all to itself.

Tuesday 9 March 2021

Another Vintage Boardgame gets the Rescue Treatment

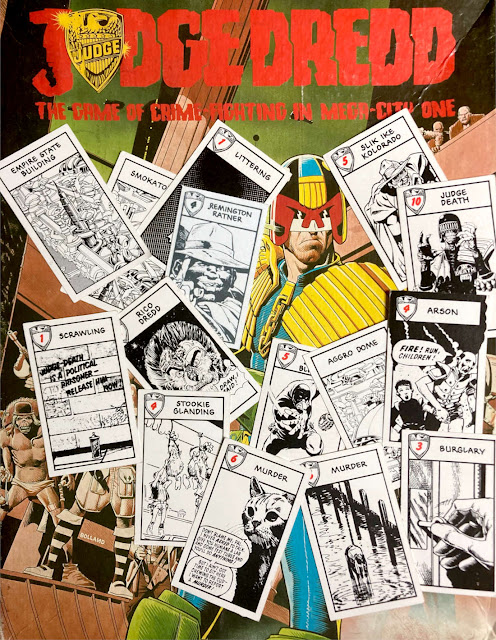
This is my copy of Judge Dredd the boardgame which I have had since I was 10.

Sadly along the way I managed to lose a perp.  Careless of me I know, but in my defence it has been 39 years and two house moves.

Judge Dredd Boardgame
Judge Dredd Boardgame (1982)

The miscreant in question was one Remington Ratner proprietor of Ratner's Rest Home for the Semi-Dead (which may have been a slight dig at the House of Lords) and featured in the story Body Sharks (progs 149-151).  

In game terms he is only semi dangerous (4) and body sharking is a mid level crime (5).  

Body Sharking and Organ Legging

According to the the 2000ADopedia (seriously needs a better name) body sharking is a very common crime and 1 in 4 (25%) of citizens will encounter body sharks in their lifetime.  Nevertheless Body Sharking and Organ Legging are heinous crimes and cary a mandatory life sentence.

Friday 5 March 2021

Rescuing the Oldest Game I Own - Belisha (1937)

A few years back a good friend (and fellow bargain hunter) bought me a Christmas Gift of two copies of an old card game game at an antiques fair in Covent Garden. 

Sadly, one of them was missing two cards and so I rescued it from oblivion.

Belisha - The "Safety First" Card Game

Published way back in 1937 by Castell Brothers Ltd (1878-1983) under the "Pepys" series of games.  Belisha is a reimplementation of popular card game Rummy.  The name "Belisha" was borrowed from the iconic Belisha Beacon introduced to UK roads in 1934 by then Minister of Transport the Rt.Hon Leslie Hore-Belisha.

Belisha - The Safety First Card Game (1937)

  A Game of Thrill

"All the family can play this new and entertaining game. Young and old alike. will find in it many a new thrill and many a valuable lesson, for 'Belisha' teaches the ever-valuable and all-important doctrine of 'Safety First'. 

Played on the same familiar lines as 'Rummy' with new and ingenious variations. 'Belisha' is a game of many interests. As the game proceeds the players are taken on a tour of England and Scotland from London to Oban: many of the cards bearing beautiful pictures in colour of famous beauty spots.

Belisha Card Game Advertisements

Each card bears in the top left-hand corner a familiar safety first symbol; some cards illustrate the dangers of the road; some show how accidents may be avoided. 

There's a touch of humour, a smattering of geography, a new method of teaching 'Safety First' and a heap of fun. 'Belisha' is a game that should be played in every home, for it has the merits of a family or party game with the added attraction of demonstrating again and again the way to ensure road safety for all."

Safety First, the birth of RoSPA and the Tufty Road Safety Club.

Tufty Club Badge
The "Safety First" campaign can trace its heritage back to 1916 and the founding of the London Safety First Council.  A public meeting was held due to an increase in road traffic accidents involving motor vehicles and the reduction in street lighting to aid "blackout" during WWI.  Their first campaign which encouraged people to walk on the pavement on the side of the road facing oncoming traffic reduced pedestrian deaths by 70%.

In 1941 the NSFA patron the Duke of York became King George VI he wished to continue his patronage and RoSPA was born.

I first encountered RoSPA, like many of my generation, when having to perform my bicycle safety exam as a child in the 1970s.   

The Tufty Road Safety Club had been around since the early 50s and I distinctly remember having to negotiate a mock road course which had been det up in my school playground.  Getting your Tufty Club badge was a seminal achievement back in my day.  

Tufty and his woodland friends have been iconic champions of children's road safety education for decades and featured on many educational board games over the years.

Tufty Road Safety Boardgame (1970s)

A masterpiece of marketing before the advent of  Baby Shark, "do doo, dee doo, dee doo" he was rocking the hit parade with an album of nursery rhymes related to road safety. 

Fun times.

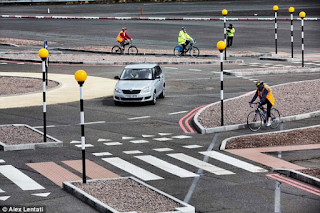
Bicycle Road Safety Training
Bicycle Road Safety Training and Belisha Beacons

Wednesday 24 February 2021

It's Alive!!! - New 3D Printer at RGP HQ

A sad and sorry tale has finally come to an end...

I have been without a 3D Printer since November 2020 when my something got fried on my CTC i3 Pro B motherboard.  I blame the operator carelessly backdriving the extruder motor when extracting filament although it didn't help that the printer was equipped with an early Mk3 extruder with no way to disengage the drive wheel.

Geetech i3 Prusa Pro W

I took delivery of my new printer last Thursday, but opening the box revealed a kit of parts which filled me with dread.  My previous printer came partially assembled and I had no motivation to get stuck in to what could possibly be the larget single meccano challenge I have embarked upon.

Two days later and the printer was built.  

Geetech Prusa i3 Pro W
My New Geetech Prusa i3 Pro W

What were my initial observations?

No Manual - I am no newbie to 3D printing and this printer is essentially the same as my last one.  I knew I would find a comprehensive guide to building the printer on the Geetech YouTube channel and lo and behold there it was.  What I wasn't expecting was getting to the final stage in the build process, wiring the control board and there being no final step!!!

Luckily the printer uses the ubiquitous GT2560 control board so finding a manual and a picture online was no problem.  However, by following the manual I did manage to connect all the limit switches incorrectly which meant the printer didn't home properly (cue horrible motor clunking sounds as the x-carriage refured to recognise the limit switch).

In addition this printer differs in one respect from my old printer in that the x-axis limit switch is set considerably further back and so the home position is actually off the print bed by about half an inch.  I could have fixed this by updating the printers firmware and setting an offset, but I've been here before.

Half an inch makes all the difference

My old printer had a similar problem in the Y-axis which meant that it would home too far forward.  The solution now as then was to print off an extension finger which would press the x-axis limit switch that half an inch early.  

So off to thingiverse I went and lo and behold someone had made a model and bish bash bosh my printer was off to the races printing out its first part.  Given that the Prusa design is derived from the Rep Rap project itself I think this is quite fitting.

An x-axis trigger extension
First Part Printed - An x-axis trigger extension

Upgraded Parts - The reason I bought this particular printer was that it was one of the cheapest I could find with a Mk8 extruder.  However, this was not the only upgrade that the printer came with.  No siree, I got proper lead screws for the z-axis instead of plain old threaded rod, proper flexible couplers not pieces of rubber tube and a significantly better x-carriage assembly with threaded holes for mounting a second hot end fan.  The hot bed was also an upgraded version without the annoying brass rivet in the middle like my old printer.  The borosilcate glass platter now sits perfectly flat on the hot bed ensuring no distortion in z height and no hot spots.

Laser Cutter Dust - I could not believe how dirty I got when handling the laser cut plywood panels which make up the frame.  Every edge of the printer is covered in a thin film of wood ash which comes off on your clothes and hands.  If I were ever to build another laser cut framed printer then step 1 would be to wipe down all the wooden parts with a damp rag.

Jessie Will Be Chuffed

Now I have a working 3D Printer I can return to blogging about the things that I print in my Jessie's Prints series.  Jessie has been on a severe no PLA diet since June 2020 so he will be chuffed to bits.

Monday 25 January 2021

Cthulhu Ate My Minis! - Rescuing A Vintage Curse of the Mummy's Tomb

My Games Workshop Bookcase Boardgame collection has a couple of survivors who are hanging on for grim death.

Curse of the Mummy's Tomb Box Art
Box Art
One such game is Curse of the Mummys Tomb which has long since lost its metal minis and I need to replace these.  Being a tightwad I'm not going to spring for a mint copy or the £35 for a full set of 5 minis.

To the scanner dear boy...

I have the character cards which have fantastic Gary Chalk illustrations of the four protagonists which can easily be turned into papercraft miniatures.  I wrote a papercraft minis how how to many moons ago and this sort of boardgame first aid is trivial if you have a scanner and printer.   

This also gives me the opportunity to print out the additional characters from the expansion "In Search of Eternity" which featured in issue 102 of White Dwarf. 

 According to the Lost Minis Wiki all 8 character minis were repurposed from the Gothic Horror range and the Mummy from the Night Horrors.  In fact this is probably what happened to my minis... Cthulhu ate them.

Scan, GIMP, Inkscape, Print, Play

Paper mini layout in Inkscape
Replacement Character Minis
I scanned in all the player cards and in GIMP cut out each of the character images.  I increased the white point using adjust levels  to make them pop before saving them into individual files.

Moving to Inkscape I created a basic standee template 1 inch wide x 1.5 inches tall with a half round base.  Each character was then pasted in and flipped copy pasted in.  Remember to put these head to head otherwise your standees will be upside down.

Export them out as a PDF and print them out.  I only have a cheap inket and even cheaper paper so mine came out a bit blurry.  These were then stuck to cereal box card with PVA glue and once dried cut out.  There's a significant difference in thickness of cereal box cardboard.  Name brand varieties tend to be quite thick which can be a disadvantage if you are using plastic stands.

The player cards for the expansion were also printed out and backed onto cereal box card along with some missing value 1 Tanna Leaf counters.

Another Game Saved from the Scrapheap 

As can be seen from the photo the quality of the minis is very dependent on your printer and paper.

Curse of the Mummys Tomb Paper Minis
Replacement paper minis for base game and expansion
 

However, for me this is perfectly acceptable for the time being as I am desperate to play a solo game during COVID lockdown 3.0. 

Curse of the Mummy's Tomb
Curse of the Mummy's Tomb: rescued and ready to be played


Sunday 24 January 2021

Gaslands: A Question of Scale

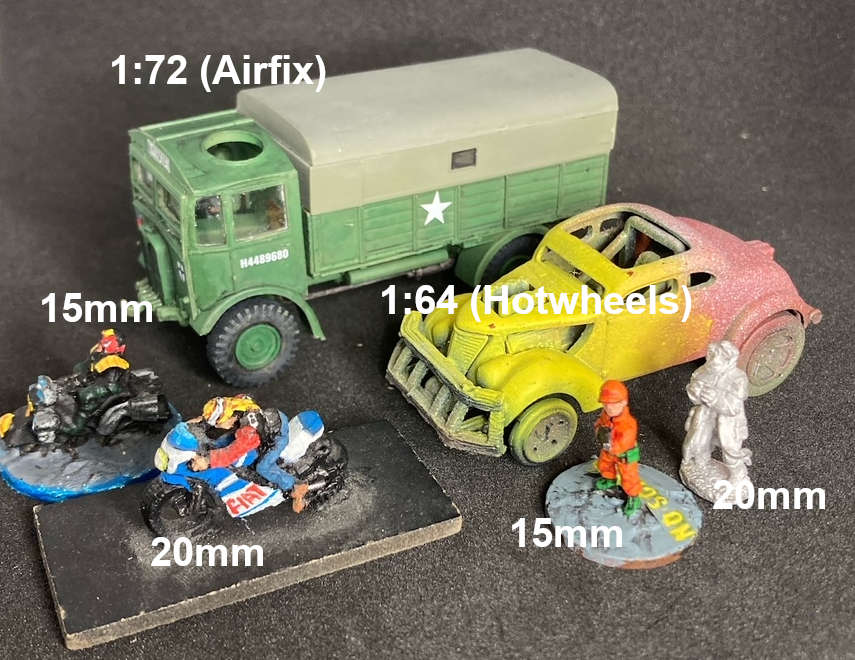
 I recently joined the Gaslands facebook group and a user posed the interesting question of what scale models can you use when building your post apocalypse road warrior gang?

The simple answer is quite a few.  Pictured below are a selection of miniatures from my own collection.

1:72 - Airfix kits are an obvious go to for those military inspired builds especially the tanks and helicopters of Rutherford and Mishkin 

Gaslands Scale Comparisons
Gaslands Scale Comparison

1:64 - Hotwheels and Matchbox are nominally 1:64th scale but there's a lot of leg room and models tend to besized to fit in a blister pack rather than be true scale.

20mm - A popular modern wargaming scale designed to fit in with 1:72 plastic kits.  This seems to be the scale that most 3rd Party companies like Stan Johansen Miniatures have adopted

15mm - Popular with Sci-Fi wargamers but cheap as chips and there are lots of manufacturers out there.

Wednesday 1 July 2020

Reaper Bones #23 - Vermin!

Can you believe that only 8 weeks ago I was patting myself on the back after painting my 50th Bones mini.  This weeks offering of some tiny critters pushes me past the 100 mark!

Reaper Bones Giant Spider, Scorpion and Beetles

Every DM needs a selection of menacing critters to up the threat level when the party are getting that little bit blasé when casually clearing dungeon rooms.


Bones Progress

Reaper Bones: 245 - Painted: 108

Related Posts


Wednesday 24 June 2020

Birthday Wishes and Resin Printers

As regular readers of this blog will know I am a 3D Printer owner, hobbyist maker and novice designer. 

I've owned my cheap as chips FDM Printer (a CTC i3 Pro B) for over 2 years and it has served me exceptionally well given the limitations of the technology.  With my birthday coming up I am feeling like I should take the next step and buy a Resin 3D Printer so I can printer higher definition and smaller scale objects.

What budget Resin Printers Can I Buy?

There are 3 main models that seem to be popular at the moment and are within my price range:


Creality SLD-002R
Buy it on Amazon


Anycubic Photon S
Buy it on Amazon

Elegoo Mars
Buy it on Amazon

SPECS
Vol: 120 x 65 x 165mm
XY Res: 2560 x 1600px
Z Res: 20-50 microns
Speed: 50-70mm/h
Price: £253
SPECS
Vol: 115 x 65 x 165mm
XY Res: 2560 x 1440px
Z Res: 25-100 microns
Speed: 20mm/h
Price: £280

SPECS
Vol: 120 x 68 x 155 mm
XY Res:
2560 x 1440px
Z Res: 10 microns 
Speed: 22.2mm/h
Price: £230


I am leaning towards the Creality SLD-002R on the basis of the print speed and the print volume so if anyone has any real world experience of this printer please drop me a comment below.

Wednesday 10 June 2020

Jessie's Prints Episode 10 - Soda Bottle Stacking Planters

This week, I are mostly been printing...

Soda Bottle Stacking Planters - https://www.thingiverse.com/thing:4437199

Living in an apartment I have very limited garden space, basically it is my kitchen window ledge.  I was challenged by my 80 year old Dad (who has an alllotment channel on YouTube) to start growing some microgreens.

I used to have a ramshackle mix of pots and planters which did not take advantage of the one thing I do have which is ample amounts of vertical space and a chance encounter with an image on Pinterest made me think "I can do that with my printer". 

Minutes later, the Soda Bottle Stacking Planter was born.

Soda Bottle Stacking Planter

Just print twice, glue the halves together and combine with your favourite 2 Litre bottle of soda.

"But this is a gaming blog! What the heck has this to do with gaming?" I hear you say. 

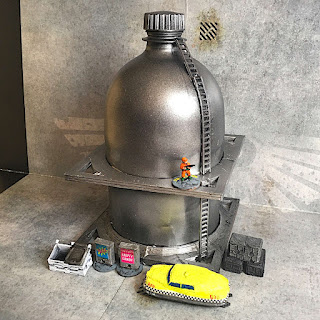
Well this is a perfect example of a crossover print.  With the addition of this ladder from Thingiverse designer Cheng Huat Wan it becomes a multi-purpose Bulk Liquid Storage Tank for use in all your Sci-Fi miniature wargames and RPGs.

I know that I'll be using mine in my Gaslands and Judge Dredd RPG games.

Bulk Liquid Storage Tank

Sci-Fi Bulk Liquid Storage Tank


Wednesday 3 June 2020

Jessie's Prints Episode 9 - Car Wars

This week, I are mostly been printing...

Classic Car Wars Vehicles 15mm / 1:64 - https://www.thingiverse.com/thing:4403771

Steve Jackson's classic automobile apocalypse game Car Wars was a big part of my childhood.  The tiny scale (and cardstock counters) meant that the whole epic game could fit  into a case slightly smaller than a video cassette.  

Many expansions were released over the years including The AADA Vehicle Guide.  By now SJG had developed a sort of short hand for describing these vehicles but the AADA Vehicle Guide was unusual in that it included a full set of elevation drawings for each vehicle.  A further expansion pack of AADA Counters was also available for play in the game. 

These are perfect for my 15mm Judge Dredd game so I thought I would have a go at modelling and printing some of these futuristic looking things.  They are also perfect for Gaslands with a bit of postapolcalyptifying and each model prints out in about 30 minutes, so faster than you can say "Can we go to the shops and buy some Hotwheels, mum?".

If you download them please remember to collect, share your makes and tip the designer if you fancy it.

Reminds me of the Volvo Ad catchphrase in the 1990 movie Crazy People "They're boxy, but good"

Superflash

Car Wars Superflash

Tonto

Car Wars Tonto


Spring Surprise

Car Wars Spring Surprise

Painted

Car Wars Cars Painted

Saturday 2 May 2020

Justifiers - Long Dead Game Unofficial Miniatures Review

Last week I blogged about my love of one particular long dead game from the 80s, Justifiers RPG.

I have subsequently unearthed some of the custom miniatures I made for each of the player characters.

Justifiers was already dead when I acquired my copy and it was never a big game to begin with.  There were never any officially licensed miniatures and back in those days sci-fi minis were very much dominated by the Grim Dark 40K style.  There was a very small cottage industry of gaming miniature makers like Denizen but they were focusing on anime and movie properties.  There was nothing I could do but make my own.

Custom Justifiers RPG Miniatures
Custom Justifiers PC Minis (LtoR: Fox, Rhino, Gazelle, Bat and Owl)
I wanted the characters to be wearing their company issue vacc suits, so I turned to the nearest simalcrum 1/72nd scale flight crew.  Specifically I chose the the Italieri #1246 Nato Pilots and Ground Crews box set which you can still get today from Amazon

#1246 Nato Pilots and Ground Crews Buy From Amazon
A bit of Milliput sculpting later and I had added the necessary ears, horns, wings, snouts and other animal features to turn these into the required Fox, Rhino, Gazelle, Bat and Owl miniatures to match my players characters.

Needless to say these went down a storm and the other miniatures from the set were given a liberal black undercoat and left to represent NPCs.  The game plot was essentially an escape from a rival corporate spaceyard, so I bought a box of Russian Infantry to be the enemy force.  I have a feeling they were also by Italieri or Airfix.


Being plastic these are too lightweight to be left unbased and I chose the extravagant option of mounting them to 5p pieces (1p pieces were too large).

The moral of this tale is that you can still give your long dead games some table time with a bit of imagination and a few plastic soldiers.

If you want to relive the 80s and play the Justifiers RPG you can buy the watermarked PDF from DrivethruRPG

Old School RPGs - Available Now @ DriveThruRPG.com