Showing posts with label Make:. Show all posts

Thursday, 26 December 2024

Cheap Chinese Soldering Irons - Are they worth the money?

Embarking on the odd electronics project over the last few months has had me sucking at the teat of Aliexpress.  As my previous solder station (a Lidl Parkside special) was almost impossible to find tips for at a reasonable price. I dipped my toes into the water and bought a cheap chinese soldering iron.

80W Chinese Digital Soldering Iron - Under £10

At an almost ludicrous price I was not expecting much.  It came loosely packed with a set of tips a sponge and a pressed metal stand.  Sadly it was equipped with a two prong Euro style cord rather than the far superior UK 3 pin plug but I could not find any UK plug variants at similar prices.

The iron has a small digital display and two buttons marked + and - .  The instructions did not cover basic operation but after a bit of trial and error I worked out that:

  • 1 short press of the + or - button allows you to set a target temperature 1 degree at a time
  • 1 long press of  the + or - button allows you to change target temperature quickly
  • 2 rapid presses of the + button switches between Centigrade and Farenheit temperature measurement.

Light as a Feather 

As with a lot of mains powered hot tools such as pyrograves, soldering irons and hot glue guns they are extremely light.  They are often lighter than the mains cable they are attached to and so are constantly making a bid to throw themselves off the table.  

The stand provided does an excellent job of preventing this from being a major problem.  However, there is nowhere to place the provided sponge. 

Easy to Overheat

As a relative newbie I found it was too easy to casually or accidentally change the temperature as I was soldering leading to oxidation building up on the tip and then a lengthy cleaning exercise.

What is the best temperature to solder at?

I found that 350 degrees C is the best temperature for soldering.  However, due to the design of these irons it is so easy to accidentally change the temperature that constant monitoring is essential.

Invest in a Brass Wire Cleaner

This is where I chose to supplement my meagre little collection of soldering accessories with a brass wire cleaning pot.

A Simple Solder Station - Thingiverse: Thing 6809777 

I designed a simple soldering station baseplate to organise the supplied stand and sponge and to accomodate a tin of brass cleaning wire.  Your stand and wire pot dimensions may differ so please feel free to remix this model.

Saturday, 26 October 2024

Mega City Block Upgrade - Arduino Nano MAX7219 Display

A while ago I built a Mega City One Miniature Cary Case for my Judge Dredd miniatures and it was always my intention to have some sort of digital display which I could display random "in game" messages and to send instructions to the players such as ROLL FOR INITIATIVE.

The Components

Arduino Uno / Arduino Nano

I'd been itching to mess around with an Arduino microcontroller for years but never had the courage to just dive in.  However, there are so many people on ebay and Aliexpress selling ridiculously cheap arduino kits that there really is no barrier to entry. 

I plumped for an Arduino Uno Rev 3 Starter Kit which included a breadboard, jumpers and a whole pack of additional resistors and what nots.

The goal here is to make a small form factor self contained device so migrating from the large Uno dev board is essential.  I ordered a random Nano board from Aliexpress before realising that they come in 3 varieties with different board to PC connectors.  the cheap one I had picked came with an old style mini USB B connector and no lead.  Fortunately I had an lead from an old digital camera to use in the meantime, but I quickly ordered a bunch of nanos with USB C connectors for this and other projects I have in mind.  

MAX7219 8x32 Dot Matrix Display

The perfect lo-fi display for this project is a MAX7219 LED 8x32 dot matrix display.  It's small enough to work as a standalone unit and can take its power from the Arduino itself.  I bought one from AliExpress for only a couple of pounds. 

Wiring the MAX7219

I grabbed a bunch of dupont wires (these are the handy dandy push pin connectors which you get in your arduino kit.  I chopped one end off each wire and soldered them to the MAX7219 pins:

  • VCC - Purple - 5v
  • GND - White - GND
  • DIN - Black - Digital Pin 11
  • CS - Blue - Digital Pin 10
  • CLK - Grey - Digital Pin 13

Wiring the Button

The button is wired into:

  • VCC - Red - 5v
  • OUT - Orange - Digital Pin 7
  • GND - Yellow - GND

Entering the The Matrix Code

A bit of googling discovered the perfect code in the form of MAX7219 Message Selector on the Arduino Forums by user groundFungus.  Some tweaking later and I had a bunch of messages which I could toggle through with the addition of a button push on PIN7

// Program to demonstrate the MD_Parola library
// button select canned messages
// MD_MAX72XX library can be found at https://github.com/MajicDesigns/MD_MAX72XX
// by groundFungus AKA c. goulding

#include 
#include 
#include 

const byte  buttonPin = 7;    // the pin that the pushbutton is attached to

// Define the number of devices we have in the chain and the hardware interface
// NOTE: These pin numbers will probably not work with your hardware and may
// need to be adapted
#define HARDWARE_TYPE MD_MAX72XX::FC16_HW
#define MAX_DEVICES 4

// Scrolling parameters
#define SPACE_IN      A5
#define DIRECTION_SET 8 // change the effect
#define INVERT_SET    9 // change the invert

#define CLK_PIN   13
#define DATA_PIN  11
#define CS_PIN    10

MD_Parola P = MD_Parola(HARDWARE_TYPE, CS_PIN, MAX_DEVICES);

// individual messages in strings
const char msg_1[] = "<< WEATHER ALERT>> RAIN IN 10 MIN <> SECTOR 237 RIOT IN PROGRESS <> HOTTIE DAWGS ARE GOOD TO EAT <> BE GOOD CITIZENS LITTERING IS A CRIME>>  ";
const char msg_2[] = "<> ROLL FOR INITIATIVE>>";
const char msg_3[] = "<> GET UGLY GET OTTO SUMPS OIL OF UGLY TODAY!! >>";
const char msg_4[] = "<> HEAVY TRAFFIC ON THE BIG MEG CHOOSE ALTERNATE ROUTES >>";
const char msg_5[] = "<> THIS AREA IS IN LOCKDOWN >>";
const char msg_6[] = "<> CLEAN UP CREWS IN TRANSIT >>";

// an array of pointers to the strings
char *messages[] = {msg_1, msg_2, msg_3, msg_4, msg_5, msg_6};
byte messageNum = sizeof(messages) / sizeof(messages[0]);

int buttonPushCounter = 0;   // counter for the number of button presses
int buttonState = 0;         // current state of the button
int lastButtonState = 0;     // previous state of the button

void setup(void)
{
   Serial.begin(115200);
   Serial.println("\nParola pick a message program\n");
   P.begin();
   pinMode(buttonPin, INPUT_PULLUP);
}

void loop(void)
{
   if (P.displayAnimate())  // time to show next frame?
   {
      P.displayText(messages[buttonPushCounter], PA_CENTER, 50, 3000, PA_SCROLL_LEFT, PA_SCROLL_UP);
   }
   checkButton();
}

void checkButton()
{

   static unsigned long timer = 0;
   unsigned long interval = 25;
   if (millis() - timer >= interval)
   {
      timer = millis();
      buttonState = digitalRead(buttonPin);
      // compare the buttonState to its previous state
      if (buttonState != lastButtonState)
      {
         if (buttonState == LOW)
         {
            // if the current state is LOW then the button
            // went from off to on:
            buttonPushCounter++;  // add one to counter
            // if counter over number of messages, reset the counter to message 0
            if (buttonPushCounter >= messageNum)
            {
               buttonPushCounter = 0;
            }
            //Serial.println(buttonPushCounter);
         }
      }
      lastButtonState = buttonState;
   }
}

Debugging the Code

Unfortunately this particular code only reads the button state at the end of each scroll.  This is where an interrupt is going to be necessary.  The arduino Uno and Nano boards that I have access to are only enabled for interrupts on digital pin 2s and 3 and will necessitate a bit of a rethink in the code 

MAX7219 Case - Thingiverse: Thing 6809712

No one wants to live in a run down cyberpunk world with exposed wires everywhere, so I needed a case for the display with enough depth to house the nano and the button which would switch modes.

I found a simple MAX7219 8x32 case on Thingiverse which I could easily embed magnets into to affix to the top or side of my Mega City Block Storage Case.  Sadly this did not fit my particular MAX7219 board as the pins came out sideways.  

This was easily fixed with a bit of modelling in Sketchup and if you need a case and have side exit pins feel free to download this from Thingiverse using the link above.


Saturday, 19 October 2024

Jessie's Prints - Episode 46 - Looot Insert Boxes

This week, I are mostly been printing... Looot Boxes!!

I am lucky to have a bevvy of machines to do my bidding and enable me to print in both style, Fused Desposition Modelling (FDM) and Stereolithography (SLA).  FDM is the perfect choice for projects like these boardgame organiser boxes.

Looot Insert - Thing 6661983    

This was a commissioned print for my colleague Stephen who is a mad keen boardgamer.  I used some Geetech Silk filament one of the cheapest I could get from Ali Express and I was blown away by the smooth texture.  

Definitely something I will look out for in the future.

Looot Boardgame Insert Boxes


Thursday, 17 October 2024

Mega City Block Upgrade - The Okey Dokey Chef

Once you start pimping out your Mega City One Block Storage Case it's hard to know when to stop...

The Okey Dokey Chef Animated Sign

I wanted my sign to be an advertising hoarding and one of the most famous signs in Mega City One is the Okey Dokey Chef as featured in the Supersurf 7 race story Midnight Surfer (progs 424-429).  I was also inspired by the famous Vegas Vic neon sign whose arm waving welcomed gamblers from all around the globe since 1951.

He wold make an excellent starting point to learn about how to control low voltage RC servos with Arduino.

The Chef

I found a nice piece of clipart online which had the vibe I was going for and imported this into GIMP for editing.  

I cut out the "Chef's Kiss" hand using the lasso tool and moved this over into  a seperate file.  This is going to be the sweeping hand which we will animate later using a servo.

I added a speech bubble with some appropriate text coming out of the side of the chef's head. 

Okey Dokey Chef Sign

Preparing for Tinkercad

I have learned that Tinkercad is a pretty simplistic modelling tool and it does not particular like creating complex curved or polygonal shapes.  The easiest way to solve this conundrum is to simply create a solid black mask version of your line drawn artwork.  This can be used as a background and because both shapes are exactly the same image size, they will register perfectly together when you import them into Tinkercad.

When I was happy with both files, I and exported them (and their solid black mask counterparts) as a PNG then converted into an SVG using convertio.com.  Each line drawn SVG is imported into Tinkercad for extrusion into a 3D object using the same technique I used to create my badges and Index Card RPG Card Back Stamps. I use an extrusion height of 30mm.

The black mask variant is then imported and the combined shapes exported as a single STL.  This gives me an STL file for the chef and a file for the arm which can be printed on the Anycubic Photon M5.

Okey-dokey-sign-002

The Electronics

The core of this project is an Arduino nano.  These little boards are stupidly cheap and really easy to start your coding adventure.  Seriously, if an idiot like me can do it then anyone can.

The bit doing all of the moving is a 9g 5v 180 degree hobby servo which I bought in a twinpack from Ali Express for £1.79.

Okey Dokey Chef with servo hand
This was superglued across the gap between the Speech bubble and the chef's arm.

The Wiring and Code

I used the excellent How to Control Servo Motors tutorial on the makerguides website.  The servo has 3 wires Red (5v Power) goes to the 5v pin,  Brown (Ground) goes to the GND pin and the Yellow (Signal) goes to Pin 9.

The code example given is perfect for my purposes, but I did need to customise the start and end positions for the hand as it does not need to run the full 180 that the servo is capable of.  I also added a 500 millisecond delay at the end of each travel.


#include 

Servo myServo;  // Create a Servo object

void setup() {
  myServo.attach(9);  // Attach the servo to pin D9
}

void loop() {
  // Move from 30 to 135 degrees
  for (int pos = 30; pos <= 135; pos += 1) {
    myServo.write(pos);  // Tell servo to go to position in variable 'pos'
    delay(45);           // Wait 15 milliseconds for the servo to reach the position
  }
  delay (500);
  // Move from 135 to 30 degrees
  for (int pos = 135; pos >= 30; pos -= 1) {
    myServo.write(pos);  // Tell servo to go to position in variable 'pos'
    delay(45);           // Wait 15 milliseconds for the servo to reach the position
  }
   delay (500);
}

Troubleshooting

In my naievete I thought that the Arduino nano would be able to power this whole project.  However, the little servo apparently draws too much power to run continuously causing the nano to reset itself and creates some erattic animation.

I tried to mitigate this by adding increasing the dealy to 45 thereby slowing down the move, but sadly this was not enough.  It would have been nice to know all this from the start as an alternative board such as an ESP32.  

Anyway that is another story.  In the meantime check out the final result


Download the Files

I have also uploaded the Okey Dokey Sign STL files to Thingiverse if you should want to make your own version of this iconic comic book sign.

Okey Dokey Chef Sign with Supports

Let me know if you found this useful or if you have made your own animated signs for your own games


Thursday, 11 July 2024

Gillian Anderson - Laser Engraved Coasters

My friend and Dragons Keep clubmate Kat is a Gilliam Anderson superfan.  This makes it incredibly easy to make super special custom gifts for her birthday.

Laser Engraved Gillian Anderson Coasters

On a recent Aliexpress buying spree I bought a pack of 72 plywood blanks for the princely sum of £7.20 so that's 10p each.  Measuring 73mm square and 2.3mm thick with rounded corners, they are a perfect size for a custom coaster project.  I decided to break the project up into a border and an image so I could take advantage of the speed of an .svg file for the outlines and the variable laser power that comes with a rasterized image.

The Border

This is my first really successful project designing something in Inkscape specifically for the laser engraver and LaserGRBL.  The border file was engraved at 20% power and 200mm/minute and each coaster took a little over 3 minutes to engrave.

The Pictures

I assembled a series of 6 images from the internet covering some of Gillian's most famous roles and prepared these in GIMP ensuring that they were scaled to exactly 63mm square.  Trial and error ensured that when I imported these images into LaserGRBL I had the necessary 6mm x/y offset to ensure that they were centered inside the engraved square.

These images were then imported as 1 bit Dithered B/W at 15 lines per mm and the engrave settings were 20% power at 500 mm/minute.  This meant each coaster took between 30 and 100 minutes depending on the amount of black space in the image.   

I could probably have engraved these much faster but I'm still learning how to engrave and I don't mind it taking a little longer rather than having to run multiple passes. 

Gillian Anderson - Laser Engraved Coasters

Gillian Anderson truly is a chameleon of an actress.

Bonus Cats

I also added a bonus portrait of each of Kat's two Cats, Bonnie and Clyde for good measure.  

Sunday, 30 June 2024

My First Laser Cut Box and bases

Whilst it may seem to outsiders like I am just obsessed with laser cutting at the moment, I'm not.  There are other projects in the works but these are longer term and I am having a bit of a redesign of my makerspace in order to make the machines I have work seeamlessly together.

Chief of these was working out how to make my laser cutter actually cut and so I printed off a couple of Laser Focus Height Gauges from Thingiverse so that I could really fine tune my laser focus using the Ramp Method.

3D Printed Laser Cutter Height Guages

My First Laser Cut Box

I designed this on the free to use MakerCase website and it was a doddle.  Just plumb in the dimensions of your box, the thickness of the material and then move the sliders to determine the width and number of your finger joints.  Once you are happy the software will export an SVG file which you can edit further in inkscape or just drop into your cutter software of choice.

My First Laser Cut Box

The Maker Case software has lots of options including those cool curved corner boxes

Curved Corner Box Pattern

Miniature Bases

Whilst I was at it I drew up some simple miniature bases in inkscape and in 20 minutes I had a sizeable stack of collection ready to use for my minis.  This is a great use for hardboard or MDF offcuts and I can see that I will be making a lot of custom wooden pases in the future for my many modelling projects.

Laser Cut Wooden Bases for Miniatures


Monday, 27 May 2024

Boardgame Badge Burn Ballsup

My friend Stephen (Table Tok Games) is making the pilgrimage to UK Games Expo in Birmingham this year and will be running demos of some of the upcoming releases from Hachette Boardgames

He asked me if I could make some badges for the event. I thought that this would be a great way to learn how to use my new Laser Cutter Engraver.

Stephen created a design in two parts, an etch file with his meeple logo and a cut file with a series of 30mm circles which would be the badge.  Registration marks in two opposite corners made sure that Illustrator would not trim the images to just the internal drawing.

LaserGRBL

I am currently using LaserGRBL which has support for SVG from inkscape but this is an experimental feature so the files were exported as PNG.

The Cut File 

The cut file was uploaded into LaserGRBL and I used the centreline option to vectorize a cut path.  This was slightly problematic in that the on the very top and bottom row of circles the line hit the edge of the page and vectorizing broke the cut path.  

Pardon the pun, but there is definitely a learning curve when creating files for the laser cutter.  The next attempt will have some whitespace between the design and the registration marks.

I imported this at 120mm/min and a laser power of 95%

The Etch file

Importing the etch file I opted to go for the Line to Line Tracing option at a speed of 500mm/min and a laser power of 95%

The Material

I had some scrap MDF sheet left over from some DIY project.  This measured 2.8mm thick and I mounted it on my workspace with Duck Double Sided Tape (Boy this stuff is sticky) 

Laser Engraving

I was reasonably pleased with the engraving which took just over 20 minutes with one pass.  I initially tried 1000mm/min but the laser threw an error about two thirds of the way through and it would not recommence.  I think that it must have run into a buffer problem or the speed was too high.  I have not done any testing on speeds as yet so this may be part of my learning curve. 

Laser Cut Badges Fail

The only downside with the Line to Line Trace option is that it prints like a conventional printer and you get jaggy curves (there's no anti-aliasing as far as I can tell)

Laser Cutting

This is where I fall down, hard.  With any new technology or tool you just have to learn what works and what doesn't.  I have no idea if I am using the software correctly, if my laser is focused correctly, how many passes I should be making, should I be using Air Assist, if my material is at fault or even if I am expecting too much.  There are so many variables.

After 4 passes and 160 minutes of cutting I gave up in frustration.

Resin 3D Printer to the Rescue 

This job still needed to be completed as delivery is scheduled for the following day.  45 minutes later these bad boys came off the Photon Mono 4K.

Table Tok Games Badges

Sunday, 19 May 2024

Roleplay-Geek Gets a New Robot

Well payday came and went and not long after a new tool arrived in my workshop.

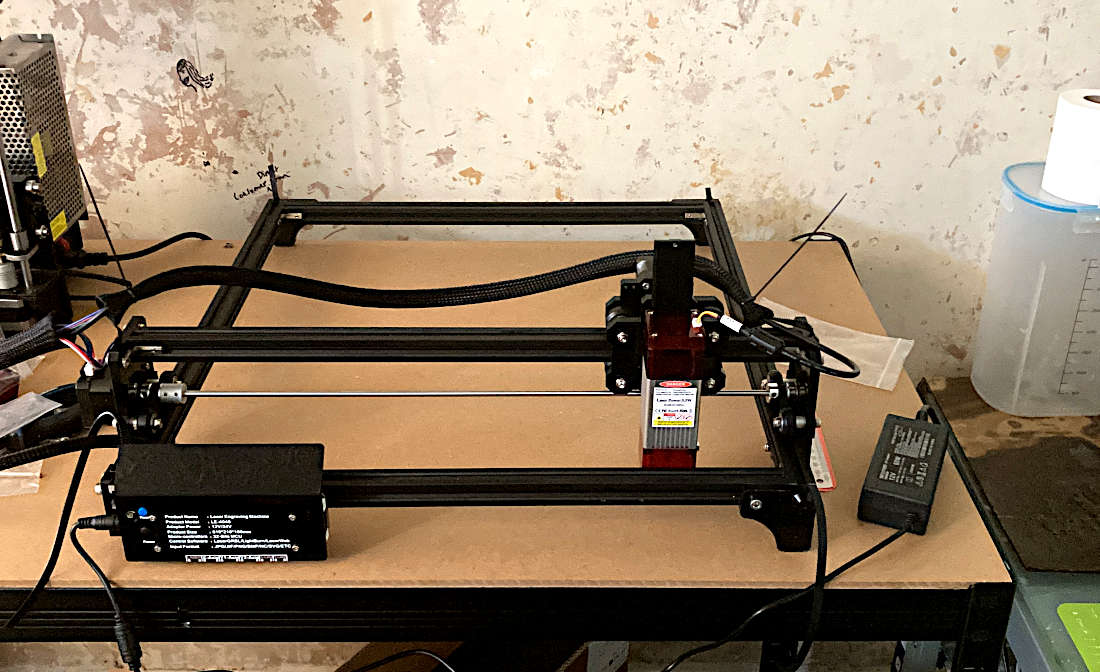
A Cheap Laser Cutter / Engraver

There are just some jobs when you need a tool like this (or have lots of skill and patience).  That one job was making a custom enclosure for a secret project I have yet to reveal out of acrylic sheet.  

I'm reasonably handy, but when it comes to transparent sheet materials, you have to be super careful otherwise you will end up scratching or gouging the delicate finish.

I bought this one off ebay and it needed to be able to do a few things

  • Cut A4 sheets - my stock is A4 (210 x 297 mm) so having a largish envelope was key.
  • Cut Plexiglass - a little bit of research showed that a 5W Laser should be capable of this

The one I ended up buying from eBay was the:

5.5W Actual Output Laser Engraver Machine For DIY Engraving Cutting 40x40cm   

New Hobby Tool - Laser Cutter

Assembly

This was my first experience assembling Aluminium extrusion and frankly I am gobsmacked at the ingenuity of this stuff.  It seriously is the Lego of mechanical engineering.  The instructions were pretty clear although they could have done with a bit better photos showing the orientation of the relevant parts.  

As long as you are pretty good with IKEA furniture this will be a relatively stress-free exercise and the total build time was less than one hour.

My only issue came with the routing of the cables and the complete lack of instructions regarding zip ties and cable management.  They have pretty much thought of everything though and as long as you follow the labels on each connector it is pretty logical where everything goes.  After all, we aren't wiring a 1974 RA 21 Toyota Celica with a 2005 2UZ V8 from a Tundra (Seriously if you aren't watching Sarah-n-Tuned what are you doing with your life). 

Software Installation

The nice eBay seller sent me a message with a QR code for the software download.  Installation was a breeze and after a little bit of reading of the help pages I was connected and ready to go.

Lots of Problems

I ran the cutter power test which seemed to go okay although there was a lot of burning around the edges.  After loading up a picture, I went through the basic interface and set the printer going.  Immediately I had an alarm and couldn't work out what had stopped the printer.  

After another set of tries and different images and more alarms I gave up.

2 Weeks Later...

Sometimes it is better to sleep on a thing and after 2 weeks of sleeping on it I summed up the courage to have another go.  

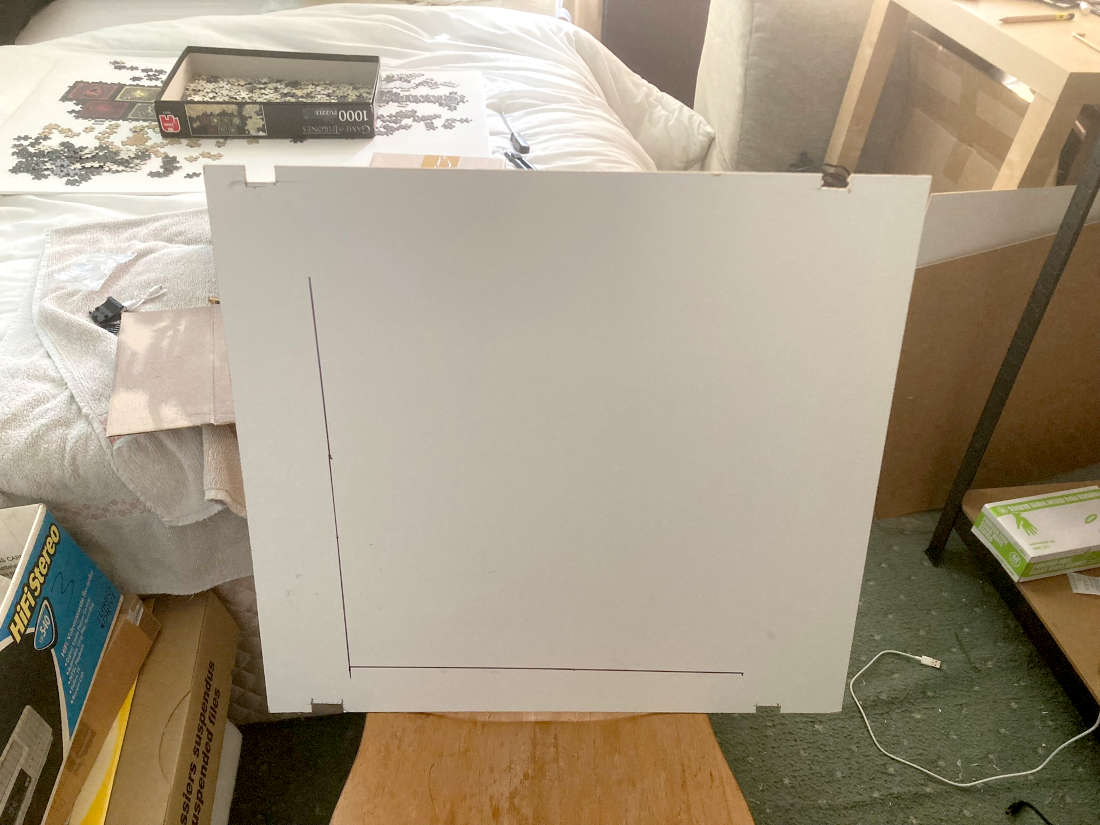
The first thing I wanted to do was build a baseboard to keep the cutter square and in place on my workbench.  This was quickly fashioned from a piece of white laminate hardboard.  I made little cutouts for the 4 printer feet to lock into.  

Laser Cutter Baseboard

I then homed the cutter and using the "flash" button I marked the home position I then manually moved the head to the furthest X position and flashed the laser again marking this position.  Homing the printer made all sorts of noise, I guess that it doesn't like its stepper motors being back driven but unlike my 3D Printer there is no option to disable the steppers.  

I decided to use the Jog feature to send the head North along the Y axis but after about 5 or 6 Jogs it threw another alarm.  I flashed the laser and marked this point.  Connecting all the dots gave me a rudimentary XY scale and origin point about which I can set some guides snd be a little bit more confident in where my images are going to appear.

X Y Offset

It seemed like when the image uploaded into the cutter workspace it was centered on the origin and the first thing the cutter wanted to do was travel West and South beyong the cutter's Home position.

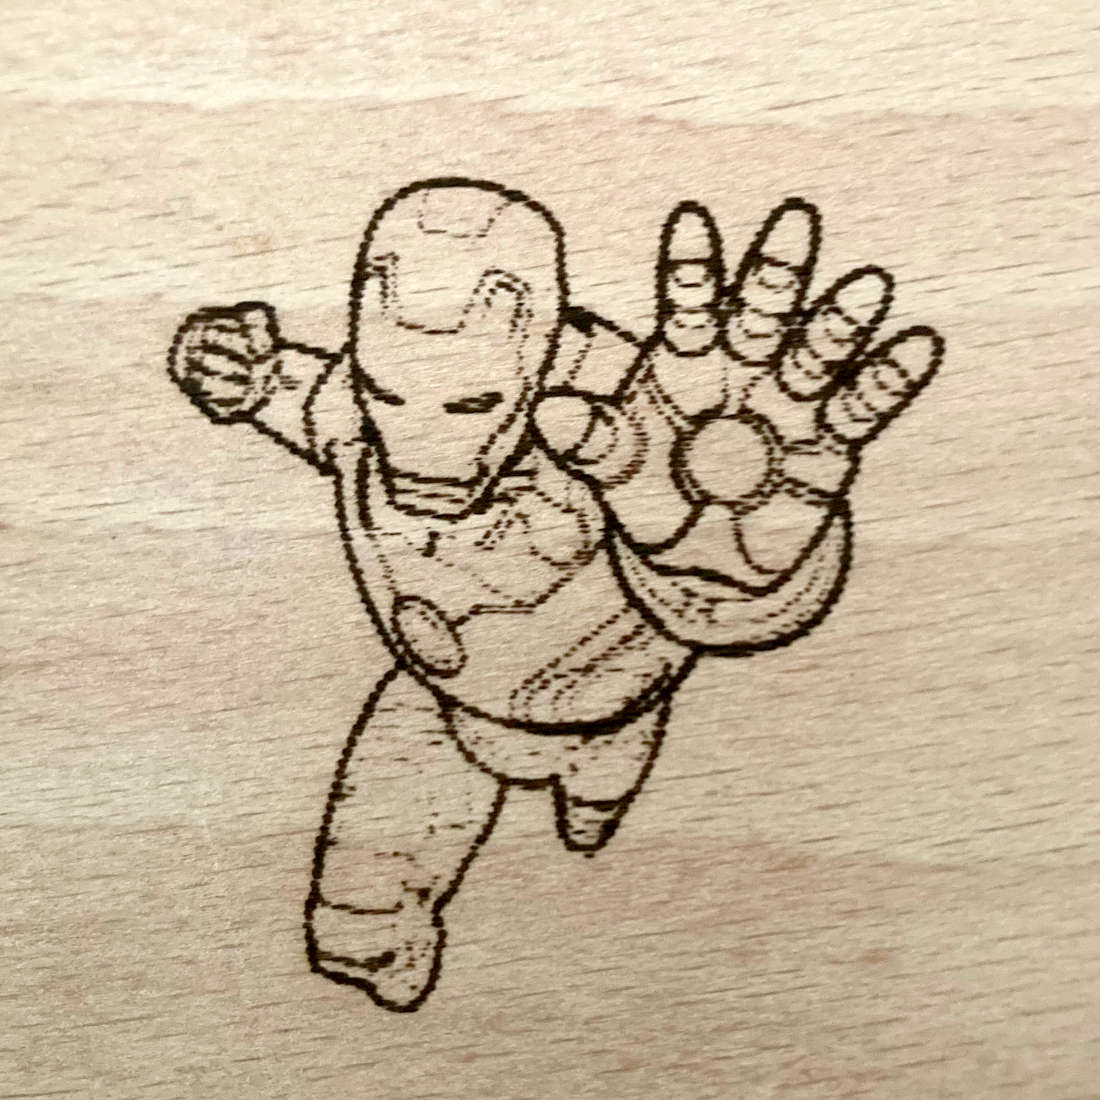
Eventually I discovered that in the import / resize dialogue there are some offset commands.  These were bizarrely set to -43 in both axis.  Resetting these to +20 in each axis and hey presto my laser moved and burned my first image... Tony Stark!

Tony Stark Iron Man

Next Projects

I really want to be able to quickly locate stock at the origin and be able to judge the offset when importing my art, so making an L-shaped scale is high on the agenda.

I also want to create a detachable shelf for the workbench as this particular model requires a laptop to be connected at all times. amd I just dont have anywhere nice to put the laptop at the moment.

Watch this space.

Friday, 10 May 2024

Jessie's Prints - Episode 45 - Nonagon Infinity open the door!!

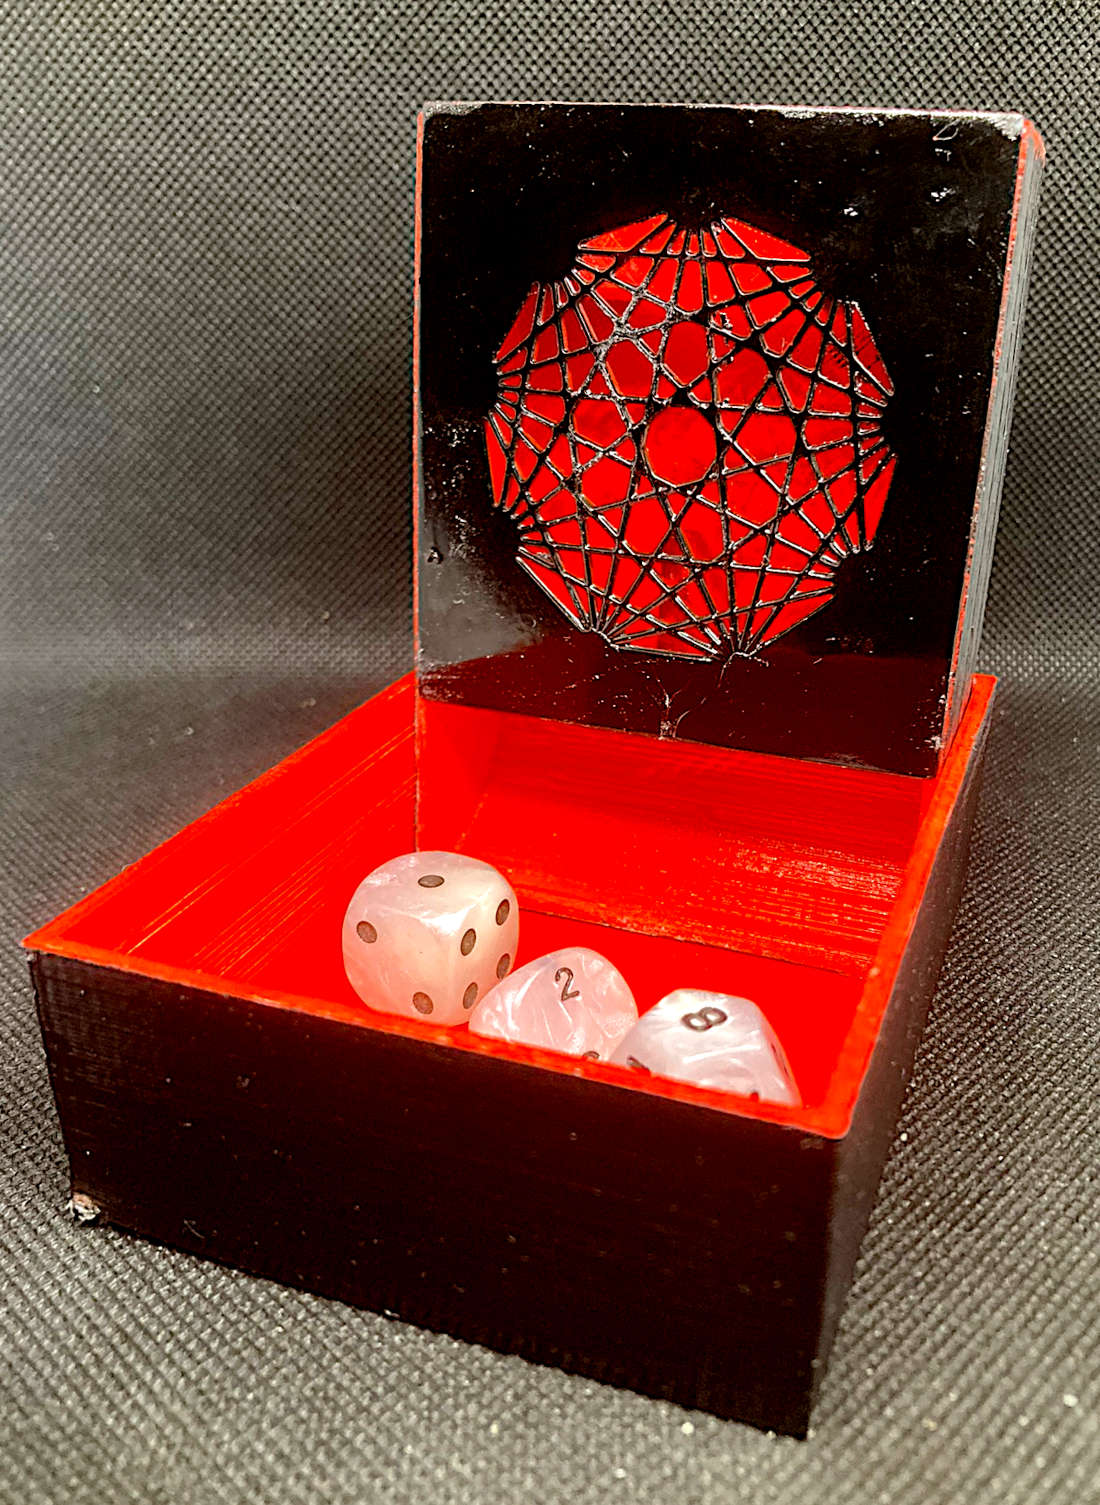
This week, I are mostly been printing... A Compact Travel Dice Tower!!

If you know me in meatspace then you know I am a big fan of the Australian progressive microtonal rock band King Gizzard and the Lizard Wizard.

Here's a Nonagon Infinity Inspiration Coin for infinite inspiration when fighting the Petrodraconic Apocalypse

Nonagon Infinity Inspiration Coin - Thingiverse thing: 6608846

Designed for use with my Compact Travel Dice Tower you can make this magnetically attach to the tower so you are never seperated from the ultimate inspiration coin.

Nonagon Infinite Inspiration Coin

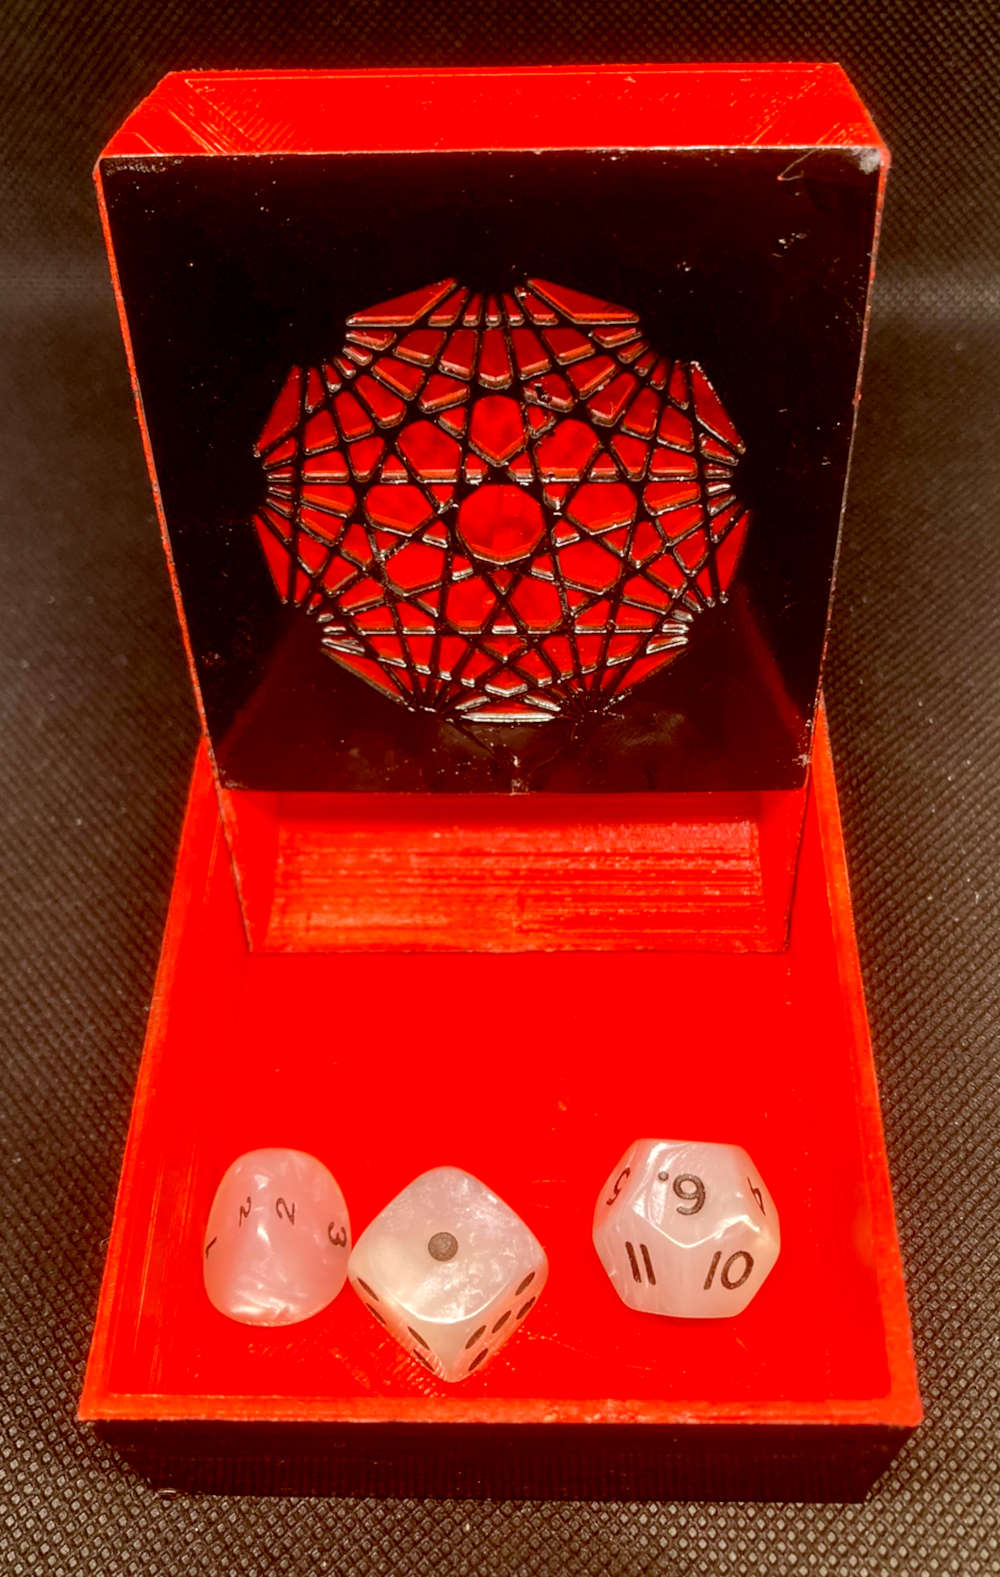
I also modelled a new slide for my Compact Travel Dice Tower with a nonagon cutout.

Nonagon Infinity Compact Travel Dice Tower

Nonagon Infinity Compact Travel Dice Tower

Nonagon Infinity Compact Travel Dice Tower

OK, Robot Stop!

Wednesday, 1 May 2024

1:100 Scale Halcon Baltimore Schooner NTJK Models - Part Two

I decided to take my time with this build, I'm surprisingly impatient when it it comes to modelling projects.  When I get bitten by the bug, it's hard for me to not just dive in.

Building the Keel, Frames and Fitting the Deck

The first part of the instructions are probably the best part of the instructions and it was just a simple case of popping out the numbered parts and supergluing them together.

The first thing to build is the cradle / display stand.  disappointingly this does not have a name plaque in English so this will need to be designed and printed.

I did make one change to the order of operations in that I left the frames unglued until I had laid in the deck.  This was a lesson I learned from my earlier 1:30 Naxos Fishing Boat build as the frames do not always line up with the cutouts in the deck.  If you force them to conform you will either snap the horns of the frames or the delicate deck. 

Halcon 1840 - Keel, Frames, Deck Fitted

Deck Fittings

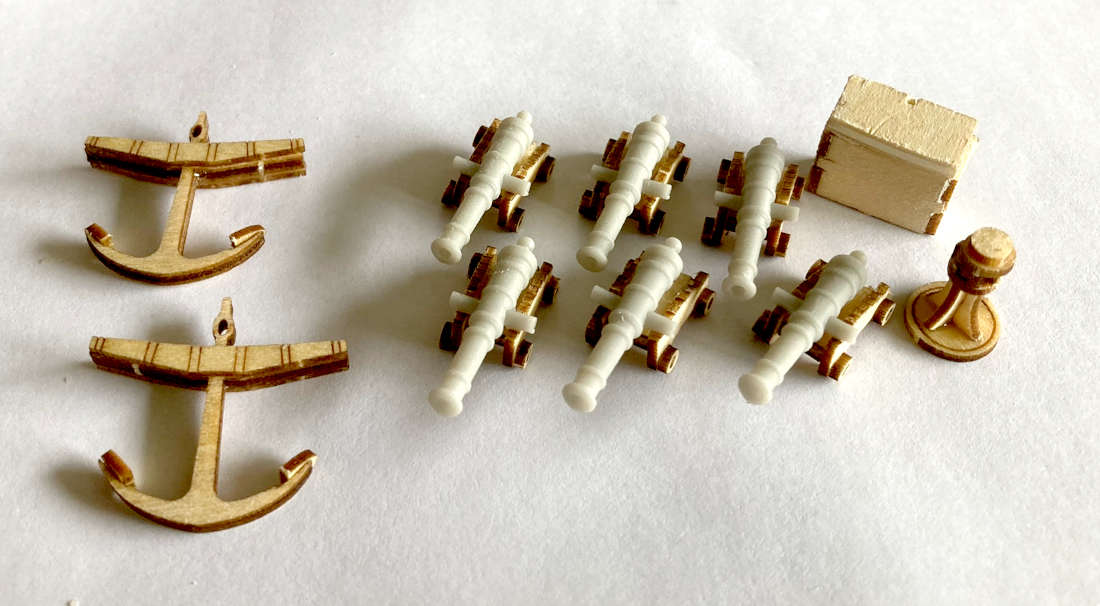
Cannons - the laser cut frames of these cannons are perfectly acceptable at 1:100 scale so I proceeded to glue these together.  The cannons provided in the kit are flat and definitely not good enough for this model.  You can buy an upgrade pack with brass cannons but as I have a couple of 3D Printers it was a trivial task to find a suitable model and print them out.  

I will document all the 3D printed parts including the links in a seperate post. 

Halcon 1840 - Deck Fittings

Capstan - I thought I would try out the capstan which was provided.  After building it I am in two minds as I think it would possibly look nicer in resin, but it's a crazy shape and will likely test my modelling skills.  There were also a distinct lack of arms on this capstan which might be historically acurate but it looks kinda weird on a masted ship.

I have bought some scale chain to go with this capstan and so I will need to check out how it meshes with the webbing to see if I want to continue using it.

Locker - Again this is borderline acceptable at 1:100 scale although the roof of this locker is way too thick and will need to be sanded down

Anchors - I liked the laser etched detail on the anchors so I thought I would give them a try.  They sort of look okay at the top but the buisness end of the anchor looks awful.  I will have to mull this over.

In the Part Three I will look at planking the hull.

Monday, 29 April 2024

1:100 Scale Halcon Baltimore Schooner NTJK Models - Part One

I immensely enjoyed my recent foray into wooden model boat building, learning new skills and working with unfamiliar materials so I thought I would have another go with another cheap chinese kit from Aliexpress.

1:100 Halcon Wooden Sailing Boat - NTJK Models - £5.99

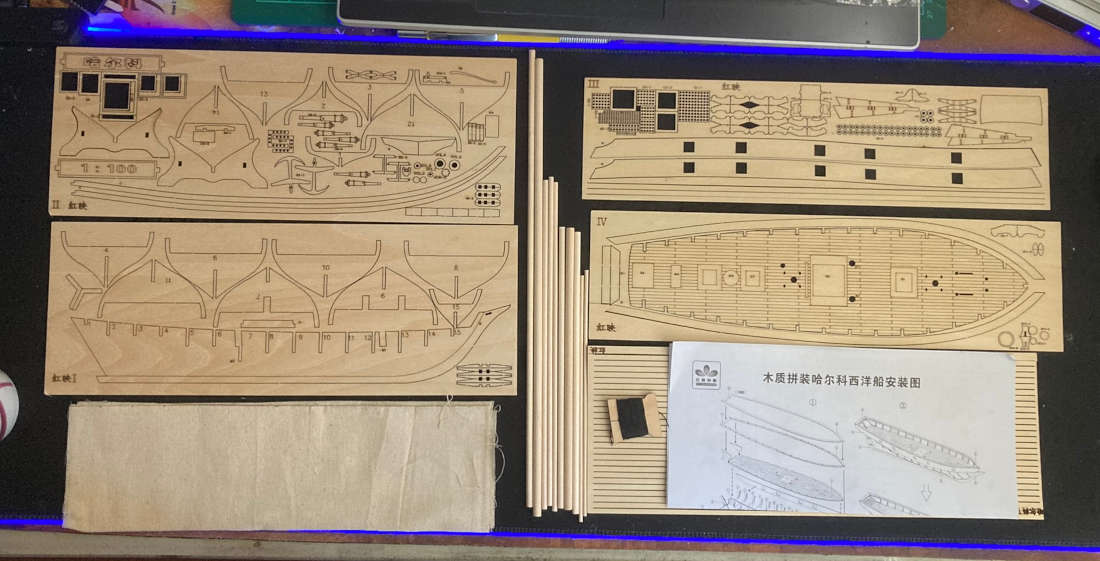
This is another kit from NTJK Models and comes in a little plastic bag with all the basic things needed to make a passable model.  Five laser cut sheets of varying thicknesses of wood, some lengths of dowel for masts, a sheet of linen for sails and a reel of cotton for rigging. 

At the super low bargain price of £5.99 (that's cheaper than a Big Mac) there literally is no downside.

1:100 Baltimore Schooner Halcon 1840 - Contents of the Kit

The History of The Halcon 

Doing a bit of research turned up some interesting documents:

A 1933 court report documents that on February 15, 1932 the Spanish Honduran registered ship The Halcon was found off the coast of New Orleans with a cargo of "intoxicating liquor".  She was escorted to Mobile Alabama and seized by US Customs. 

Model Research 

Building my last kit from NTJK models taught me that the assembly instructions are somewhat lacking in the actual instruction department.  Nothing has changed with this wooden boat kit and there are some pretty critical instructions missing including: 

  • Sail Plans - How big are the sails and what shape?
  • Mast Dimensions - All those dowels need to be cut to lengths but how long do they need to be.
  • Rigging Plan - What ropes need to go where and what blocks and dead eyes are needed.

Some intense internet browsing was therefore required.

Ships of Scale - This build log has a number of great pictures and also illustrates how there can be differences in the kit supplied and that an accessory kit is also available containing brass cannons and fixtures.  These I will of course be replacing with 3D Printed parts.  Also useful is a set of deck and rigging plans showing the routing of the anchor chains and various other deck accessories. 

There are a few other builders on there who have documented their builds of the Halcon, so this was a must community to join.

HIS Models - There are plenty of different models of the Halcon and companies supporting the model making fraternity with accessories.  One such company is HISModels who provide a set of CNC wooden blocks and deadeyes.  They illustrate the content of their kit with this extensive rigging plan

Best Ship Models - is another great resource site for model boat building and they have another set of plans. 

Tune in for the Part Two when I actually start building this boat.

Friday, 5 April 2024

1:30 Scale Nax Fishing Vessel - NTKJ MODEL - Part 3

In Part Two of this mini series we managed to get the boat sanded, filled, painted and wired.  In this episode we finish the model

Fitting the Accessories

Replacing some of the awful laser cut accessories has been a primary goal and now we get to fit those to the deck.  In the photo below you can see the life preservers, anchors and vents which have all been painted and glued to their respective positions around the boat.

NAX Fishing Boat - Accessories

Some additional accessories were necessary though:

A deck winch - Cults 3D - This is apparently the upper deck crane winch for a Liberty Ship, but it looked suitably mechanical for my needs.

A light housing - Thing:6007577 - Not perfect but do you know how hard it is to find these sorts of objects from a description

Rigging the Mast

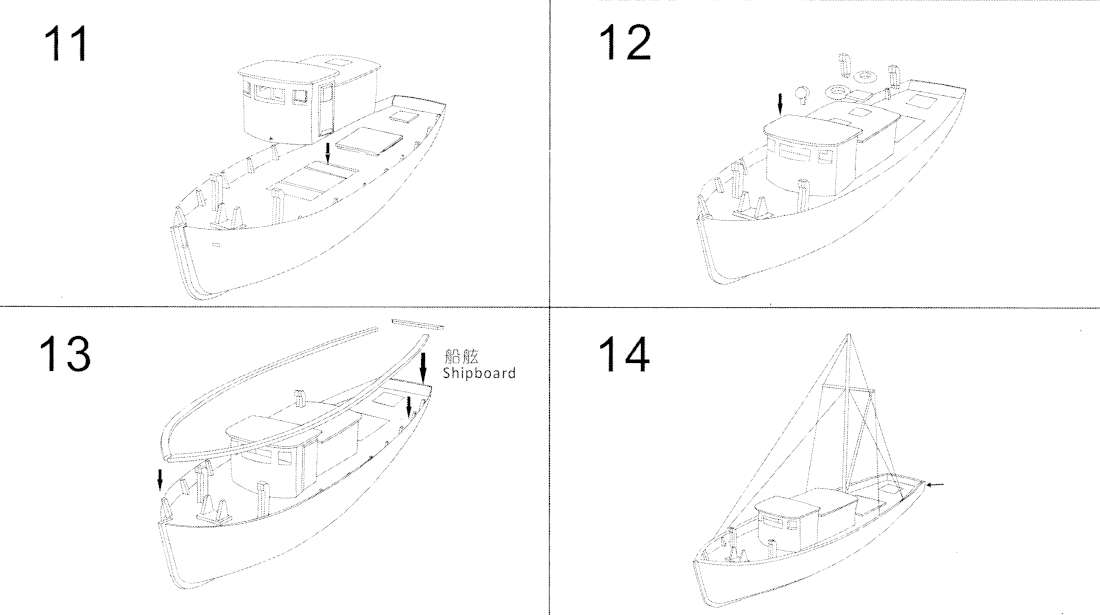
We are almost at the end of the build and this is where the quality of the instructions once again fails to clearly indicate what you are supposed to do.

NAX Fishing Boat - Steps 11 - 14

I need a little bit more instruction given the limited amount of wood we have left.  So I spent an hour or so studying the other Naxos fishing boat model reference photos I had collected and drew myself out a rigging plan.

NAX Fishing Boat - Rigging Plan

Given that I had used some of the thin length of dowel for my prop shaft, I did not have enough left to do both the Spar and the crane Jib.  I grabbed a BBQ skewer from the kitchen drawer and used that for the crane Jib.  I chucked both lengths into my drill and game them a sanding, adding a taper to both ends of the mast to ensure that it fitted into the deck hole and also that it came to a rounded point at the top.

With no hardware (I believe is the appropriate term chandlery?) attaching these together was going to reuire some ingenuity.  I grabbed the thin aluminium florist wire I use for pinning my miniatures and bent up a couple of hooks. I then drilled a hole into the mast and one into the end of the Jib supergluing the hooks so that they act as a rudimentary swivel.   

Four more hooks were also made.  Two fit into the gunwhales on either side of the mast and two in the rear corners of the transom.  

I then laminated some plasticard and created a trapezoid shape which would act as a place to anchor the Jib Pulley.

Talking about Pulleys, I could have used 3D Printed parts for these but the kit actually came with some wierd figure of 8 shaped pieces of wood which may have been for the deck winch that I didn't end up using.  These would do nicely as pulleys. 

Some thin "straps" were cut out of the plasticard to add a little believeability to my scratchbuilt fittings and it was time to glue in the mast.  I wish that I had spent a little more time on this as my mast ended up a bit cockeyed and listing to starboard.  I tried to rescue this with the mast rigging on the port side  but it was a little more adrift than the thin cotton thread could muster.  Chalk that up to experience.  

With the mast rigged it was a simple case of adding a length of thread to the end of the jib and looping it through a pulley and down the mast.  This is when I realised I needed to tie it off somewhere and so I drilled a second hole into the mast for a tiedown.  I left the end of the thread long so this can be the end of the rope used to raise and lower the jib.

The final part of the rigging was to add a length of thread between the the two aft hooks and wrapping it around the end of the jib.  All the threads were superglued in place to stop them from ever coming undone.

And with that it's done, or at least as done as it can be for now.  I will probably tidy up the paint and maybe add some more accessories some time in the future.

NAX Fishing Boat - Complete

I was really impressed with what I was able to do given the limited nature of the materials and it was a real challenge of my modelling skills. 

I really enjoyed my nautical adventure and it has spurred me on to try another more historic vessel and another cheap Aliexpress wooden boat kit.

Friday, 29 March 2024

1:30 Scale Nax Fishing Vessel - NTKJ MODEL - Part Two

In Part One we got the basic hull together 

Sanding and More Sanding

As I mentioned the hull is made of straight ply planks and there are a lot of gaps and seams which require filling with wood filler.  I bought a tub of 151 wood filler which I thought was going to do the trick and I was dissapointed that it was more like wall filler than anything else.  Still I persevered and ended up slapping on a ton of the stuff.  

Naxos Fishing Boat filling the plank gaps

In hindsight I would do this totally differently.  The filler oozed between the planks and ended up inside the boat hull trapped between the frames which then dried and fell off.  I have in effect created a boat shaped maraca.  

Nax Fishing Boat Opening up the hull

This necessitated opening up the deck under the wheelhouse in order to release the now rock hard filler.  This might sound like major surgery, but as the deck is so thin it was easily acomplished with a sharp craft knife and a steady hand.  I made sure to keep the offcut as I have plans for that later.

The way to tackle this is to use the old superglue and baking soda trick to fill up the gaps.  This of course only works if you are painting the hull.  If you are going for the natural wood finish then you are going to have to get better at laying the planks. 

Painting

Painting the boat in sections is unavoidable at this stage.  I carefully masked off the deck and gave the now smooth (ish) hull a spray coat of white primer followed by a couple of coats of white gloss.

The airbrush then came in handy for painting the decks with a Vallejo Burnt Umber wash.

NAX Fishing Boat - Painting the Deck

The remaining wooden pieces for the wheelhouse, deck covers and the gunwhales were then extracted from their boards and sprayed with the same Vallejo Burnt Umber wash. 

NAX Fishing Boat - Deck Painting

Adding Some Colour

I imagined the boat a sort of tri-tone with a red top stripe white hull and black or red hull bottom.  In the end I just gave it a stripe of red on the sheerstrake plank and continuing around the transom.  Masking this off was a tricky exercise as I only had some really nasty cheap painters masking tape.  I will have to come back and do some tidying up by hand later.

Trial fitting the wheel house accents and deck hatches really makes the boat come alive.

NAX Fishing Boat - Red

You might beable to see in the photo above that I managed to glaze all the windows with some clear acetate from some recycled packaging.  I glued this in using my now favourite hobby glue UV Resin which I picked up in my Wish Hobby Products 2024 experiment.  This stuff is amazing.

Adding the Lights

Last year I picked up some micro LED lights for another project (which I have yet to start).  These are incredibly tiny and come pre-soldered onto super thin magnet wire.  I quickly soldered a couple of these together with a CR2032 coin cell battery holder and a latching push button and stuffed it into the hole.

NAX Fishing Boat Lighting

I will probably tidy this up with a piece of perfboard at a later date as the circuit is tiddly. I am also undecided if I will add any navigation lights.  For the uninitiated this mean a RED LED for the left (Port) side of the boat and a GREEN LED for the right (Starboard) side.  I have some 3mm LEDs from another side project but these might be too large, we will have to see.  Adding them to the circuit should be no problem and might even add some much needed resistance to bring down the brightness.  

The LEDs were then routed up through the floor of the front wheelhouse and up one corner.  One LED illuminates the interior and is bonded to the roof with the UV Resin and the other goes outside in front of the cabin as an exterior deck light.  I will need to find an appropriately nautical shroud for this exterior light as they are suprisingly bright for their size.

NAX Fishing Boat - Lighting the Wheelhouse

Oh did I forget to mention that I added a salty seadog to steer this fine boat across the treacherous seas? 

He is one of the many 3D Printed accessories I covered in part one of this mini series.  A fine free model although he is now sealed in his cabin for all eternity as I have glued on the roof and floor.  

In the next, and final part of this mini series we will add all the accessories masts and rigging.

Monday, 18 March 2024

Jessie's Prints - Episode 39 - Index Card RPG Card Back Stamps

This week, I are mostly been printing... Stamps!!

ICRPG CARD BACK STAMPS - Thing 6545499

My recent foray into the Index Card RPG system (ICRPG) involved a lot of DIY card making, which I love.

However, during play this presented a problem in that all my card backs where blank and indistinguishable from each other.  What I needed was a simple stamp which I could apply to my card backs.  

I find it useful to categorise my cards into one of 4 types:

  • People - NPCs, Villains, Bio-forms
  • Places - Locations, buildings, Landscapes 
  • Objects - Things, weapons, loot, traps and trinkets
  • Monsters - Stuff that wants to kill you

This would help me to keep my ICRPG cards organized and reduce seek times to a minimum and thereby make me look like a great DM.

Tinker Cad to the Rescue

My experiments making a plaque for my Cowboy Bebop Swordfish II model taught me that this was going to be easily achieved.  

Step 1 - Make a black and white image in GIMP where black is what you want stamped and white is what you don't want to stamp.  This image is then reversed and saved as a JPG or PNG.

ICRPG Card Back Stamp - Places

Step 2 - Use convertio.co to convert your JPG or PNG into an SVG which can then be imported into Tinkercad.

ICRPG Card Back Stamps - Tinkercad

Step 3 - Import your SVG into Tinkercad and scale it to fit inside your stamp pad.  Make sure that the stamp is at least 4mm high and that you create a backing plate at least 1mm high to connect all the pieces of your stamp together.  Position the stamp so that it intersects with the backing plate and then group the objects together.  Export this as an STL for your 3D printer.  

ICRPG Card Back Stamps - Ready to Slice

Step 4 - Make a wooden backing plate and handle for each of your stamps.  If you get into ICRPG you are going to be making a lot of cards and doing a lot of stamping so this step is essential for long lasting stamps.  I made mine out of some scraps of hardboard I had laying around and I glued some pieces of old broom handle onto the backing plates before supergluing my stamps together.  

You could of course model the whole thing in Tinkercad.
 
ICRPG Stamps - DIY Handles

Step 5
- Stamp Away!! - I bought some cheap stamp pads from AliExpress less than £1.50 each and they have lots of different colours to choose from so you can have a different colour for each card type.

 
ICRPG Card Back Stamps

Buy Me a Coffee

I have shared the stamp patterns on Thingiverse, so if you like them, download them and print your own card backs.  Support the channel and please leave a tip in the jar or use the paypal tip link.   

Saturday, 16 March 2024

1:30 Scale Nax Fishing Vessel - NTKJ MODEL - Part One

In my recent foray into buying modelling supplies from Wish.com I mentioned that I had ordered a little wooden boat kit but that the order got cancelled.

Needless to say, I found a different seller on AliExpress and snapped it up.

This is a fun little kit and my first foray into making a wooden boat with a planked hull.  I made a balsa wood sailing yacht from old model engineering plans, decades ago with a lot of help from my dad, but I can't remember if we ever finished it.

The NAX Fishing Boat or should I say NAXOS Fishing Boat

The inspiration for this model is clearly that of a mediterranean coastal fishing vessel of which there are many models.  The kit is made by NTKJ Model and sold through various etailers.

Naxos fishing boat models

This is plenty of inspiration for me to commence making this kit.

Meet the Parts

The kit comes as a set of 6 laser cut wooden sheets, a couple of dowels for the mast and a reel of cotton for the rigging.  A set of pictorial instructions with quite well translated text completes the package which cost the grand sum of £5.94 which in 2024 money is less than a Big Mac meal.  

1:30 Scale Nax Fishing Boat - The Parts

Steps 1-4 - Making the Deckhouse

Whilst the first 4 parts seem fairly self explanatory and involve removing the deckhouse parts and assembling them, the parts are not numbered.  There is a disparity in the plans, in particular the inner bulkhead seems to have a large notch behind it which intimates a part fits into it but the instructions offer no assistance as to what goes in here.   

NAX Fishing Boat Kit Steps 1-4

The wheelhouse fits to the deck with 6 pegs and matching holes.  Dry fitting the parts to the deck helps keep the wheel house square and stable whilst gluing the instrument panel back wall and the top visor.

I left the roof unglued to enable me to paint the inside and out and to glaze the windows and doors with acetate.  

NAX Fishing Boat - Wheelhouse - Steps 1-4

This model is ripe for replacing some of the clumsier laser cut parts with 3D printed ones.  In particular the boat has some cowl vents which are made of laminated wood but they look awful and it will be so much easier to find some on the web or even scratch build.  The same can be said for the portholes and life preservers.  

  • Cowl Vents - Cults 3D - A collection of vents of different shapes and sizes.  The two large vents at the front of the boat are 20mm tall and the one on the rear of the wheelhouse is 10.3mm tall. 

  • Life Preservers - Thingiverse - A good looking life preserver model.  You will need to print six, two at 10.5mm across and four at 12.5mm across.

  • Boat Anchor - Printables - This anchor seems to have the same shape and dimensions as the wooden one.  However, the model is huge and will need to be scaled down to fit.

  • 3 Bladed Screw - Thingiverse - This will need to print this on a resin printer at about XX scale  The original prop is about 11.5mm in diameter.

Steps 5-8 - Laying down the keel 

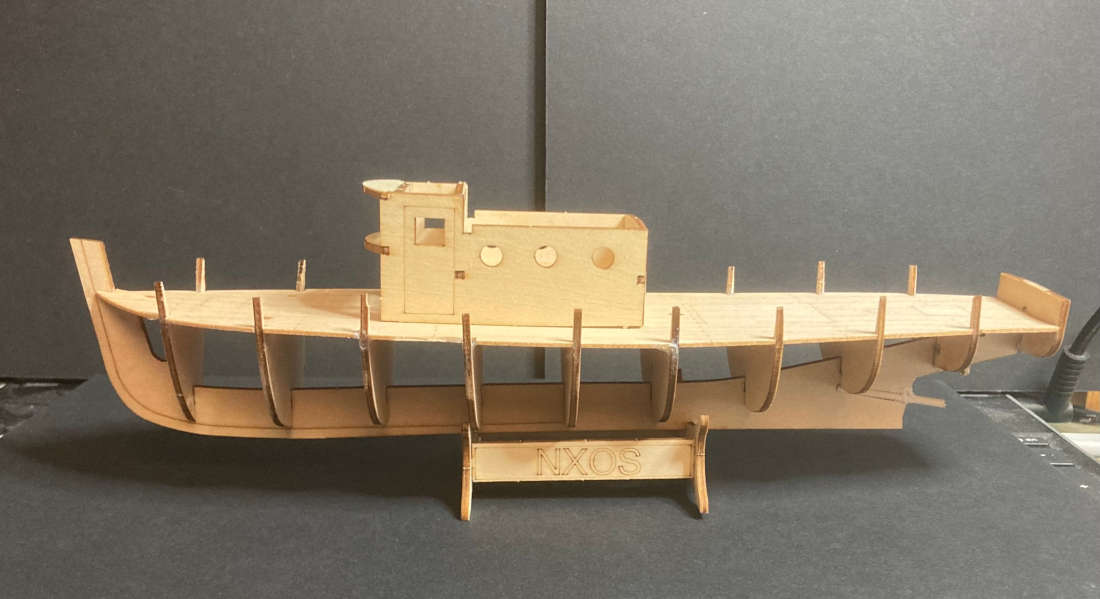
Now the serious work begins.  The frames are all numbered and from 1 to 10 and are slotted into their corresponding slots in the keel.  Be careful when removing theframes from the sheet as the protruding sections are prone to breaking due to the orientation of the wood grain.

NAX Fishing Boat Plans - Steps 5-8

The diagonal slot at the stern of the boat I thought might be for the stern tube but there was no mention of it on the plans.  The kit comes with two diameters of dowel.  The thin one should be for the stern tube and it is a good idea to add a 1¼ inch length at this point as the keel is relatively thin and likely to snap as you insert the frame 8.  Ask me how I know...   

You could add the rudder at this point but the stupid thing has one mission in life and that is to snap.  It is much better to leave this until after you have planked the hull and either fit it or replace it with a 3D printed part.

Once all the frames are fitted you can add the deck plate.  Before you do STOP! 

Take the time now to add some cardstock or a thin piece of styrene to the back of the deck plate.  It is incredibly thin and the laser engraved planking makes some of the edge planks prone to detatching.  The slots that the frames fit in are also too thin and not in exactly the right places for the frames to slot into so you are going to have a whale of a time gently coaxing them into place and you will probably snap a few.  Don't panic.  Take some time out to put the stand together and have a cup of tea.  

NAX Fishing Boat - Steps 5-6

The next step is the one I've been both dreading and looking forward to in equal measure.

Steps 7-8 Planking the Hull

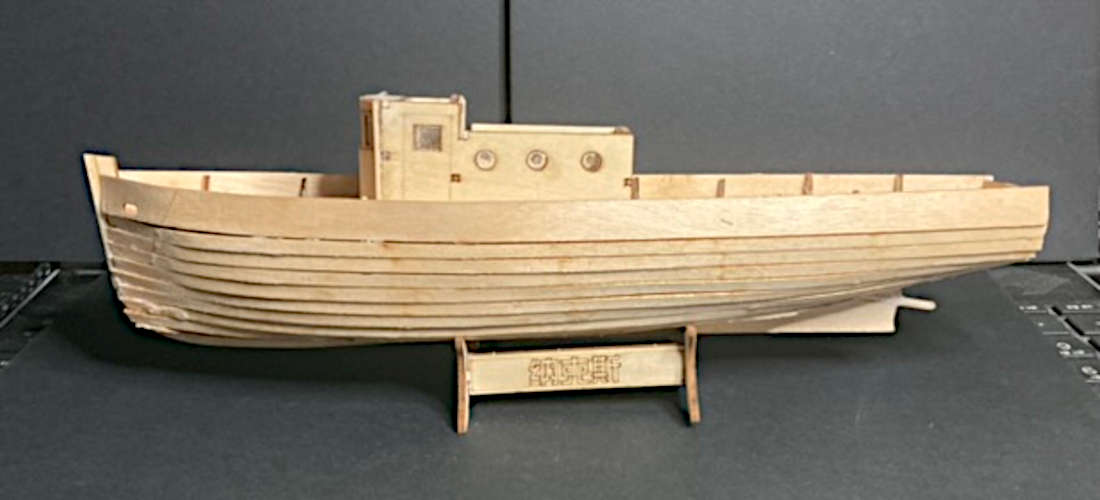
That kettle you just boiled is going to be handy.  We now need to steam the first couple of planks.  These are the wide ones with the little oval holes on the planking sheets marked IV.  The holes go at the bow (the front) of the boat and you will need to hold the end of the plank in the hot steam to soften it and then gently put a curve into it. 

This is incredibly fiddly so be patient.  With these straight planks being made of plywood they really aren't made to go around these curves.  I glued 8 planks down from the sheerstrake (the wide one) and then the remaining planks up from the bottom.  These all had to be shaped at both ends to fit.

Nax Fishing Boat - Steps 7 to 8

There will be lots of gaps.  When we shape the hull planks by sanding we are going to use some wood filler to fill in the gaps.  Real wooden boats have caulked seams and they are designed to swell when they get wet and thereby get tighter.  The hull is going to be painted so you won't be able to see the seams.

More 3D Printed Accessories

Fisherman with ships Wheel - Thingiverse - I spent a long time trying to find a suitable helmsman for my boat and this one conjurs up the same vibe as the Lovecraftian fishing horror game Dredge. be

To be continued...

Monday, 26 February 2024

Can You buy Good Hobby Products from Wish.com in 2024?

Earlier this month I blogged about my experience buying hobby products from AliExpress in 2024, this time I turn my attention to Wish.com.

104pcs Simulation Static Grass Tufts Model Mini Grass Cluster - £4.06

My basing game has been pretty weak of late.  Trix Robot Rider needed some desert vegetation to add a little va va voom so I chose these mini grass tufts.  Herein lies the problem when you are buying stuff from Wish, you are entirely reliant on the chinglish descriptions that the vendors provide.  They often list multiple pack sizes or products in the same listing and sometimes it's hard to know what you are buying.  

The upside is of course at these stupidly low prices you can often order multiple different options all for less than the price if you were to go to a big box retailer like Hobby Craft.  If you want to try out a hobby product for not much outlay the online vendors on Wish.com are a fairly safe way to do it.

Mini Grass Tufts

These tufts are quite small and measure 5mm in diameter.  This might be what the number 5 on the box refers to.  In their defence it does say mini... 

I added a few of them to Trix's base and I really think that they add a certain something.  

Trix Robot Rider

Perhaps on a smaller miniature base they would have much more impact.  I will try to buy some bigger ones in future. 

50pcs DIY Craft Party Alligator Clamp Wire Clip - £3.74 - 3/5

I had seen GroundAffected suspend his resin parts for priming on these alligator clips so I bought a bag of 50.  To be honest the clips are not really strong enough to safely hold larger parts but for small 32mm miniatures they are going to be a godsend. 

Alligator Hobby Clips on Wires

There are obviously 2 parts to any painting jig, the thing that attaches to the bit you are painting and the thing that that thing attaches to, lets call it a base.  Having a sturdy base is just as important  

Margot Kidder Superman "Who's Got You?"

Clearly I am going to have to design and print some sort of hobby clip base or print out something like this Alligator Clip Stand by retro-stingray.

If I were buying again I would opt for longer wires as I think the ones I bought were mainly designed as table card holders.

60g Six Colour Flock Adhesive Nylon Static Grass Powder - £2.51

Wow this is great value considering a similarly sized bag of grass from a well known retailer is 3 times the price and only comes in one colour.  I now need to build a static grass applicator like Luke Towan  

Static Grass

UV Resin - 50g UV Resin Ultraviolet Curing Epoxy Resin Crystal Clear - £1.28 5/5

I have wanted to try out some of this clear UV resin for a while.  I have a large bottle of the stuff for my 3D printer but it doesn't set quickly enough when making things like pools of lava or green ooze.  This little bottle was cheap enough that I don't care if it works that well.

I am glad to report that it works really well, just 5-10 seconds under my pretty weakass UV torch and it sets rock hard.  I have a big lava base project in the works and this will be just the ticket for greating that glossy flowing lava.

A DIY Funny Wooden Sailing Boat Model Kit 1/50 Scale Ship £5.42 - 0/5

I would love to say that this is an amazing model and a fun way to spend a Sunday afternoon, but I can't.  Sadly the vendor cancelled the order unilaterally.  This happens from time to time on Wish.com, often when the price is too good to be true.  

I've seen this kit on AliExpress so maybe I'll try another order... ooh a stirling steam engine!