I decided to take my time with this build, I'm surprisingly impatient when it it comes to modelling projects. When I get bitten by the bug, it's hard for me to not just dive in.
Building the Keel, Frames and Fitting the Deck
The first part of the instructions are probably the best part of the instructions and it was just a simple case of popping out the numbered parts and supergluing them together.
The first thing to build is the cradle / display stand. disappointingly this does not have a name plaque in English so this will need to be designed and printed.
I did make one change to the order of operations in that I left the frames unglued until I had laid in the deck. This was a lesson I learned from my earlier 1:30 Naxos Fishing Boat build as the frames do not always line up with the cutouts in the deck. If you force them to conform you will either snap the horns of the frames or the delicate deck.
Deck Fittings
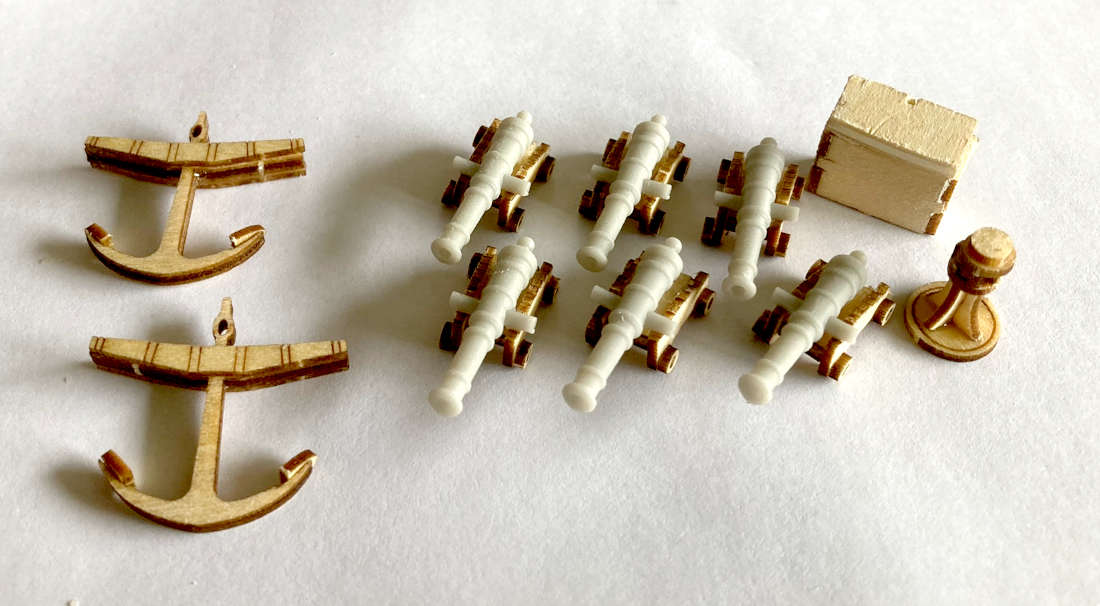
Cannons - the laser cut frames of these cannons are perfectly acceptable at 1:100 scale so I proceeded to glue these together. The cannons provided in the kit are flat and definitely not good enough for this model. You can buy an upgrade pack with brass cannons but as I have a couple of 3D Printers it was a trivial task to find a suitable model and print them out.
I will document all the 3D printed parts including the links in a seperate post.
Capstan - I thought I would try out the capstan which was provided. After building it I am in two minds as I think it would possibly look nicer in resin, but it's a crazy shape and will likely test my modelling skills. There were also a distinct lack of arms on this capstan which might be historically acurate but it looks kinda weird on a masted ship.
I have bought some scale chain to go with this capstan and so I will need to check out how it meshes with the webbing to see if I want to continue using it.
Locker - Again this is borderline acceptable at 1:100 scale although the roof of this locker is way too thick and will need to be sanded down
Anchors - I liked the laser etched detail on the anchors so I thought I would give them a try. They sort of look okay at the top but the buisness end of the anchor looks awful. I will have to mull this over.
In the Part Three I will look at planking the hull.


No comments:
Post a Comment