Showing posts with label Aliexpress. Show all posts

Wednesday, 1 May 2024

1:100 Scale Halcon Baltimore Schooner NTJK Models - Part Two

I decided to take my time with this build, I'm surprisingly impatient when it it comes to modelling projects.  When I get bitten by the bug, it's hard for me to not just dive in.

Building the Keel, Frames and Fitting the Deck

The first part of the instructions are probably the best part of the instructions and it was just a simple case of popping out the numbered parts and supergluing them together.

The first thing to build is the cradle / display stand.  disappointingly this does not have a name plaque in English so this will need to be designed and printed.

I did make one change to the order of operations in that I left the frames unglued until I had laid in the deck.  This was a lesson I learned from my earlier 1:30 Naxos Fishing Boat build as the frames do not always line up with the cutouts in the deck.  If you force them to conform you will either snap the horns of the frames or the delicate deck. 

Halcon 1840 - Keel, Frames, Deck Fitted

Deck Fittings

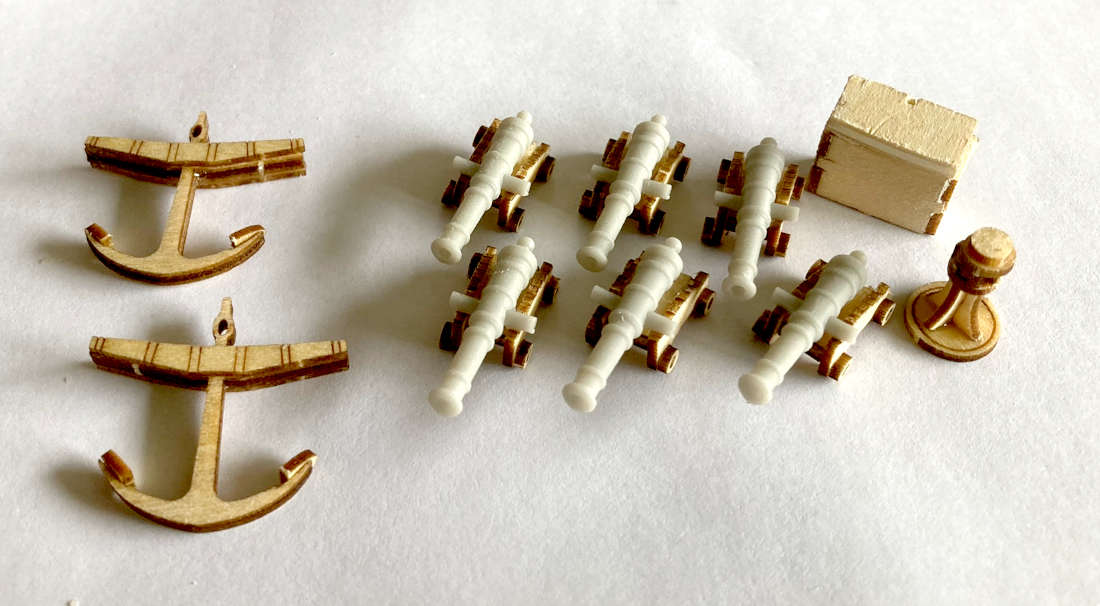
Cannons - the laser cut frames of these cannons are perfectly acceptable at 1:100 scale so I proceeded to glue these together.  The cannons provided in the kit are flat and definitely not good enough for this model.  You can buy an upgrade pack with brass cannons but as I have a couple of 3D Printers it was a trivial task to find a suitable model and print them out.  

I will document all the 3D printed parts including the links in a seperate post. 

Halcon 1840 - Deck Fittings

Capstan - I thought I would try out the capstan which was provided.  After building it I am in two minds as I think it would possibly look nicer in resin, but it's a crazy shape and will likely test my modelling skills.  There were also a distinct lack of arms on this capstan which might be historically acurate but it looks kinda weird on a masted ship.

I have bought some scale chain to go with this capstan and so I will need to check out how it meshes with the webbing to see if I want to continue using it.

Locker - Again this is borderline acceptable at 1:100 scale although the roof of this locker is way too thick and will need to be sanded down

Anchors - I liked the laser etched detail on the anchors so I thought I would give them a try.  They sort of look okay at the top but the buisness end of the anchor looks awful.  I will have to mull this over.

In the Part Three I will look at planking the hull.

Monday, 29 April 2024

1:100 Scale Halcon Baltimore Schooner NTJK Models - Part One

I immensely enjoyed my recent foray into wooden model boat building, learning new skills and working with unfamiliar materials so I thought I would have another go with another cheap chinese kit from Aliexpress.

1:100 Halcon Wooden Sailing Boat - NTJK Models - £5.99

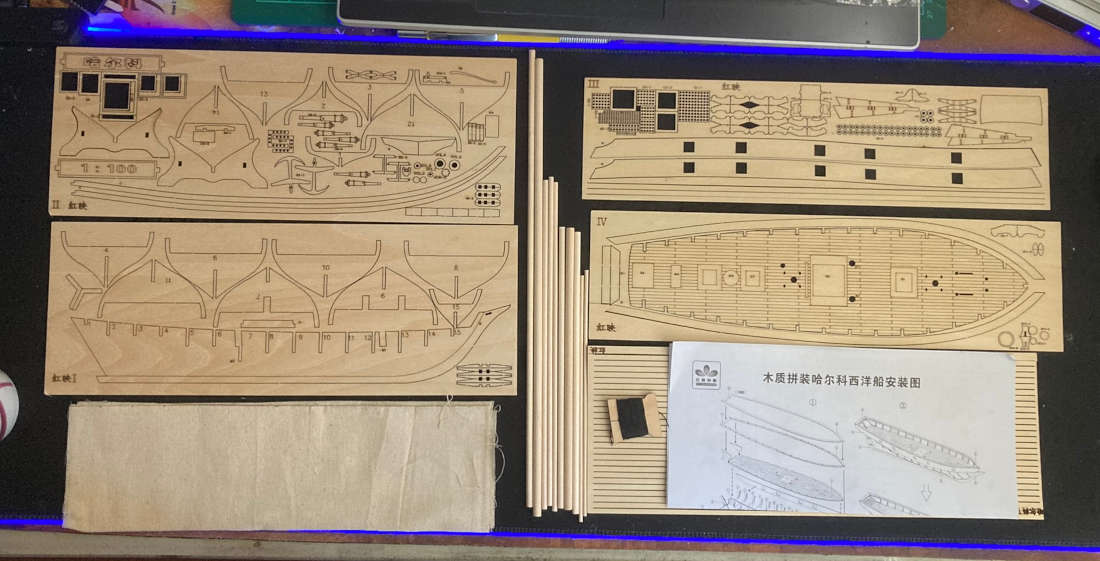
This is another kit from NTJK Models and comes in a little plastic bag with all the basic things needed to make a passable model.  Five laser cut sheets of varying thicknesses of wood, some lengths of dowel for masts, a sheet of linen for sails and a reel of cotton for rigging. 

At the super low bargain price of £5.99 (that's cheaper than a Big Mac) there literally is no downside.

1:100 Baltimore Schooner Halcon 1840 - Contents of the Kit

The History of The Halcon 

Doing a bit of research turned up some interesting documents:

A 1933 court report documents that on February 15, 1932 the Spanish Honduran registered ship The Halcon was found off the coast of New Orleans with a cargo of "intoxicating liquor".  She was escorted to Mobile Alabama and seized by US Customs. 

Model Research 

Building my last kit from NTJK models taught me that the assembly instructions are somewhat lacking in the actual instruction department.  Nothing has changed with this wooden boat kit and there are some pretty critical instructions missing including: 

  • Sail Plans - How big are the sails and what shape?
  • Mast Dimensions - All those dowels need to be cut to lengths but how long do they need to be.
  • Rigging Plan - What ropes need to go where and what blocks and dead eyes are needed.

Some intense internet browsing was therefore required.

Ships of Scale - This build log has a number of great pictures and also illustrates how there can be differences in the kit supplied and that an accessory kit is also available containing brass cannons and fixtures.  These I will of course be replacing with 3D Printed parts.  Also useful is a set of deck and rigging plans showing the routing of the anchor chains and various other deck accessories. 

There are a few other builders on there who have documented their builds of the Halcon, so this was a must community to join.

HIS Models - There are plenty of different models of the Halcon and companies supporting the model making fraternity with accessories.  One such company is HISModels who provide a set of CNC wooden blocks and deadeyes.  They illustrate the content of their kit with this extensive rigging plan

Best Ship Models - is another great resource site for model boat building and they have another set of plans. 

Tune in for the Part Two when I actually start building this boat.

Tuesday, 23 April 2024

Bitten by the Aliexpress bug again

You go on Aliexpress to buy one thing and you end up with seven!!!

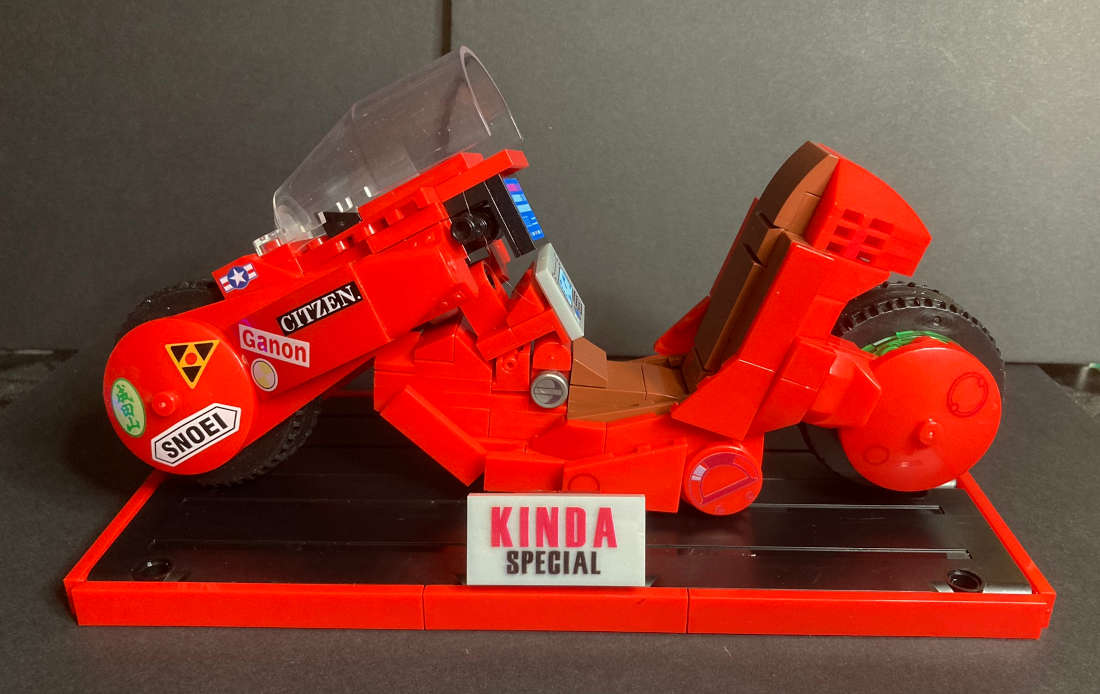
Akira Bike Construction Toy (241 Pcs) £5.63

The Lego monopoly is over guys and those ingenious chaps at Jie Star have come up with a fantastic little Akira bike which is Kinda Special - Lol.

Aliexpress - Akira Bike

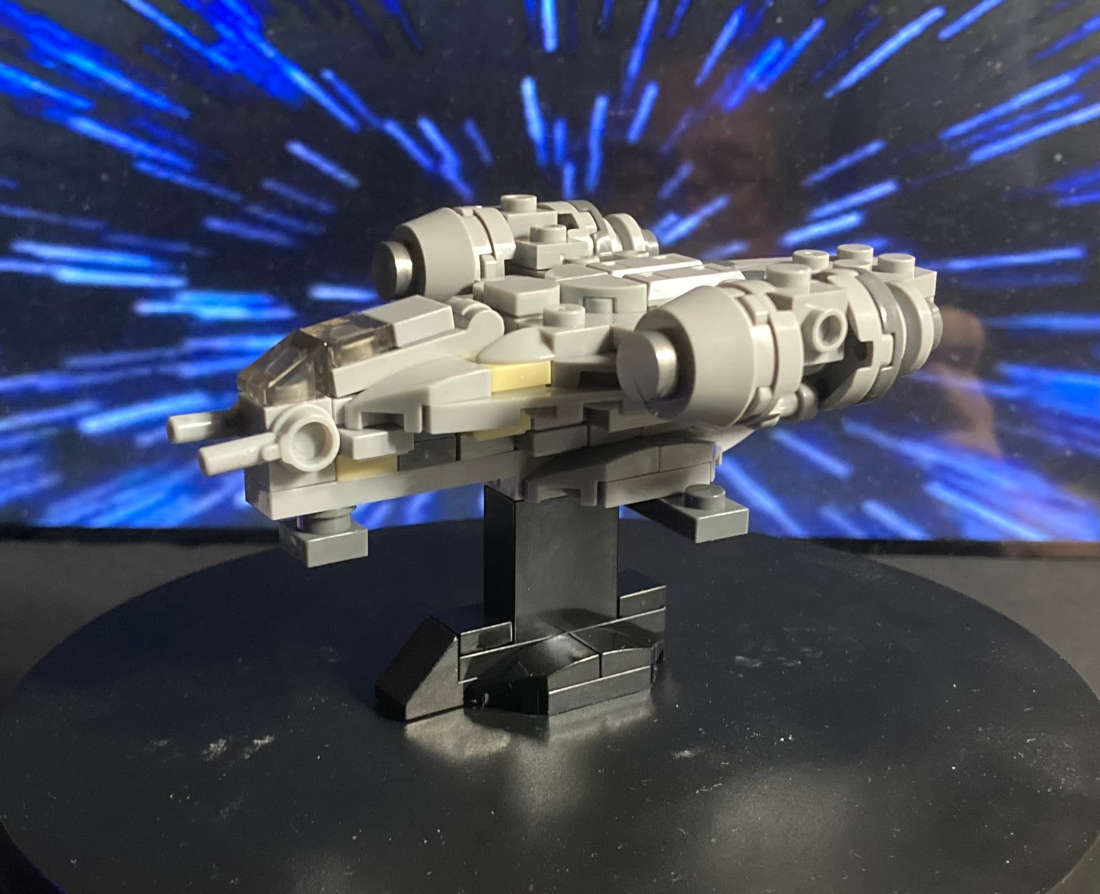
Mandalorian Razor Crest Construction Toy (103 Pcs) - £3.11

I'm sure that this blatant ripoff of the Star Wars IP will have Kathleen Kennedy issuing legal letters.  But it's a fairly passable miniship version of the much beloved Razorcrest.  She is gone but never forgotten...

Aliexpress - Razorcrest

Tabletop Gaming Wound Counter - £1.50

This is such a simple design 2 acrylic plates (40mm x 19mm x 3mm),  2 plastic wheels (19.5mm x 3mm)  and 6 tiny 4mm x 3mm magnets.  The wheels have little numbers printed on them and they are mirror images of each other.  Honestly it's so simple it's a genius idea and it should be free...

Aliexpress - Wounds Tracker

1:100 Scale Baltimore Schooner Halcon 1840 (Wooden Kit) - £5.99

When I saw this complicated looking model kit I just knew I had to buy it.  Something to challenge the old modelling skills now that I seem to be into making model boats for some reason...

Aliexpress - Halcon 1840 Baltimore Schooner

Outdoor Shockproof Waterproof Case with Foam insert - £4.32

Given the absolutely exorbitant prices of miniature carry cases I put my money down on one of these bad boys.  It is properly watertight including a rubber gasket seal and made from some hard shiny ABS like plastic.  A bit on the small, but has enough space inside to comfortably fit an entire party of human sized minis.  I think the trick here is to do a lot of searching to find exactly the right size whihc works for your minis.  

Aliexpress - Miniature Waterproof Storage Case

7 in 1 Multi Tool Pen

So this is a bit of a random "Choice" purchase and was made just to ensure that I qualified for the free postage.  What can it do? I hear you say...It is one a pen, two a spirit level, three a cm ruler, four an inch ruler, five a smart phone finger, six a philips screwdriver and seven a flat blade screwdriver.  Amazing!!

Aliexpress - 7 in 1 Multi Tool Pen

But Why?

Well... I have a secret project which has gone a bit Pete Tong and I thought I might be able to rescue it with a...

STC15F2K60S2 Microprocessor - £1.26

Friday, 5 April 2024

1:30 Scale Nax Fishing Vessel - NTKJ MODEL - Part 3

In Part Two of this mini series we managed to get the boat sanded, filled, painted and wired.  In this episode we finish the model

Fitting the Accessories

Replacing some of the awful laser cut accessories has been a primary goal and now we get to fit those to the deck.  In the photo below you can see the life preservers, anchors and vents which have all been painted and glued to their respective positions around the boat.

NAX Fishing Boat - Accessories

Some additional accessories were necessary though:

A deck winch - Cults 3D - This is apparently the upper deck crane winch for a Liberty Ship, but it looked suitably mechanical for my needs.

A light housing - Thing:6007577 - Not perfect but do you know how hard it is to find these sorts of objects from a description

Rigging the Mast

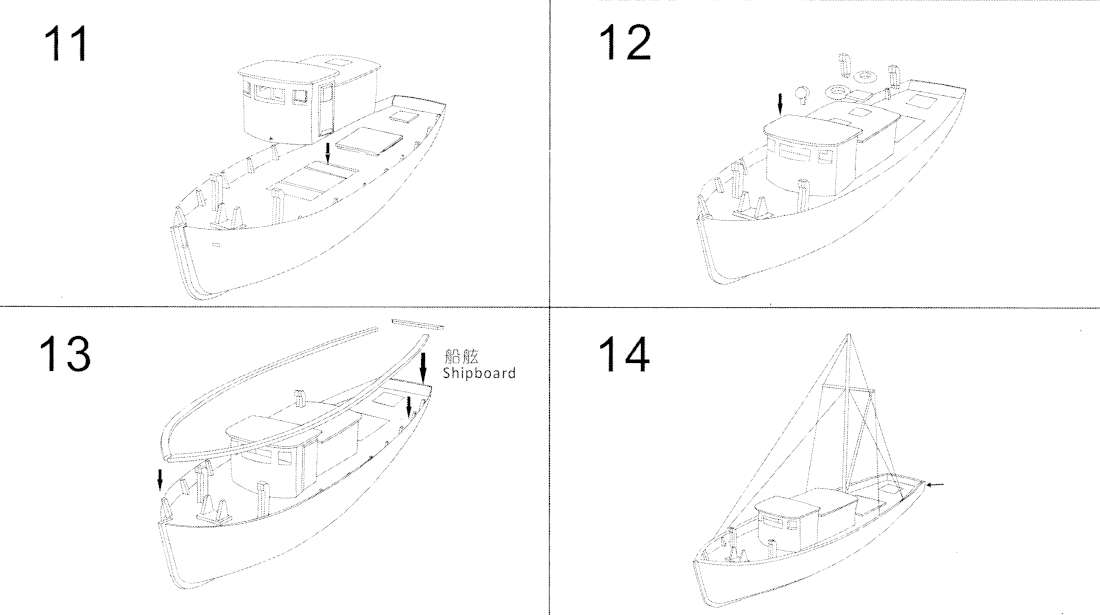
We are almost at the end of the build and this is where the quality of the instructions once again fails to clearly indicate what you are supposed to do.

NAX Fishing Boat - Steps 11 - 14

I need a little bit more instruction given the limited amount of wood we have left.  So I spent an hour or so studying the other Naxos fishing boat model reference photos I had collected and drew myself out a rigging plan.

NAX Fishing Boat - Rigging Plan

Given that I had used some of the thin length of dowel for my prop shaft, I did not have enough left to do both the Spar and the crane Jib.  I grabbed a BBQ skewer from the kitchen drawer and used that for the crane Jib.  I chucked both lengths into my drill and game them a sanding, adding a taper to both ends of the mast to ensure that it fitted into the deck hole and also that it came to a rounded point at the top.

With no hardware (I believe is the appropriate term chandlery?) attaching these together was going to reuire some ingenuity.  I grabbed the thin aluminium florist wire I use for pinning my miniatures and bent up a couple of hooks. I then drilled a hole into the mast and one into the end of the Jib supergluing the hooks so that they act as a rudimentary swivel.   

Four more hooks were also made.  Two fit into the gunwhales on either side of the mast and two in the rear corners of the transom.  

I then laminated some plasticard and created a trapezoid shape which would act as a place to anchor the Jib Pulley.

Talking about Pulleys, I could have used 3D Printed parts for these but the kit actually came with some wierd figure of 8 shaped pieces of wood which may have been for the deck winch that I didn't end up using.  These would do nicely as pulleys. 

Some thin "straps" were cut out of the plasticard to add a little believeability to my scratchbuilt fittings and it was time to glue in the mast.  I wish that I had spent a little more time on this as my mast ended up a bit cockeyed and listing to starboard.  I tried to rescue this with the mast rigging on the port side  but it was a little more adrift than the thin cotton thread could muster.  Chalk that up to experience.  

With the mast rigged it was a simple case of adding a length of thread to the end of the jib and looping it through a pulley and down the mast.  This is when I realised I needed to tie it off somewhere and so I drilled a second hole into the mast for a tiedown.  I left the end of the thread long so this can be the end of the rope used to raise and lower the jib.

The final part of the rigging was to add a length of thread between the the two aft hooks and wrapping it around the end of the jib.  All the threads were superglued in place to stop them from ever coming undone.

And with that it's done, or at least as done as it can be for now.  I will probably tidy up the paint and maybe add some more accessories some time in the future.

NAX Fishing Boat - Complete

I was really impressed with what I was able to do given the limited nature of the materials and it was a real challenge of my modelling skills. 

I really enjoyed my nautical adventure and it has spurred me on to try another more historic vessel and another cheap Aliexpress wooden boat kit.

Friday, 29 March 2024

1:30 Scale Nax Fishing Vessel - NTKJ MODEL - Part Two

In Part One we got the basic hull together 

Sanding and More Sanding

As I mentioned the hull is made of straight ply planks and there are a lot of gaps and seams which require filling with wood filler.  I bought a tub of 151 wood filler which I thought was going to do the trick and I was dissapointed that it was more like wall filler than anything else.  Still I persevered and ended up slapping on a ton of the stuff.  

Naxos Fishing Boat filling the plank gaps

In hindsight I would do this totally differently.  The filler oozed between the planks and ended up inside the boat hull trapped between the frames which then dried and fell off.  I have in effect created a boat shaped maraca.  

Nax Fishing Boat Opening up the hull

This necessitated opening up the deck under the wheelhouse in order to release the now rock hard filler.  This might sound like major surgery, but as the deck is so thin it was easily acomplished with a sharp craft knife and a steady hand.  I made sure to keep the offcut as I have plans for that later.

The way to tackle this is to use the old superglue and baking soda trick to fill up the gaps.  This of course only works if you are painting the hull.  If you are going for the natural wood finish then you are going to have to get better at laying the planks. 

Painting

Painting the boat in sections is unavoidable at this stage.  I carefully masked off the deck and gave the now smooth (ish) hull a spray coat of white primer followed by a couple of coats of white gloss.

The airbrush then came in handy for painting the decks with a Vallejo Burnt Umber wash.

NAX Fishing Boat - Painting the Deck

The remaining wooden pieces for the wheelhouse, deck covers and the gunwhales were then extracted from their boards and sprayed with the same Vallejo Burnt Umber wash. 

NAX Fishing Boat - Deck Painting

Adding Some Colour

I imagined the boat a sort of tri-tone with a red top stripe white hull and black or red hull bottom.  In the end I just gave it a stripe of red on the sheerstrake plank and continuing around the transom.  Masking this off was a tricky exercise as I only had some really nasty cheap painters masking tape.  I will have to come back and do some tidying up by hand later.

Trial fitting the wheel house accents and deck hatches really makes the boat come alive.

NAX Fishing Boat - Red

You might beable to see in the photo above that I managed to glaze all the windows with some clear acetate from some recycled packaging.  I glued this in using my now favourite hobby glue UV Resin which I picked up in my Wish Hobby Products 2024 experiment.  This stuff is amazing.

Adding the Lights

Last year I picked up some micro LED lights for another project (which I have yet to start).  These are incredibly tiny and come pre-soldered onto super thin magnet wire.  I quickly soldered a couple of these together with a CR2032 coin cell battery holder and a latching push button and stuffed it into the hole.

NAX Fishing Boat Lighting

I will probably tidy this up with a piece of perfboard at a later date as the circuit is tiddly. I am also undecided if I will add any navigation lights.  For the uninitiated this mean a RED LED for the left (Port) side of the boat and a GREEN LED for the right (Starboard) side.  I have some 3mm LEDs from another side project but these might be too large, we will have to see.  Adding them to the circuit should be no problem and might even add some much needed resistance to bring down the brightness.  

The LEDs were then routed up through the floor of the front wheelhouse and up one corner.  One LED illuminates the interior and is bonded to the roof with the UV Resin and the other goes outside in front of the cabin as an exterior deck light.  I will need to find an appropriately nautical shroud for this exterior light as they are suprisingly bright for their size.

NAX Fishing Boat - Lighting the Wheelhouse

Oh did I forget to mention that I added a salty seadog to steer this fine boat across the treacherous seas? 

He is one of the many 3D Printed accessories I covered in part one of this mini series.  A fine free model although he is now sealed in his cabin for all eternity as I have glued on the roof and floor.  

In the next, and final part of this mini series we will add all the accessories masts and rigging.

Saturday, 16 March 2024

1:30 Scale Nax Fishing Vessel - NTKJ MODEL - Part One

In my recent foray into buying modelling supplies from Wish.com I mentioned that I had ordered a little wooden boat kit but that the order got cancelled.

Needless to say, I found a different seller on AliExpress and snapped it up.

This is a fun little kit and my first foray into making a wooden boat with a planked hull.  I made a balsa wood sailing yacht from old model engineering plans, decades ago with a lot of help from my dad, but I can't remember if we ever finished it.

The NAX Fishing Boat or should I say NAXOS Fishing Boat

The inspiration for this model is clearly that of a mediterranean coastal fishing vessel of which there are many models.  The kit is made by NTKJ Model and sold through various etailers.

Naxos fishing boat models

This is plenty of inspiration for me to commence making this kit.

Meet the Parts

The kit comes as a set of 6 laser cut wooden sheets, a couple of dowels for the mast and a reel of cotton for the rigging.  A set of pictorial instructions with quite well translated text completes the package which cost the grand sum of £5.94 which in 2024 money is less than a Big Mac meal.  

1:30 Scale Nax Fishing Boat - The Parts

Steps 1-4 - Making the Deckhouse

Whilst the first 4 parts seem fairly self explanatory and involve removing the deckhouse parts and assembling them, the parts are not numbered.  There is a disparity in the plans, in particular the inner bulkhead seems to have a large notch behind it which intimates a part fits into it but the instructions offer no assistance as to what goes in here.   

NAX Fishing Boat Kit Steps 1-4

The wheelhouse fits to the deck with 6 pegs and matching holes.  Dry fitting the parts to the deck helps keep the wheel house square and stable whilst gluing the instrument panel back wall and the top visor.

I left the roof unglued to enable me to paint the inside and out and to glaze the windows and doors with acetate.  

NAX Fishing Boat - Wheelhouse - Steps 1-4

This model is ripe for replacing some of the clumsier laser cut parts with 3D printed ones.  In particular the boat has some cowl vents which are made of laminated wood but they look awful and it will be so much easier to find some on the web or even scratch build.  The same can be said for the portholes and life preservers.  

  • Cowl Vents - Cults 3D - A collection of vents of different shapes and sizes.  The two large vents at the front of the boat are 20mm tall and the one on the rear of the wheelhouse is 10.3mm tall. 

  • Life Preservers - Thingiverse - A good looking life preserver model.  You will need to print six, two at 10.5mm across and four at 12.5mm across.

  • Boat Anchor - Printables - This anchor seems to have the same shape and dimensions as the wooden one.  However, the model is huge and will need to be scaled down to fit.

  • 3 Bladed Screw - Thingiverse - This will need to print this on a resin printer at about XX scale  The original prop is about 11.5mm in diameter.

Steps 5-8 - Laying down the keel 

Now the serious work begins.  The frames are all numbered and from 1 to 10 and are slotted into their corresponding slots in the keel.  Be careful when removing theframes from the sheet as the protruding sections are prone to breaking due to the orientation of the wood grain.

NAX Fishing Boat Plans - Steps 5-8

The diagonal slot at the stern of the boat I thought might be for the stern tube but there was no mention of it on the plans.  The kit comes with two diameters of dowel.  The thin one should be for the stern tube and it is a good idea to add a 1¼ inch length at this point as the keel is relatively thin and likely to snap as you insert the frame 8.  Ask me how I know...   

You could add the rudder at this point but the stupid thing has one mission in life and that is to snap.  It is much better to leave this until after you have planked the hull and either fit it or replace it with a 3D printed part.

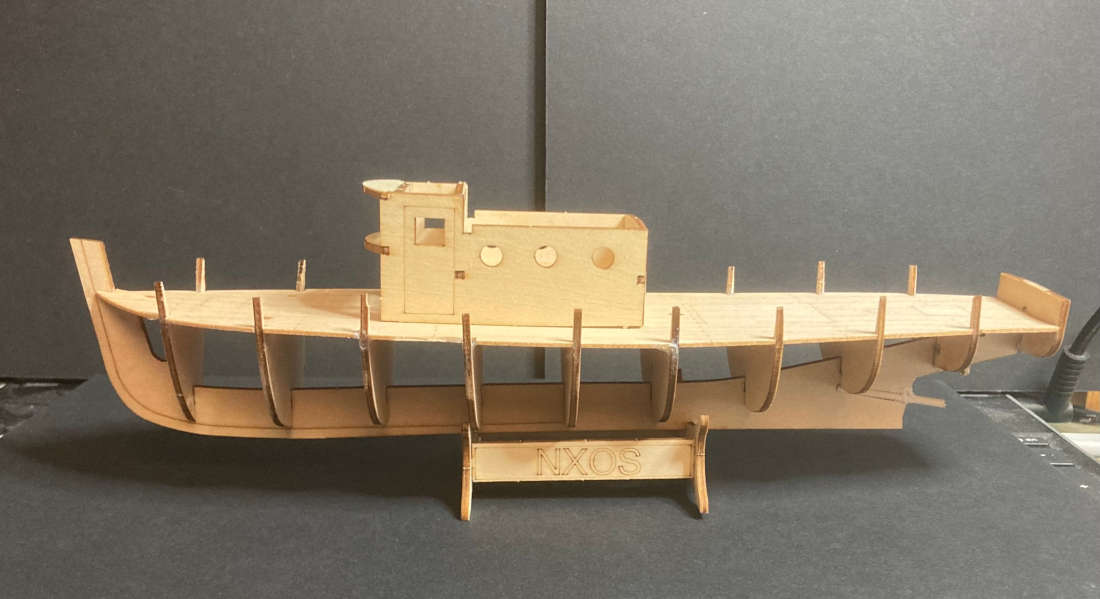
Once all the frames are fitted you can add the deck plate.  Before you do STOP! 

Take the time now to add some cardstock or a thin piece of styrene to the back of the deck plate.  It is incredibly thin and the laser engraved planking makes some of the edge planks prone to detatching.  The slots that the frames fit in are also too thin and not in exactly the right places for the frames to slot into so you are going to have a whale of a time gently coaxing them into place and you will probably snap a few.  Don't panic.  Take some time out to put the stand together and have a cup of tea.  

NAX Fishing Boat - Steps 5-6

The next step is the one I've been both dreading and looking forward to in equal measure.

Steps 7-8 Planking the Hull

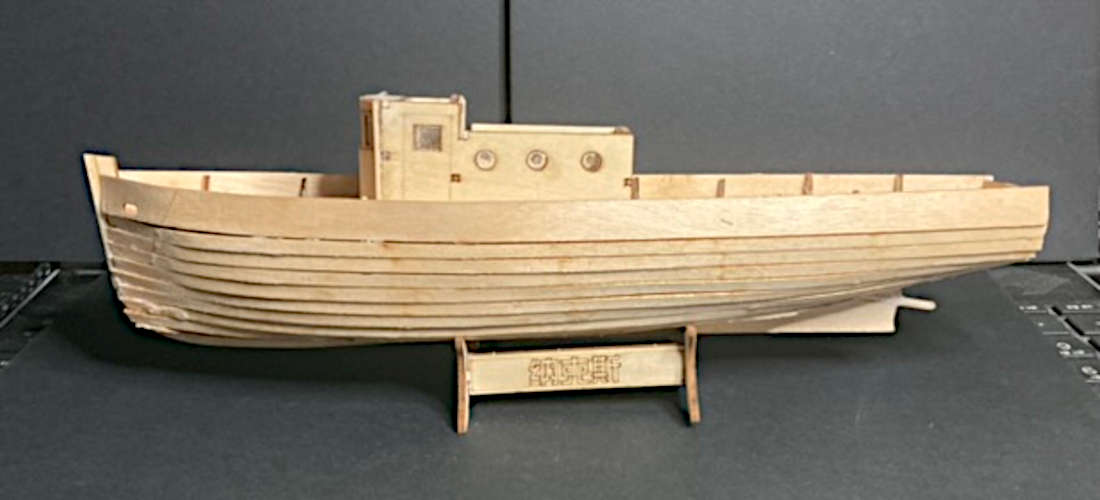
That kettle you just boiled is going to be handy.  We now need to steam the first couple of planks.  These are the wide ones with the little oval holes on the planking sheets marked IV.  The holes go at the bow (the front) of the boat and you will need to hold the end of the plank in the hot steam to soften it and then gently put a curve into it. 

This is incredibly fiddly so be patient.  With these straight planks being made of plywood they really aren't made to go around these curves.  I glued 8 planks down from the sheerstrake (the wide one) and then the remaining planks up from the bottom.  These all had to be shaped at both ends to fit.

Nax Fishing Boat - Steps 7 to 8

There will be lots of gaps.  When we shape the hull planks by sanding we are going to use some wood filler to fill in the gaps.  Real wooden boats have caulked seams and they are designed to swell when they get wet and thereby get tighter.  The hull is going to be painted so you won't be able to see the seams.

More 3D Printed Accessories

Fisherman with ships Wheel - Thingiverse - I spent a long time trying to find a suitable helmsman for my boat and this one conjurs up the same vibe as the Lovecraftian fishing horror game Dredge. be

To be continued...