When I got my new printer I knew that there were a few grail items that I've always wanted to own but was too afraid to print.
I am running a Judge Dredd campaign for my Friday night role play club in South East London (Dragons Keep Roleplay Club), so I took the plunge and printed a Judge Dredd Helmet.
 |
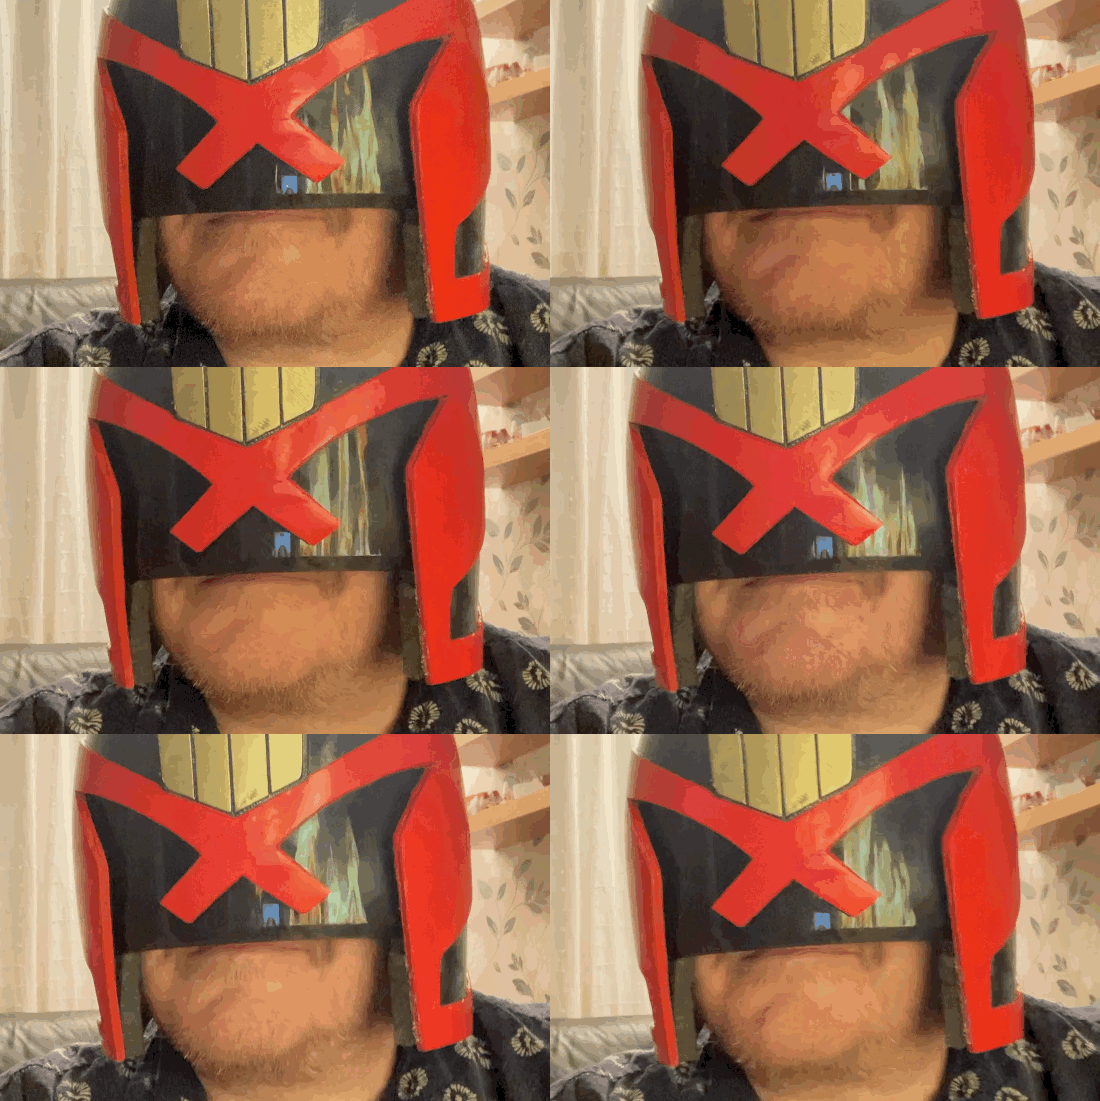
| My 3D Printed Judge Dredd Helmet |
Cutting up the STL File Using Meshmixer
I downloaded a model from thingiverse by user 3DPrintSolutions which had been cut into 4 parts but still was too big for my 200mm square print bed. The solution was to download meshmixer and split each print in half again for a total of 8 parts. These would then go together in two rings of four parts each.
Help I Need Some Support... Material
The bottom ring had virtually vertical walls so I opted to print without support material and arranged the prints on the bed to minimize any stringiness which was largely avoidable. I knew I would have a lot of clean up so a few dody edges could be fixed with bondo in post processing. This got the print time down to just under 4 hours each.
The upper ring is mostly dome so I new I was going to need a lot of support. The first print I did had support set to 15 in Cura and this took over 10.5 hours to print. Reducing this to 5 got the other three parts to print in between 7 and 8 hours each but did result in a bit of loose stringing on the inside. As they say "it don't need to glow if it ain't on show"
 |
| Lots of support needed to print the domes |
You can see why I was reticent to start a project like this. With nearly 60 hours of printing (including the odd failure) it is my biggest print to date both in size and in time.
 |
| Judge Dredd Helmet - 8 Parts Printed |
Filament, God Awful Filament
I've had this PLA filament knocking around since January last year and one reel has been open to the elements all that time. This is probably not the best PLA to use, but it's what I've got and it needs to be used up. I've never been one for colour matching filament and this filament is a gorgeous shade of poo, I mean chocolate brown.
The finished print is going to need a skim coat of plastic body filler to smooth out the layer lines so the filament colour is completely irrelevant in any case.
The other thing with this filament is it needs to be hot, 220 degrees hot and I printed some of the earlier prints at 210 which caused some under extrusion which needed fixing. I pulled out the trusty 3D Pen which is ideal for this sort of touch up work and started meshing in some extra plastic SANAGO style. I also resorted to the old superglue and baking powder trick to fill some of the more heinous gaps in the print and give the cracks some filling.
My old man was raving about some glue he had bought recently and so he sent me a care package from Amazon. It ended up being Mitre Bond Superglue & Activator which I had been trying to find on eBay and Amazon for ages but didn't know what to search for. Apparently accelerator is not the right phrase.
Assembly and Post-Processing
I assembled the first two prints before the third had even come off the printer as I was anxious to see if the parts had warped during printing. Everything was okay, well reasonably okay, fixable okay and so I held off further assembly until all the parts were printed. I taped the parts together in the interim to give me a psychological boost to keep going and to also get a handle on just how big this is.
 |
| Judge Dredd Helmet - Taped Together |
I think that this is incredibly important, especially when you have prints that fail inexplicably and you have to restart a 30 or 40% complete job twice over. 3D printing is not a fire and forget process and I learned quite a bit about my new printer in the process. This is only its third or fourth project and even though it is almost identical to my previous Prusa i3 homage, it's a little bit different in construction and behaves slightly differently. It is as much about dialling in the user as it is dialling in the printer.
Post processing is a laborious and crappy job. Another reason why I put off printing something so large. Fortunately this model is large areas of smooth surface with gentle curves rather than lots of fiddly detail and tight tolerances.
The bloke who glued the parts together (me) did a crappy job and so I had to use plenty of bondo (car body filler) to smooth out all the joints between the parts and fill in the layer lines on all surfaces.
Somebody Closed My Halfords!!!
A slight rant here but I wandered down to my local Halfords which is 10 minutes walk from my house. I say IS but I should mean WAS as thanks to COVID, the powers that be decided to close the store for good and it is now a DREAMS Bedstore. Now I am sure that they had sound financial reasons for it but it does mean that there is now no consumer auto spares store in Orpington. So rather than drive to the nearest alternative store which would be in Bromley I did what 99% of the population are going to do. I bought it cheaper off Amazon or eBay.
I think there is a morale in this tale about the death of the high street but I can't for the life of me guess what it is.
 |
| Judge Dredd Helmet - Big Boy Bondo Time! |
I also smoothed out the inside surfaces adding a bit of thickness to the entire helmet but mostly the bondo was needed to level out the discrepencies between the different sections where they meet like the four corners monument.
Painting Your Helmet
The Visor
There seem to be two types of thought on visors either stay true to the comic book and half a two tone visor or go with the Dredd movie look which is all black.
The model also comes with a printed visor which to be honest is probably
a good thing as it ensured correct alignment of the nose guard
X during assembly. This was removed once the helmet was complete and
replaced with one a sheet of acetate covered with one way black film.
After all you can't have the perps seeing your eyes (or in my case my
spectactles).
 |
| Comic Book or Dredd movie visor (which do I choose) |
The concesus also seems to be that the best way to replicate this is by buying cheap motorcycle visors from ebay and hot gluing them in. The only problem with this is size. Motorcycle visors are meant to go on the outside of a helmet not the inside so the curvature is all wrong. I also had no idea what size I needed so I just went for a JDC one size fits all visor (eBay / Amazon).
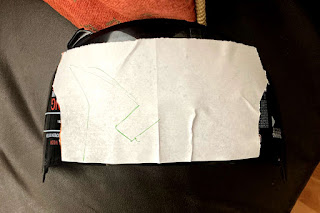
I cut out the eye holes with my knock off dremel using an abrasive cutting wheel. I cannot stress how important it is to wear a safety glasses when doing this. The little cutting wheels have only one mission in life and that is to shatter fling shards of abrasive right in your face. Fortunately I only managed to break one "Wheel of Death" and with the eyeholes removed I made a paper pattern adding a generous half inch to all sides but the bottom. I used spray adhesive to stick this to the visor on top of the removable plastic scratch cover and then dremeled it out.
As you can see in the picture below I stuck this on upside down. The visor has a curved bottom edge and a flat top edge. You want the top edge to form the exposed edge of the visor on your Dredd helmet.
 |
| Paper template stuck on visor upside down. Just big enough |
Interior Padding
This was a relatively easy job just hot gluing in sections of EVA foam tile. This is a cosplayer's go to material and can be bought as workshop flooring or playmat flooring inexpensively on Amazon or eBay.
 |
| Interior reinforcement and padding with EVA foam floor tiles |
How Much did this 3D Printed Judge Dredd Helmet Cost Me?
Here's an estimate of the costs
- Filament - £15
- Electricity - £10
- Bondo - £9
- Visor - £10
- EVA Foam - £8
- Sandpaper - £3
- Paint - £10
- Glue - £8
That's a total of roughly £73 which is about the same price as a raw fiberglass cast helmet from eBay. A finished helmet will set you back at least £150 and you don't have any of the enjoyment of getting there or the enormous sense of satisfaction when the project is complete.
I posted a couple of pics on Whattsapp and a friend immediately asked
"Can you make it reflect flames like in the Dredd movie?"
The answer is most definitely Yes.
So What Other Grail Items Are on my Bucket List?
I've already printed a Han Solo DL44 Blaster, one of my earliest prop projects and a Judge Dredd Badge. I even did a custom one for one of my players in a previous Judge Dredd RPG campaign.
As a Sci-fi fan there are a number of iconic weapons that I 've always wanted to own including:
- An M41A Pulse Rifle from Aliens
- A Bladerunner Deckard Blaster
- A Lawgiver - there are 3 to choose from Comic Book / Judge Dredd (1995) or Dredd (2011)
- A Hellboy Samaritan revolver
- An Outlaw Star Caster Pistol (as used by Gene Starwind)
I also want to print some of those iconic droids like
- A life size R2D2
- A C3PO head.
- An ABC Warrior Skull from the 1995 Stallone Movie Judge Dredd
- A life size Han Solo in Carbonite
But those are all going to have to wait until I've recovered enough to consider taking on a mega project like this again.


How much filament did the print use?
ReplyDeleteAbout 1kg
ReplyDelete