A session of a recent Diamond Throne game I played involved a short dungeon crawl. The age old problem of lighting for the non infravision equipped players reared it's ugly head. This got me thinking about ways to show the limit of torchlight in different ways, without turning this into a massive maker project. I thought I'd brainstorm the options and jot them down here and then produce a few prototypes and document how each one works in a game.
2D Templates
The simplest (and perhaps most obvious) of options to make is a flat template:
Pros & Cons:
- flat and therefore easy to transport in a flap or a pocket in a ringbinder.
- easy to make, print on OHP (Over-Head Projector) film and cut out.
- cheap.
- can't simulate the height of anything
Idea 1: Single Zone - this template is the simplest to make, just use a compass to scribe a circle of the appropriate diameter on a sheet of stiff transparent plastic. A good source for the plastic is packaging windows, you know the ones, the boxes from those toys you bought for Christmas with the big plastic windows so you can see what you're buying yourself. There's no need to print anything on, but if you make lots of different ones for different effects you might need to write effect names on them with Permanent Marker.
Idea 2: Multiple Zones - Slightly harder to make, and you might need to design something on the computer and then print it out onto OHP film. Another way is to stack them on top of one another, pin or fix together with glue to show different effect zones. If you can't get hold of coloured transparency film then colour with careful use of permanent marker. The zones don't even have to be for the same game, the possibilities are up to you.
 |
| A 2D Multi Zone template |
3D Templates
Same as 2D but with the added dimension of ... height.
Pros & Cons:
- They're 3D so probably won't fold and therefore difficult to transport
- Harder to make or find suitable component
- More expensive
- Bulkier in play, do they interfere with other miniatures, move them
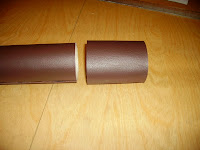
Idea 1: The Dome or Tub - Finding suitable components for this will be tricky but I should have at least 1 by the time I write Part 3. Some options are plastic soft drink bottles, CD drums, caps from Frappucchino or smoothie cups.
Idea 2: The Ring - a simple ring of stiff transparent plastic which stands on it's rim. This I will definitely try to make. A more advanced design would be adjustable like a belt so you can expand the ring for different sized zones. The width of the ring can be made to simulate the height of an effect. I'll make the belt style and try it out.
 |
| A Ring |
Idea 3: The Cone - A cone of transparent plastic which can be placed over a miniature. Cones stack inside each other for transport. They can also be made out of a flat sheet of stiff transparent plastic like OHP film.
 |
| A Cone |
Idea 4: The Cube - a transparent box which can be be created from flat sheets of stiff transparent plastic. Sounds like papercraft to me, let me at it.
The Weird & Bizarre
A combination of 2D templates with a stand or something totally different.
Pros & Cons:
- clumsy to use in play
- expensive
- hard to make
- hard to store
Idea1: Tripod & Torch - Use a length of stiff wire or a wire coathanger and a pare of wire cutters to make a rudimetary tripod and a ring over which you can hang a small torch. If the torch has a beam focus you could use it to give different size effect areas.
Idea 2: Tack and String - Less of a template and more of a measuring device. Push a pin into the base of a plastic miniature then knot lengths of string to the pin. Trim the string to the appropriate length or if making a multipurpose string add coloured tabs to the string. Each miniature then has a handy radius measure
Idea 3: Radius rod. Using a thin brass rod, dowel or heavy gauge wire. Thread a 2D template onto the rod through a hole in it's centre. A step or a blob of glue can be used to stop the template falling off the rod during use. Templates can be removed for storage. I'll have a go at this one.
If you've got some ideas that you want me to explore in prototype, feel free to comment below and if they pique my creativity I might just make them. If you've got any prototype pics you've made yourself feel free to add links.


