Showing posts with label Monsters. Show all posts

Sunday 7 June 2020

Vintage Vampire - Citadel C18 Night Horrors


I've had this mini hiding in an old tin in shame for years. 


The original paintjob was a horrible early experiment using artists inks.  I had given him a wash of blue ink over a white primer basecoat.  He was more Blue Man Group than Bela Lugosi and so it was time this scary dude got a spooky repaint.

Citadel C18 Night Horrors - Vampire
Buy it on eBay

The repaint was an experiment in glazing over a zenithal highlight with a single colour.  In my case this was Vallejo Game Colour Dark Green and I reinforced the highlights by mixing in some Vallejo Game Colour Dead White.  I picked out his eyes in Vallejo Game Air Scarlett Red and stuck a pin in him, he's done.

Like all of my recently painted minis this one got a protective coat of Windsor & Newton Matte Varnish from the airbrush thinned down with Vallejo Airbrush Flow Improver.

The C18 Night Horrors range is a particularly interesting series of minis and no doubt was designed to accompany the Gothic Horror Floorplans and GW licensed edition of Call of Cthulhu which were released about the same time. 

They were excellent value as you got 5 "classic horror" minis in a blister pack for only £2.50 which if GW used the Bank of Englands inflation calculator would be under £10 in today's money.  Well I guess it's true what they say...

"There are only two certainties in life.  Death and Games Workshop price gouging!!"

Amoebaman - A Plantman PC idea for your RPGs

I came up with a silly idea and had to post it otherwise I would forget I'd had it.  Clearly too much cheese was consumed that day.

Ameoeboids

These complex vegetable organisms are humanoid in shape and come in a variety of heights and classes.  they have all the same stats as humans.  Their one distinguishing feature is that they reproduce asexually.

Yes every time they level up they immediately split into two distinct life forms with the same stats, skills and memories.

Go forth my Son (or daughter)

Of course whilst it sounds like a fun idea, it presents a problem for the party if they keep on their new recruit.  If this lappens every level by 4th level (assuming that they all survive) their will be 8 versions of it and the party will keep growing exponentially.  The player will have to decide which to put to the sword and which of his children to cast out into the cold unforgiving wilderness.  Tough love indeed.

In hindsight perhaps to prevent this getting out of hand reproduction should be capped at twice per lifetime.

Not at all Thought Through

I cannot be held responsible for my creation if you should choose to use it in your game.  It could be an interesting Invasion of the Body Snatchers style plot hook though if you use it as a benevolent monster NPC type which can also assume the visage of an unwilling party member.

Amoeba Man - Wonder Woman #125 - Battle Prize
DC came up with the Amoeba Man idea first - dangitt!


Saturday 23 May 2020

Miniatures Monday Goes Old School Saturday

I normally leave my mini posts until Mondays to show off the latest update on my Reaper Bones Painting Marathon progress. 

Well, I thought I'd spice it up and share a few of my other projects which have recently been completed (thanks to a spot of spring cleaning during lockdown).  Normal service will resume next week.

Vintage Citadel "Fiend Factory" Balrog - FF5 C31

An iconic miniature from the Fiend Factory range, this imposing winged demon has been one of those bucket list minis that I've been holding onto for some time.  Finally he has a paintjob worthy of the sculpt and this just makes me want to find more of these vintage "pre slotta" base Citadel minis to paint.


Citadel Fiend Factory Balrof FF5 C31
Citadel Fiend Factory Balrog (FF5 C31) - Buy your own
Thrud The Barbarian (LE12)

Readers of vintage White Dwarf will recognise this pin headed barbarian.  Created by illustrator Carl Critchlow he was White Dwarf's long running comic strip from issue #45 to issue #105.

An obvious pastiche of Conan the Barbarian, Thrud was entirely played for laughs and Carl has continued to draw him outside of the pages of White Dwarf in his own Thrud The Barbarian comic.

This is my Thrud's 3rd paintjob only possible due to the chunkiness of the detail (I never bothered to strip him of his previous paintjobs).  I am half tempted to track down the other 4 Special Edition Thrud miniatures Citadel have made over the years.

Citadel Thrud The Barbarian (LE12)
Citadel Thrud The Barbarian (LE12) - Buy your own

Friday 1 August 2014

Ennie Award for Best Cavern Map goes to... Fire Ants.

One of the staple RPG tropes is the "Bug Hunt", we've all done them.  There are some pretty cool bug hunt tunnel maps out there, but even the best human cartographers can't come close in complexity to these real world Fire Ant Colonies.  These stunning aluminium casts are the work of anthillart.com

Fire Ant Colony #45 - 18.5"x12.5"x13" (HxWxL)
Carpenter Ant Colony #31 - 16.5"x4.5"x8" (HxWxL)
The artists YouTube channel has some interesting videos showing the whole casting process which inevitably causes the destruction of the colony.  I'm rooting for Hicks and Hudson on this one and prefer to immortalize the work of these pests rather than go down the "nuke it from orbit" route.

Tuesday 13 August 2013

Reaper Bones #6: Mimic, Treasure Chest and How I Rebase my Bones

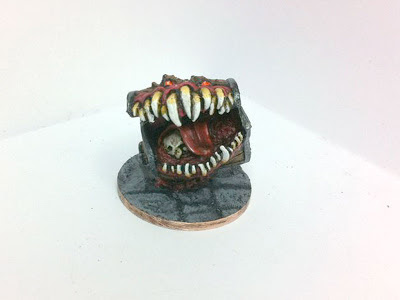
There are a handful of miniatures from the Vampire Kickstarter that I've been looking forward to painting, and this mimic is one of them.

I've never used one in a game, but now I have one in my arsenal you can bet you're bottom dollar I'll be throwing it at my players.

Mockingbeast (Julie Guthrie SKU: 77048) 
Reaper Bones Mimic (Front)
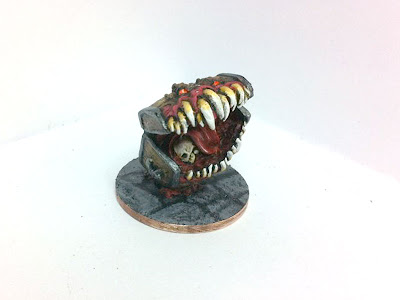
I really struggled with the eyes, I tried several different paint combos until finally settling on fluorescent orange with a dab of white for the reflection.
Reaper Bones Mimic (3/4)

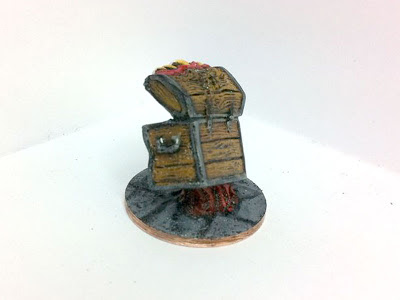
Reaper Bones Mimic (Back)

Of course you can't have a mimic without having the treasure chest it's mimicking.

Chest - Crypt of the Vampiress set (Bob Ridolphi SKU: 02990)

Reaper Bones Treasure Chest and Mimic

How I Rebase My Bones


All Purpose Filler and a Craft Knife
In comments Welleran asked, "When you rebase these, how are you cutting off the old bases? Are there any tricks to it?".  The simple answer is no I'm not cutting off the bases and there are no tricks, just a tried and tested method I've used for years.

For this you'll need a scalpel or craft knife and some all purpose quick drying wall filler, the sort of thing you use to hide cracks in plasterboard (aka gyprock or rockwall) you should be able to buy some in the discount shop for about £1.

Tutorial


  1. Superglue your miniature to your chosen base material, for me that's old 2p pieces.  As you can see in the photo, the miniature's base stands proud of the new base and we need to hide that cliff edge.

  2. Dab on small amounts of the filler and use the craft knife to smooth it out in a nice transition from  the base edge to the height of the miniature's base.

Smooth out the filler to transition from the miniature's base
to the edge of your new base.
  1. Use the blade of the craft knife (or other implement) to texture the filler to taste, or to extend the existing base style if it had one.  I like to give dungeon dweller bases a paved look, which is easy to recreate by gently pressing a blade into the filler before it dries.  Wilderness creatures get a mud base which is just dimpled with the end of a paintbrush as the surface is going to be hidden with flock.

Texturise your base before the filler dries

Bones Progress

Reaper Bones: 245 - Painted: 32

Related Posts:

Wednesday 19 June 2013

Reaper Bones #3: A Carcase of Skeletons

The Reaper Bones Painting Marathon continues, this time I have a carcase of skeletons.

So far I've been pretty impressed with the PVC material the bones minis are made from.  It's much more robust than the plastic that the WotC D&D or Paizo Pathfinder plastic miniatures are made from and the sculpts have been intentionally strengthened in some areas to ensure that they don't break or bend excessively.

The skeletons are a prime example of this as during transit they tend to get a bit bent, particularly in the polearm and base/ankle areas, which means when you unbox them they can have some weird lean angles. I had to use the hot water / cold water dipping technique on a few of them to refresh the plastic's memory and return them to their intended poses.  If you want to change a pose slightly you can, you just have to overbend them slightly as the plastic really wants to go back to its original shape.   

DHL Classic Skeletons x3 (Ed Pugh SKU: 03467)

Six skeletons (Front)

Six skeletons (Back)
From the pictures you'll see that these are the first Bones I've tried to mod.  I was pretty unhappy with the flexibility of the upper bow limbs, so I decided to string them to give them a bit of extra realism and to give the bow limb a bit of support. This involves a few steps:

  1. Heat a thin guage sewing needle over a naked flame until it glows cherry red, then pierce the miniature between the bottom limb of the bow and the skeleton's leg.  This will create a hole through which you can feed your bow string. 
  2. Cut a suitable length of solid thin wire to form your arrow and glue this between the drawing hand and the thumb with small dabs of superglue.  My knocked arrows are way too long to fit into the skeleton's quiver and I should really cut them down, but I like the way that they fit the skeleton's half draw pose so I'll leave them for now.
  3. Take a length of sewing thread and knot one end.  Then thread it through the hole you made in the bow in step 1 and set with a dab of superglue.  Stretch the thread in as straight a line as you can to the flight end of the arrow (ie the bit the skeleton is pulling) and set with a dab of superglue.
  4. Make a loop in the end of the thread and hook it over the topmost bow limb.  Tighten this thread until both bow limbs are symetrical and then set the knot with superglue.
  5. Coat the thread in superglue on both sides.  Once the superglue dries, the string becomes rigid and supports the upper bow limb and prevents any excessive flexing.
  6. The final stage is to cover up the drawn end of the bow with a flight.  Make this by pressing a small amount of modelling clay (milliput or green stuff) into a thin diamond shape on a cutting mat.  Whilst still pliable cut the diamond into two triangular halves and then stick one to the end of the bow.  You don't have to be too great at modelling to do this, just patient.

Bones Progress

Reaper Bones: 245 - Painted: 30

Related Posts:

Thursday 23 May 2013

Reaper Bones #2: Kobolds are they dogs or dragons?

The next milestone of this marathon painting challenge is the kobolds.  

Just like the Giant Rats I painted last time, these are one of the monsters in my Monster Mini Box: Level One and are a classic low level minion and dungeon pest.

Lots of people have gone before and written heaps about The Ecology of Kobolds, how they are Reimagining Kobolds and even how Kobolds are the D&D equivalent of Star Wars Jawas.  I'm not going to be going into that level of detail about their origins or whether or not they're the offspring of dogs and dragons (unlikely).  Suffice to say that my kobolds are both, they share some draconicon physionomy as well as canine.

They are hairless scaly bipeds with tails, their dog-like heads have vestigial horns and spine crests.  Their tails are not prehensile being used primarily for balance and as a way of conveying emotion.  The skin on their abdomens and upper tail is much thinner (and of a different colour) to that on the rest of their body.  They can be any colour (just like the various hues of dragonkind) but the ones I'm painting today are red.

Muttley (Hanna Barbera)
They are scavengers and any weapons or armour they use is cobbled together from items lost or discarded on battlefields or at the roadside.  In fact it is not unheard of for them to scavenge from the edge of a battlefield during the night, despatching any dying soldiers in order to loot their bodies.  During research I discovered that there was a 17th century expression "to laugh like a kobold" so now mine laugh nervously like Muttley.

The 4 Stages of a Miniature Paintjob


Stage 1 - Primer - As I've said before I like to paint over a black basecoat which helps me to build up the layers of colour from dark to light.  I use an acrylic car primer in a spray can, and any areas that get missed like undercuts can be touched up later.

Stage 2 - Basecoat - Blocking out the colour areas on a figure with base coat helps you to pre-visualize a colour scheme (ie: work out where your contrasting colours need to go), what your midtones and highlights need to be and finally avoids any need to blackline.

Stage 3 - Midtones - Pick out your midtones by painting smaller areas of colour within the basecoat patches you applied earlier.  Midtones are usually halfway between your basecoat colour and your highlight colour and should match the colour of any material or skin your are trying to simulate.  For example if you are going for a woodland green cloak, then your colours will be:
  • Black Primer
  • Basecoat - Woodland Green + Black, Navy Blue or Brown)
  • Midtone - Woodland Green
  • Highlights - Woodland Green + White, Grey or Yellow
A well stocked range of colours will enable you to paint "straight from the pot" as it were, without any need to mix colours together.  This is very important when painting large numbers of the same figure as you'll end up spending the majority of your time mixing colours.  Acrylic dries pretty fast so remember kids if you're using Dad's paints (or Mom's, cos girls likes gaming too) blob a reasonable amount on your palette, don't actually use the pot lid to paint from, you could knock it over or worse end up with the pot lid getting all gunky, losing it's seal and drying out entirely. 

Stage 4 - Highlights - Pick out your highlights in the same way as your midtones by painting even smaller patches inside your midtone patches.  The effect you are after is a subtle shift in shade from black all the way to your highlight colour.  If it looks too "stripey" then your colours probably need to be closer together in shade.

Stand Back and Admire your Handiwork


Remember it's a gaming miniature, for gaming, as long as it looks okay at "stand off scale then "jobs a good'un".  If you get good at painting there are plenty of people who will pay good money to get you to paint their armies.

Kobolds x6 (Ben Siens SKU: 77010)

A dozen Kobolds, enough to challenge any 1st level party

A Word about Variety

The Bones Kobold miniatures are all well and good, there's a dozen of them (frankly enough to enable me to meet my Appendix C requirement of 6-18) but there are only 3 sculpts (Kobold with; Sword and Shield,  Sword and Spear, or just a Spear).  When gaming you need something to identify each minion and if you can't do it by their pose, you have to resort to other means such as painting something a particular colour, in the Bones Kobold's case they're either holding a shield, or wearing a waistcoat or mantle. 

I've therefore painted a version of each sculpt in each of 4 colours, enabling my players to identify the target of their attack as "Red Shield" or "Blue Mantle" rather than me needing to paint or stick numbers on them (a less visually pleasing option).

3 Bones Kobold sculpts in 4 different colour combinations (Purple, Brown, Blue & Green)
gives me 12 uniquely identifiable minis.  A much better system than adding numbers IMHO.

Oh and if you look closely you'll see that one of them has left behind a little present...
You can tell this Kobold's shit scared.

Bones Progress


Reaper Bones: 245 - Painted: 24

Related Posts:

Monday 13 May 2013

DIY Rot Grubs

As I alluded to in my Monster Mini Box - Level One post, there's no point buying rot grubs unless you're a serious D&D mini collector or have oodles of cash to throw about.  So I'm gonna show you how easy it is to make your own.

You will need:

  • Coins, washers or other basing material - In the UK our second lowest denomination coin is the 2p (worth about 3 cents) measuring exactly 1 inch across.  I've used them as bases for my miniatures for decades despite the fact that it's technically illegal (sorry Queen) but where else can you get readily available metal bases for 2p a pop?
  • Modelling Putty - I use milliput (mostly because I have it) but other putty's like green stuff, fimo and DAS Pronto would work just as well.  Obviously you may have to modify these instructions if you your putty needs to be baked to cure.
  • Modelling tools - I use a metal ruler, a craft knife and a cutting mat, but to be honest you can use just about anything as long a you don't tell your wife.

Rot Grubs A-go-go

Build up your base with putty
Step 1 -  Build up your bases. 

Tear off some putty and squish it onto your base to make a decent base for your pile of grubs and to cover up the face of whichever monarch or dead president is staring at you with dissaproving eyes.  Pile your putty up in the middle, if you want to have a big writhing mound of grubs or you can spend hours modelling a crazy paved floor for them to crawl over.  The amount of time you spend on your bases is entirely up to you.

Step 2 - Make some sausages. 

Make a putty sausage and score it
A sausage sandwich would go down really nicely at the point, but you should concentrate on your sculpt and start rolling out some putty sausages using the ruler and a flat durface.  These sausages can be any length but try to keep them about 2mm in diameter. 

Step 3 - Score your sausage. 

Using a sharp edge, like a craft knife, roll grooves all the way along your putty sausage to simulate the segments of your rot grubs.  Take care not to cut all the way through other wise you'll be making little slices of black pudding and we ain't modelling them this week.  Varying the spacing of the grooves can give you options for heads or tails when you get to the next stage.

Croissants or Chippolatas?
Step 4 - Chippolatas and croissants. 

Chop up your sausage into small lengths, about 1/2 an inch is perfect, and put a bend in them to resemble semi-circles or croissants.  You can try longer ones with more complex curves, it's entirely up to you.  In a short while you should have about 10 to 12 grubs, that was easy don't you think?  Try having longer segments at the ends to simulate either heads or tails.  If you're confident with your modelling skills you could even try opening up a mouth at one end with a cocktail stick.

Step 5 - Plate them up. 

Rot Grubs curing in the noonday sun.
Start piling your grubs onto your base in as random a fashion as possible.  You can rinse and repeat steps 2 to 5 as many times as you like to get the perfect pile of grubs, the great thing is that unlike a production miniature each one of yours will be absolutely unique.  When your satisfied leave to cure as indicated by the instructions for the material you're using.

Step 6 - Presentation is everything -

Your rock hard grubs will need a lick of paint to really finish them off.

Painted, but finished? the question is do I give a flock?

How to Play Them


Despite the fact that rot grubs feature in Head Injury Theatre's hilarious Celebrating 30 Years of Very Stupid D&D Monsters, they are an effective way of making challenging choices that bit more icky or just punishing failure.  Use them sparingly when your party has just got a little bit too cocky or blasé about this dungeoneering lark.  It reminds them "Who's the Daddy?"

I'm an Adventurer, Get me out of here!!


Let's make no bones about it, they live in shit (and other nasty fetid places) and that's nasty.  If you've not seen Jo Nesbo's Headhunters then I suggest you rent that puppy now.  Simply put, Aksel Hennie's lead character has to make an unpleasant choice to avoid a confrontation with Nicholas Coster-Waldau's bad guy Greve.  You can make the "eeeeuwwww" factor even worse by keeping this to yourself until they're half way across the river of merde and they start feeling the little blighters nibbling at their extremities or worse burrowing into their faces.

Where there's muck there's Brass

How easy it would be just to let the PCs root through that pile of corpses to recover the awesome treasure.  Woah Stop!! where's the fun in that?  Remember how fun it was to bob for apples as a kid? Well bobbing for booty is more fun when there's rot grubs in the pile of poop.

Don't Cross There!!

Sometimes you need to subtly railroad (also known as convincing or dissuading) your players using obstacles which, although not impenetrable, have obviously undesireable outcomes.  So you ignored my warnings, eh?  Well not only have you just fallen into the poop but you now realise that the poop is infested with rot grubs.  You get the point.

Related Posts:

Friday 10 May 2013

Ray Harryhausen Appreciation Blogfest

Thanks to RJ at Gamers & Grognards for suggesting the idea of a blogfest as a great way to honour the passing of one of the greatest cinematic geniuses of our time, Ray Harryhausen.

Some of my earliest memories were sat infront of the TV watching classic monster movies, it was here that I discovered Sinbad and the tales of far flung Arabia.  Of course none of this would have caught my imagination if it weren't for the terrifying duels between man and monster cooked up by the genius animator that was Ray Harryhausen.  It must have rewired my brain somewhat as my favourite setting for D&D has always been Al-Quadim.

Last night I decided to rewatch...

Sinbad and the Eye of the Tiger


The first monster Sinbad (Patrick Wayne) encounters are the fire demons (Harryhausen's storyboard maintains they are ghouls) conjured from the flames of their campfire as they celebrate ending their return to the city.  These insect headed animated corpses  see off most of Sinbad's crewmates before he crushes them with an inexplicably placed pile of huge logs.

Fire Demons emerge from the camp fire ready to attack
Sinbad tries to return to his boat and encounters the beautiful Princess Farah (Jane Seymore) brother to Prince Kassim who has recently been turned into a baboon by his step mother the Evil Witch Queen, Zenobia (Margaret Whiting) in order to retain the throne for her own son.

Farah then introduces her Uncle Balsora who pleads with Sinbad to aid them by returning Kassim to his true form.  We get introduced to the transformed Kassim as his cage is being loaded onto Sinbad's ship.

Prince Kassim is a pretty mean Chess player
Meanwhile Zenobia, discovering that Sinbad aims to sail to the island of Cascar to seek the aid of the sage Melanthis and constructs The Minaton, a Bronze Golem, to act as her bodyguard, henchman and the oarsman for her marvelous ship without sails.

The Minaton has the strength of 6 men
The Minaton is a really iconic creature  and one of my favourite Harryhausen creations.  Interestingly I discovered that Peter Mayhew (aka Chewbacca) acted as the stand-in during filming, the model Minaton was added later by Harryhausen during post production.

As they leave in pursuit of Sinbad, Zenobia instructs the Minaton to see off Balsora's spies.  The automaton wordlessly obeys, capsizing their boat and skewering their leader.

Sinbad successfully negotiates the treacherous reefs which surround Cascar and meets with Melanthius (Patrick Troughton) discovering that the only way to return Kassim to his true form is to travel to the fabled Shrine of the Four Elements hidden in a green valley in the frozen North of Hyborea.

Zenobia's attempts to navigate the reef fares less well and the ships metal oars aredamaged in the process.  She is thwarted again when Sinbad's ship sets sail whilst her son is still making good the repairs.  In desperation she uses a magic potion to transform herself into a seagul so she can learn of Sinbad's plans.  Unfortunately she is captured by Melanthius who also discovers the amulet containing her transformation potion and uses it to enlarge a wasp to monstrous size.

Melathius fends of a giant wasp whilst the imprisoned Zenobia goads it.
In the chaos Zenobia's glass jar prison is knocked off the table and she makes good her escape, once more transorming her into a seagul and she flees back to her ship.  As bad guys go she has no luck at all however and the remaining potion is not enough to fully transform her back into her human form and she is stuck with a bird like right foot.

When they reach Hyborea Sinbad forgoes the ice tunnel and opts to travel across land.  His party encounter a Giant Walrus which further whittles down his crew.

Sinbad and crew fight off a Giant Walrus
Their journey continues to the temperate valley where they encounter a friendly giant horned troglodyte who shows them the way to the entrance mouth of the valley.

Dione befriends the Troglodyte
Zenobia arrives at the ice tunnel and the current draws them towards a jetty.  This short-cut is the first piece of fortune which goes Zenobia's way and she arrives at the pyramid Shrine of the Four Elements ahead of Sinbad.  However, her luck is short lived as without a key to the temple she uses her magic and the Minaton's great strength to break in.  The Minaton is crushed under a giant stone block in the process, quite a sad end (IMHO) for a quite menacing and well envisaged creation.

A dissapointing end to the Minaton in his hour of triumph
Sinbad rushes to the shrine as Malanthius suspects that Zenobia's forced entry will disrupt the delicately balanced nature of the Arimaspi magic.  They encounter Zenobia at the foot of the great steps in the middle of the temple and Kassim who has by now lost entirely his human traits and attacks and kills Zenobia's son Rafi.

The Troglodyte could have been a contender with his mean left hook
They managed to get Kassim into a cage and lift him high into the cascading waters which form the centrepiece of the shrine.  When the cage is lowered Prince Kassim has been miraculously restored to human form, but the distraught and enraged Zenobia, posesses the body of a frozen Smilodon and tries to kill everyone.  The Troglodyte comes to the rescue enabling the party to escape, only to die in the battle, Sinbad prevails, finally impaling Zenobia on the Minaton's spear.  With the secrets of the Arismapi lost the shrine disintegrates and Hyborea reclaims the hidden valley to ice and snow.

Sinbad is victorious, impaling Smilodon Zenobia on the spear of her own creation.
Sinbad and his comrades return to the city state of Charak where Kassim is crowned Caliph and gives his blessing to Sinbad and Farah.  This happily ever after ending is tainted by the shocking appearance of Zenobia's eyes as the credits finally roll suggesting that she will return...

Tuesday 7 May 2013

Monster Mini Box - Level One

DMG - Appendix C
Random Monster Encounters
I was originally going to post this on Thursday but the sad news of Ray Harryhausen's death (at the age of 92) has spurred me to post early.  Everyone who roleplays today owes a great debt to his pioneering work bringing some of movies greatest monsters to the silver screen.  For those abut to roll, we salute you.

My recent DIY Gelatinous Cube post got me thinking "how much moolah would it take to put together a monster minis collection for each level of Random Monster Encounter (as per Appendix C of the Dungeon Masters Guide)? 

For those who just want to slobber over pictures of old school minis I've put a pinterest board together showing all the options.

Giant Ant - (Qty 1-4)

Badger - (Qty 1-4)

Dark Sword - Epic Honey Badgers

Fire Beetle - (Qty 1-4)

  • Otherworld Miniatures has their DV4a Fire Beetles as a 3 pack (£9) or a 15 pack swarm (£37.50)
  • Reaper Miniatures do a metal 2 pack of Fire Beetles ($7.99) which they've recast in their Bone Material so should be available soon at a much lower price.

Manes Demon - (Qty 1-4)

Mega Miniatures Dwarves
(Bob Olley)

Dwarf -  (Qty 4-14)

The DMG is not too specific about what types of Dwarves so I'm guessing it's a war party of some variety.  I have plenty of dwarves but if I didn't I would look no further than:
  • Mega Miniatures (via Hurlbat Games Ebay Store) have the old school Metal Magic Fantasy Dwarves range (24 minis) sculpted by master dwarfsmith Bob Olley (£15)

Ear Seeker - (Qty 1)

This creature is too small to be represented by a miniature.

Elf - (Qty 3-11) 

Again the DMG lets us down without going into any detail, so this will probably be a war party again, but why would you encounter a war party of elves in a dungeon, there's still gotta be some logic to it.  You could just assemble a group from player character miniatures, but it is nice to have a group all wearing the same sort of armour and having the same style.
Mirliton SG - Wood Elf Swordsmen

Gnome - (Qty 5-15)

Help me out DMG!! what are these gnomes of which you speak.  I'm going for some sort of war party (if gnomes even have those).
  • Stonehaven Miniatures succsessfully Kickstarted an anime looking Gnomish Adventurers set which has stretched quite a ways expanding the range.  Sadly their webstore doesn't seem to include these new minis yet (If I can help throw some webskills at the problem, let me know guys!!) but you can still take advantage of the Kickstarter pricing
  • Reaper Miniatures do some nice gnome character figures, but I particularly like their nasty looking 06201: Bloodstone Gnome Pulgers 9 pack - but pricey ($39.99)

Goblin - (Qty 6-15)

At last we hit a proper dungeon bash monster, as so many companies do goblins it would be futile to list them all but I like:

Halfling - (Qty 9-16)

I'm beginning to hate you DMG.  Seriously why would Halflings be a wandering monster have we just wandered into their village?... in a dungeon!!

Hobgoblin - (Qty 2-8)

Otherworld Miniatures Hobgoblin Warriors

Humans


Random encounters with humans can be one of 4 different sub types

Bandits - (Qty 5-15)

Mega Miniatures - Thieves Guild
Sculpted by Joseph Ochman
  • Mega Miniatures have their Metal Magic Thieves Guild range sculpted by Joseph Ochman. A Bargain at £15 via Hurlbat Games ebay store .

Berserker - (Qty 3-9)

Brigands - (Qty 5-15)

  •  Mega Miniatures Metal Magic Castle Guard range sculpted by Joseph Ochman.  I'm starting to sound like a stuck record (that's OSR!!) A bargain at £15 via Hurlbat Games ebay store.

Character - (Qty 2-5)

This is actually supposed to be an NPC adventure party.  Clearly dungeoneering is a competitive business, perhaps someone should form a Guild or something.

Kobold - (Qty 6-18)

Dragon or dog varieties, I'm not fussy either way.

Orc - (Qty 7-12)

Pig-faced orcs only, the GW slack jawed ones need not apply for this job.

Piercer - (Qty 1-3)

No commercially available miniatures, I guess I have to make my own then, this will be a fun project (stay tuned). 

Giant Rat - (Qty 5-20)

  • Otherworld Miniatures do their beautiful 5 pack of DV3a Giant Rats (£11) sculpted by Jo Brumby.  A boxed set of 20 is also available for £32.50 saving you some money.

  • Lead Adventure do a 10 pack of really ferocious looking PA26 Giant Rats (€14.95) guaranteed to scare off any meatshields (and some PCs for that matter).

  • Nasty looking Giant Rats from Lead Adventure
  • Reaper Miniatures have recently recast their metal Giant Rats ($5.99) as a 6 pack of Bones Giant Rats ($3.49) but also do two scary looking Barrow Rats ($8.99) a 4 pack of Dire Rats ($6.99) and their 2 pack Rat Swarm ($5.99) which should meet all your rodent needs.

Rot Grub - (Qty 1-3) 

  • Scibor do some Rot & Grub resin bases (€7.52) which would fit the bill, but honestly how hard can it be to model some grubs on a base out of modelling clay?

Shrieker - (Qty 1-2)

I already have these but I know many out there don't and no dungeon would be complete without fungi.
  • Otherworld Miniatures do their wicked 3 pack DM11 Shriekers and Violet Fungi (£11)
    Otherworld Miniatures - Shriekers and Violet Fungi
  • Centre Stage Miniatures have their Shrieker and Deadly Fungi (£7.25)
  • ScotiaGrendel still do their generic resin Fungi (£8) having a patch of fungi appearing as a piece of scenery which is a monster rather than a single miniature has always made more sense to me.  

Skeleton - (Qty 1-4)

I have plenty of skellies, but if I didn't, I would go for:
  • Denizen Miniatures have been selling their Legion of the Damned Skeletons (£1 each) for years and I own a few so have a particular fondness for them.  Frankly their website sucks (Chub, I'd love to help you out with this.) but you can see the whole range at the Lost Minis Wiki.  They are true 25mm and slightly smaller in comparison to other manufacturers but they have honest old school charm and realistic action poses.

  • Steve Barber Models channels Ray Harryhausen with his awesome GMH4 Children of the Dragon's Teeth 6 pack (£7.99)
Steve Barber Models "Children of the Dragon's Teeth" skeletons

Zombie - (Qty 1-3)

I mostly have modern zombie miniatures, so these I actually need.

Few...  That was a monster bit of research!! (geddit)  The upshot of which is that it's going to cost a shedload of dosh, between £300 ($470) and £400 ($625) just to stock level 1.  This kind of backs up my love of paper minis, but they just don't have the same weight.  

Mega Miniatures is closing down!!

After 10 years of operation, they have decided to close their doors and will begin selling off their moulds on 1st June 2013.  Hopefully they will be snapped up by another miniature companies and these OSR mini ranges will live on under new ownership.  I'll try to update this post when I find out who has bought which ranges.

Friday 26 April 2013

DIY Gelatinous Cube

Finn gets half eaten by "Jelly Cube"
Adventure Time with Finn & Jake
Gelatinous cubes are one of those classic dungeon monsters you need in your DM's arsenal, in fact I'd go so far to say that if you haven't encountered one you need a new DM.

The commercially produced miniatures are on the whole way too expensive but here's a list in case you have no modelling or DIY skills.
  • Otherworld Miniatures - The go to guys for OSR style fantasy miniatures have 3 versions;  DM16a Standard (£15), DM16b Deluxe I and DM16c Deluxe II (£25).  These are very useable and to the usual Otherworld Miniatures sculpt standards, but pricey all the same.
  • D&D Miniatures - The Desert of Desolation series of minis introduced which you can still pick up (if you have deep pockets) on ebay for £40.  One for the serious collector I think.

Standing on the Shoulders of Giants - The DIY Roundup


There are basically two ways to tackle this, solid or hollow.  Making your gelatinous cube solid has a number of advantages namely that it will be extremely sturdy durable and you can embed miniatures and other items inside for that partially digested look.  However the cost of resin can be high and it's not a material everyone feels confident using. 

The obvious advantage of the hollow cube is that you can put your PC's miniature inside it and there's a weight saving.  It's a purely personal choice, but here's a quick round-up of the more prominent jelly cube makers out there on the interweb.

Solid DIY Gelatinous Cubes
Hollow DIY Gelatinous Cubes

Make it the Roleplay-Geek Way

You will need:
An old shirt box, ripe for recycling
  • Acetate - I got mine from an old shirt box (I bet you have some old packaging lying around) so was this was essentially free and made me feel good about reusing and recycling.  Most come clear but any colour will do, it just has to be transparent.
  • Hot Melt Glue Gun - I picked mine up from a discount store complete with a couple of packs of sticks for £3, but most DIYers and hobbyists will have one of these already.  If you don't have one of these you can use superglue, but make sure that you add some gluing tabs to your box grid (see Step 1 below).
  • Pen - A Sharpie or other non branded fine permanent marker (like a CD Pen).  Green or Blue are best, but any colour will suffice.
  • Sandpaper - Wet & Dry is best to minimise coarse scratches but essentially any sandpaper will do the finer the better.
  • Ruler - for marking, cutting and folding your acetate.
  • Craft Knife - for cutting your acetate.

  • Sticky Tape - for holding your cube sides together as you glue.
  • 30-60 Minutes of Your Life! - You won't ever get it back but you were only going to waste it watching TV or reading some other persons blog.
Acetate marked out in "Cross Pattern"
Step 1: Get your sheet of acetate and mark out a grid of 2 inch squares (50mm) in the standard folded out cross pattern you learnt in high school geometry class using the pen and ruler.  Like so:

If you want to make a hollow box, cut out a smaller square (approximately 40mm) from one face, usually the end one in the cross pattern. 

If you're using superglue it's a good idea at this stage to leave a thin glue tab around each of the faces as it's really tricky to glue edge to edge without seepage and the inevitable fingers stuck together.

Acetate cut, scored, folded and scuffed
Step 2: Making sure that you have the marked side face up, cut out the acetate cross and score along all the fold lines using the blunt side of the craft knife.  Using the ruler as a straight edge will help you make sharp folds.

box taped and glue up in progress
Step 3: Again, making sure that you have the marked side face up, take your sandpaper and rub along all the inside faces edges to both scuff off the pen lines and to give it a frosted look.

Step 4: Tape each side one at a time and glue the edges together.  The hot melt glue may heat up the plastic and deform your box sides but don't panic at this stage.  Beware, the hot melt glue is exactly that, HOT! and will take a while to cool down, so try to avoid the temptation to touch it as it will burn you, stick to your fingers and go all stringy. 

If you're using superglue instead of hot melt glue try to avoid getting any on your fingers as it's a real pain and you will get finger print marks in the acetate. 

Extra drippy effect applied to outsi
Step 5: When all sides are glued and cooled, strip off the tape and repeat the process on the outside edges.  You can drip hot glue (or PVA) from the top face down each side for that extra... drippy look.

Eh voila, you have a super cheap Gelatinous Cube, or as we say in Sarf East Lahndan, "Jellied Cube for nish, mate!".  You can make your cube's as big or small as you like and in as many colours as you like. Try spicing it up by by glueing miniature swords, shields or bits of that half butchered skeleton you have lying around your bits box, to the inside faces

With a bit of creativity you can use hot melt glue and acetate for all sorts of things like flying stands, Tenser's Floating Disc, magic portals, Walls of Ice, Fire, Force and Fog or any of the Bigby's Hand spells.  Let your imagination and hot glue flow free!.
Finished gelatinous cube happily munching on a GW half-orc