Showing posts with label Jessie's Prints. Show all posts

Friday 3 May 2024

Jessie's Prints - Episode 44 - Keeper of Secrets

This week, I are mostly been printing... A Giant Keeper of Secrets!!

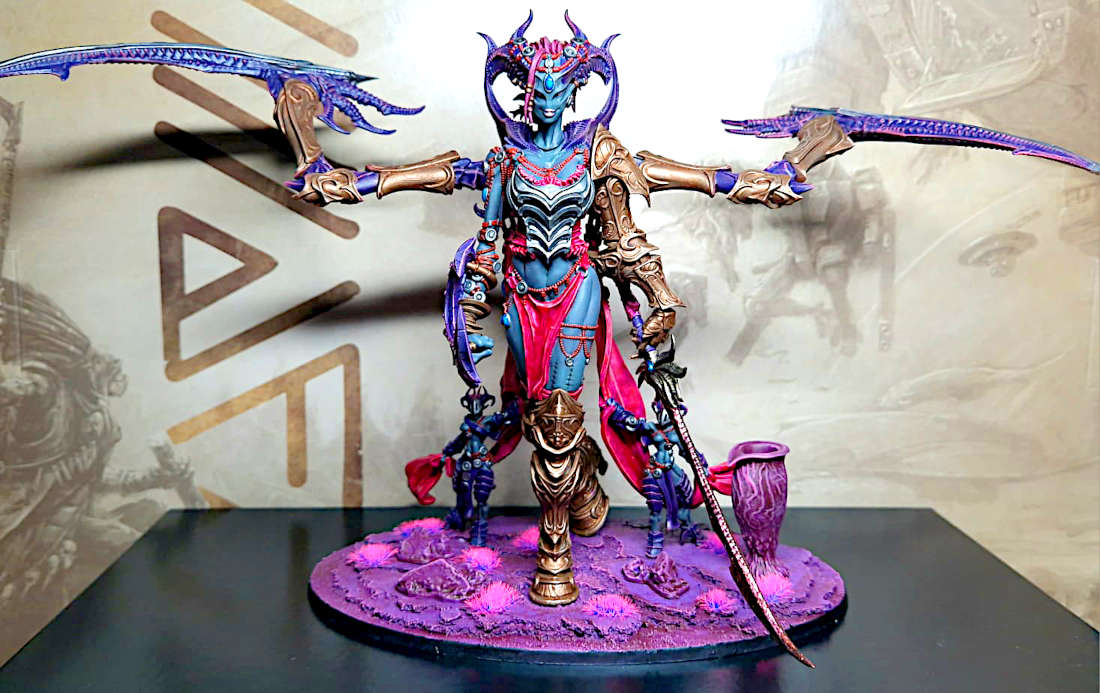
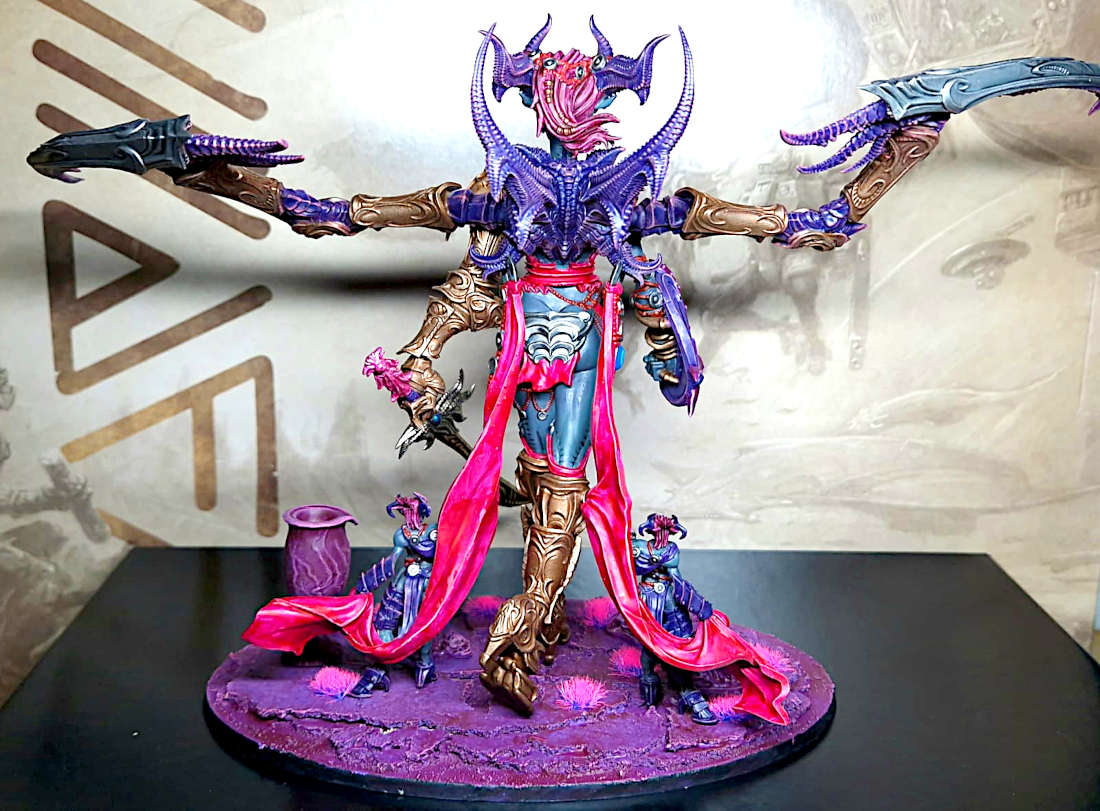
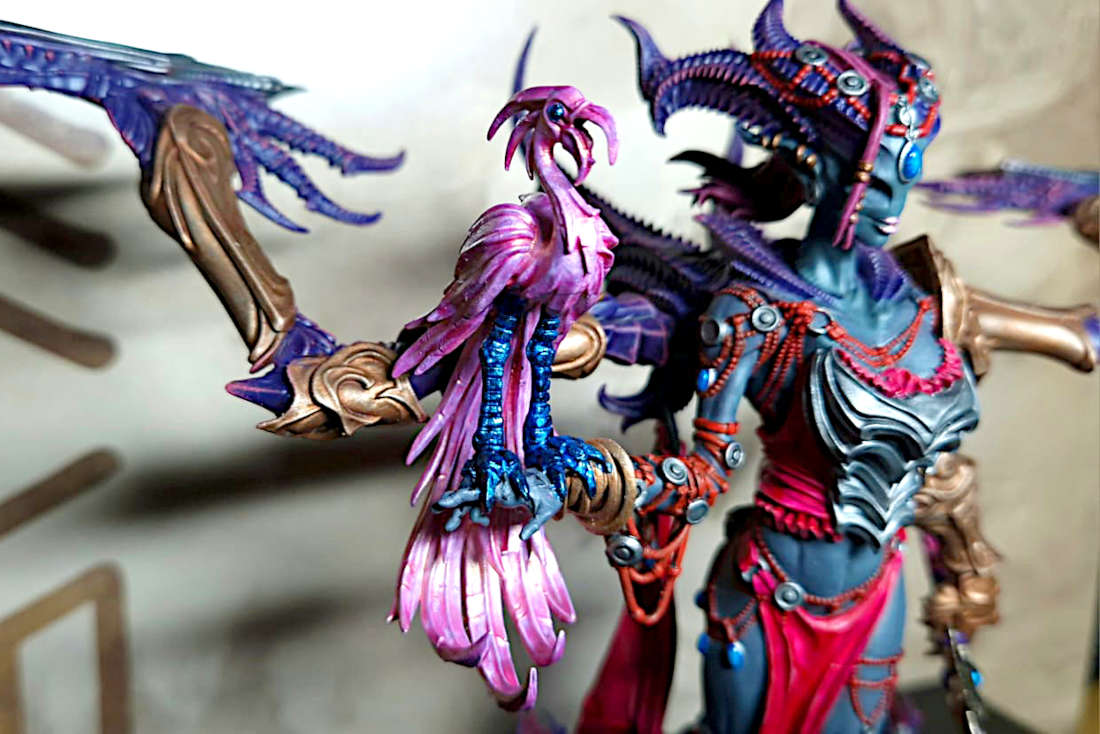
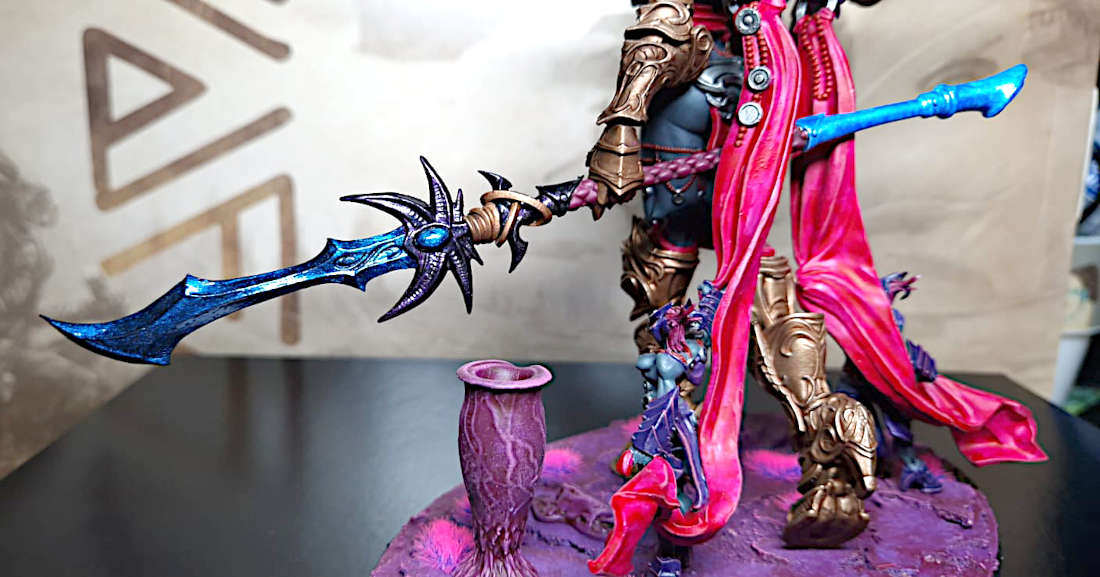
Well this is another commissioned print by me and an amazing paintjob from Sam, my fellow founder at Dragons Keep Roleplay Club.  I'll let the pictures do the talking but suffice to say that a few short years ago all of this was impossible...

Daemon Damzels Queen Lillith the Keeper of Secrets - Keta Minies

Daemon Damzels - The Queen Lilith

Daemon Damzels - The Queen Lilith - Back

Daemon Damzels - The Queen Lilith - Optional Bird

Daemon Damzels - The Queen Lilith - Optional Spear

Saturday 27 April 2024

Jessie's Prints - Episode 43 - Compact Travel Dice Tower

This week, I are mostly been printing... A Compact Travel Dice Tower!!

When I found out last week that a new modelling competion had launched on Printables, I had to have a go and enter my first 3D modelling competition.  I don't expect to win or even get any award at all.  I am just entering for the experience and the badge.

Compact Travel Dice Tower - Printables

When you're gaming on the go you don't want to be lugging around a hefty chunk of plastic or having some huge lump taking up valuable space in your games bag.  The travel dice tower is just the thing.

Compact Travel Dice Tower

I designed this for D&D or other RPGs which use the standard 20mm (d20) sized polyhedral dice. The dice tower is big enough to safely store a set of 7 dice.

The "Slide" comes in two varieties solid or grill or can be replaced by a 2mm thick sheet of perspex or acrylic if you truly want that high visibility look.  This is a work in progress so expect more designs to come in the future.

Dice Tower Back D&D

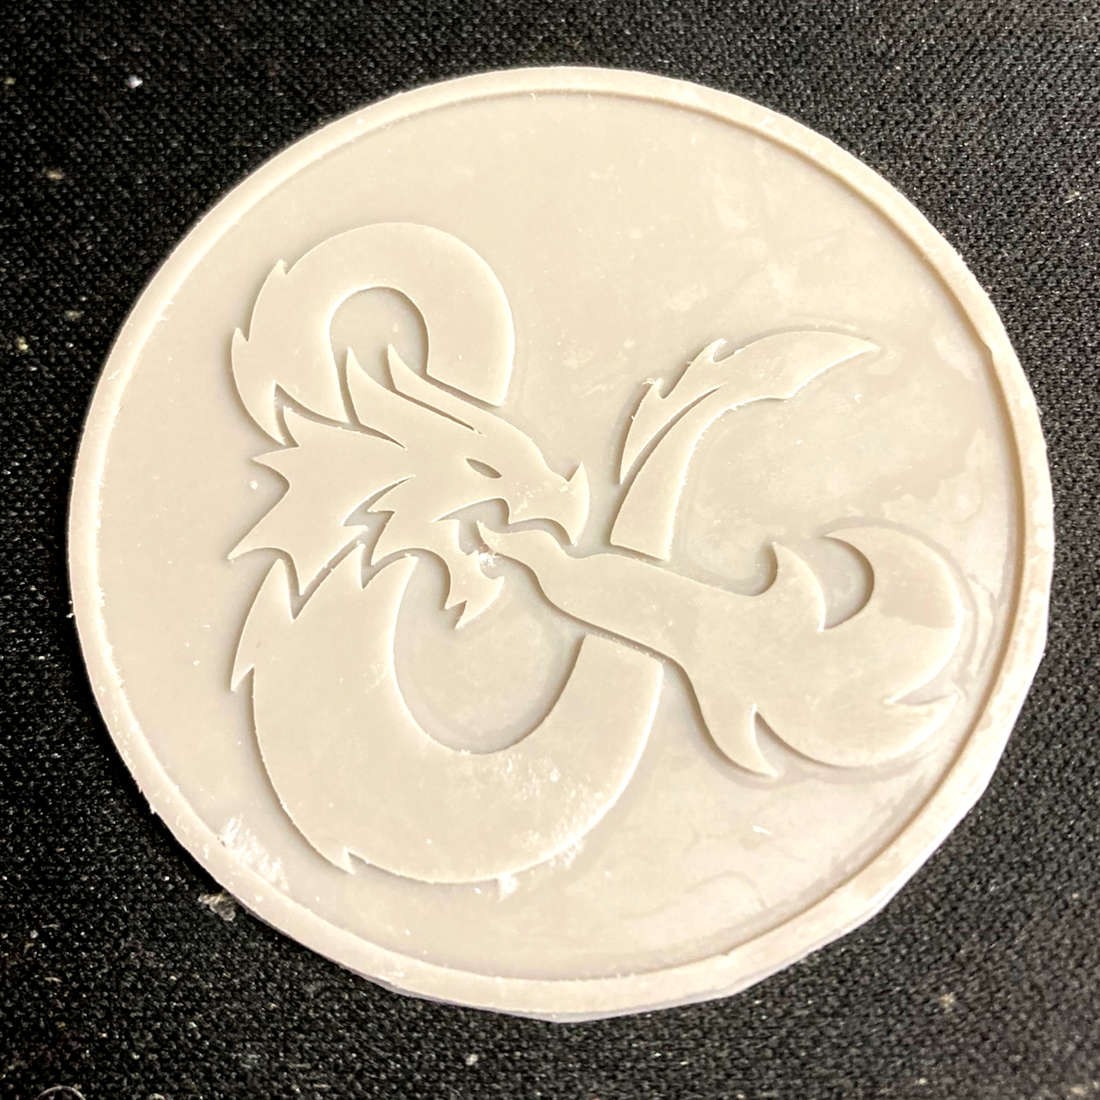
The backside of the insert includes a 50mm indent to magnetically attach an Inspiration or Hero Coin for your chosen RPG. Check out my other models for inspiration coins:

I have also produced a few 50mm "Inspiration" counters for some of the more popular roleplaying games and these can be fixed to your dice tower magnetically.  Coins are actually the simplest dice of all so you get a bonuus d2 if you download the matching coin for your favourite RPG.

If you are a boardgamer then you will appreciate a solid 1st player token.

Inspiration Coins / 1st Player Token

Please let me know if you download and make your own and if you would like a custom coin please leave a comment below.

Enjoy :)

Thursday 18 April 2024

Jessie's Prints - Episode 42 - Tiamat the Colossal Chromatic Dragon

This week, I are mostly been printing... A Colossal Chromatic Dragon!!

Tiamat - Printables 41937 

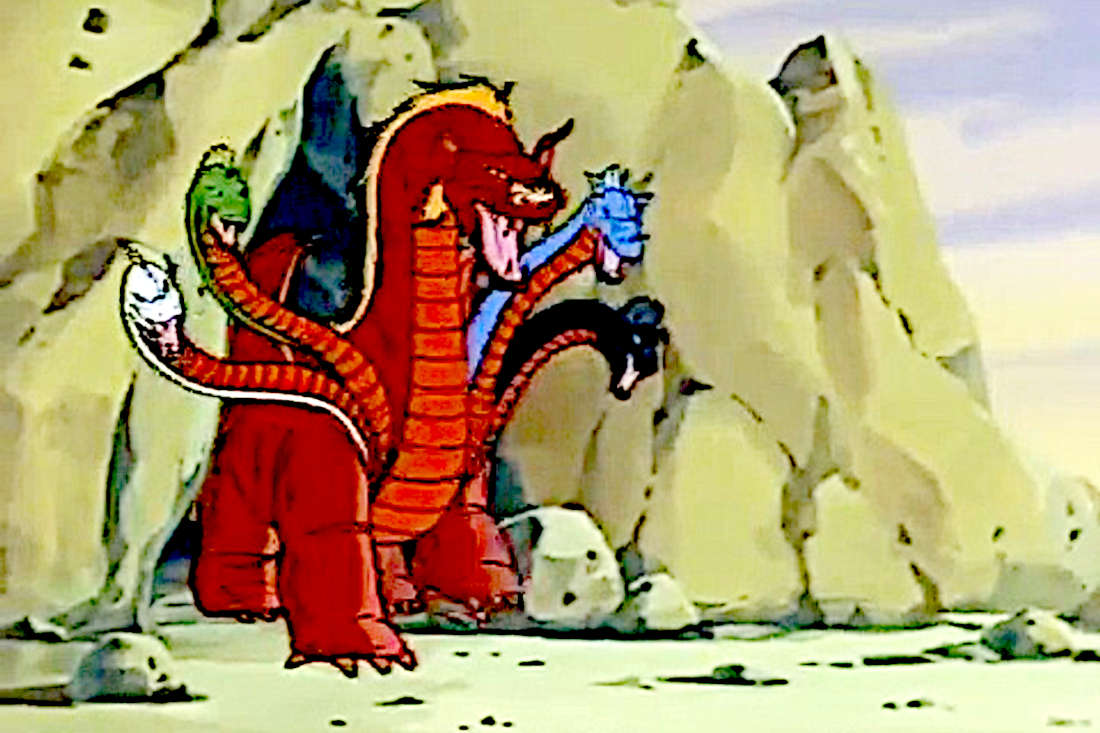
Tiamat was a regular recurring character in the Dungeons and Dragons Cartoon back in the 80s and I have to admit that she never really did it for me.  The rendering of her was always a bit pudgy and more like Pete's Dragon (1977) than a fearsome multi headed monstrosity. 

Dungeons & Dragons Cartoon - Tiamat
As can be seen in the image above, she is quite girthy about the shoulders and feet.  Trust me it gets worse the further along her body you go.  Her red head is considerably larger than the other four and it has a peculiar dog-like look to it.  This might be deliberate as some say she is the progenitor of all Kobolds and I do prefer a canine look to my kobolds.
 
Whilst I never noticed this at the time, the 80s was a long time ago and we've learned a few things about sculpting dragons since then.

It's another Multi-part Model 

A model of a dragon of this size and stature can only be executed in a large scale multi part model, 13 parts in total.  The great thing is that the designer Miguel Zavala (aka MZ4250) has supplied multiple variants of the model ensuring that it will fit on most smaller resin printer build plates like my Anycubic Photon Mono 4K.

However, there's only so much a designer can do and I still needed to split both the tail and wings in half and I also hollowed out Tiamat's body so I could save on resin.

All told (including the odd failure and reprint) this model was spread across a total of 7 build plates.  Total printing time over a number of days clocked in at  29 Hours 47minutes... However, it still took less than a whole 1kg bottle of resin, meaning that this print cost less than £15.  The official WotC Aspect of Tiamat miniature is currently going for ten times that price.  If you don't have a 3D Printer a licensed version of this print will set you back about £70.

Hollowing out the Parts.

Some of the parts, like the body, were pretty substantial so I elected to save resin and hollow these out using meshmixer.  I was most concerned about the wings and the necks as these would be the parts with the most angle of dangle and, as I experienced with my Demon Prince B'lakor model, the highest likelihood of not staying where I want them.

Pinning and gluing the meshmixed halves back together was essential.  I managed a much better job of matching the two parts than on the previous wings I tackled.  I sliced the tail at an odd angle a bit wonky but you can only tell if you look real hard. 

Tiamat - Meet the Parts

Puttying the gaps in the seams was always going to be required and as they say  "Milliput and paint make me the modeller I ain't"  

It's Magnet Time Baby

The necks and wings were all sculpted with generous square keys and sockets but I wanted these to be removable for transportation.  The keys needed to be sanded to ensure a slip fit and then the magnets installed in both socket and key to ensure that they stayed put.  

A fiddly job but well worth it.  In hindsight I should have hollowed the body out less, the shell really needs to be a bit thicker than the depth of each magnet.  I ended up punching through the shell and having a hell of a time supergluing the magnets in.  Lesson learned for next time.

I used 5mm x 1.5mm magnets which,  whilst not immensely powerful, are strong enough to keep things reasonably well attached given the weight of each neck and wing.  Some of the necks were incredibly tricky to magnetize and I had to add a couple of pins as guides.

Painting

I always use a zenithal prime of matt white over a black base.  I opt to go cheap and cheerful with some auto paint I found in Poundland at only £2.50 for a large 400ml can.  They also do matt silver, gold, grey and white and black gloss.  Honestly, I can't see why anyone would use anything more expensive unless they were entering a Golden Demon painting competition.

The zenithal on this model I did with all the necks and wings connected this would produce reasonably realistic shadows where one neck blocks the light from another.  Similarly you want a nice zenithal gradient going down the wing as the model is posed with wings outstretched.

Tiamat - Primed

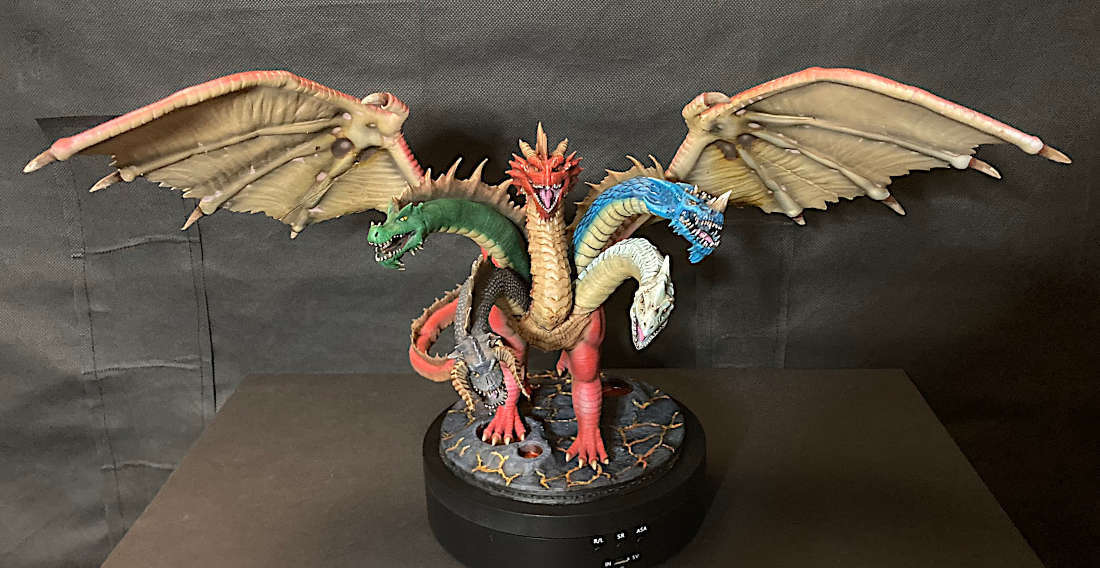
In the cartoon Tiamat's heads were ordered from left to right; White, Green, Red, Blue, Black but in MZ2450s model they are Black, Green, Red, White and then Blue.  Being slavishly canonical has never been my thing, but making sure that I know which head is which is fairly critical when it comes to painting each one.

A Colossal Base

According to the her stat block Tiamat is COLOSSAL which deserves a 120mm round base or even larger.  This is where my FDM printer excels and, when it works, can spit out a base in next to no time.  
 
Cracked Lava Base 120mm
 
I have a stock of cool bases which I can just scale as necessary and I opted for a cracked lava with vent holes.  The model is so huge that Tiamat can only fit on it in one or two spots with either a front or a back leg in the large lava vent.  I think that this is quite a cool idea as it makes her look even more powerful, having no fear of injury from boiling lava!    Miguel has to be applauded for sculpting the tail sweeping around and pointing forwards like a spear.  This is way better than the comical dinosaur tail of the cartoon Tiamat. 

I opted for a black basalt colour scheme accented with yellow thru orange to red lava effects.  The black areas were given a dry brush with Vallejo dark grey.  The cracks and lava vents were then painstakingly filled (using a needle and syringe) with the UV resin I got from my recent Wish Hobby Haul.  Wow this is amazing stuff.
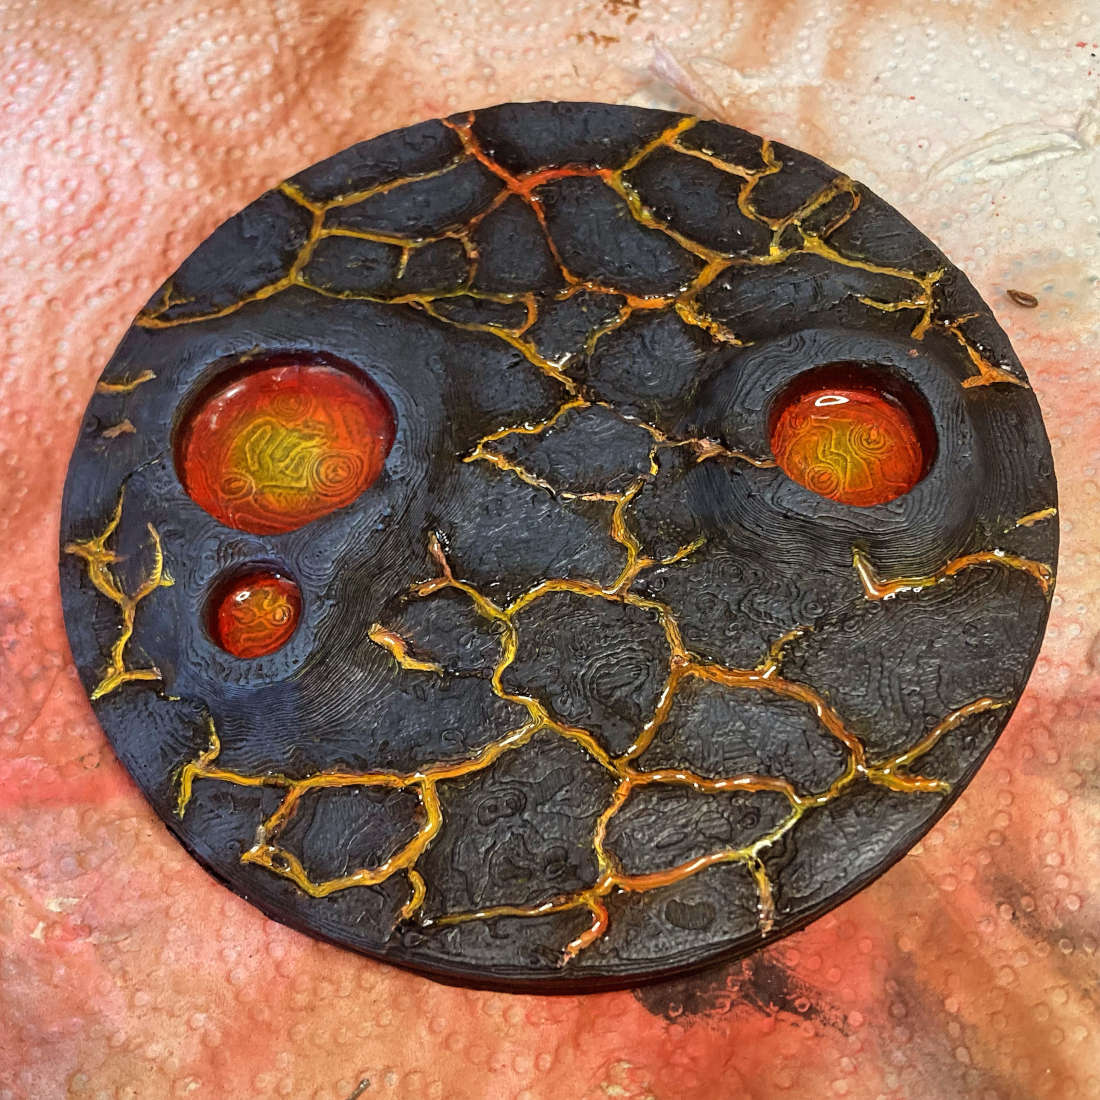
Painted Cracked Lava Base - Tiamat

Colouring A Colossal Chromatic Dragon

I cannot tell a lie this was a monster painting project mostly because she is so intimidating a miniature to paint.  I rattlecan primed and zenithal highlighted her back in mid february and she just sat there glaring at me.

Eventually I summed up the courage to shoot her with a coat of Vallejo Game Air Bloody Red (72.710) across all the exposed skin of the body making sure that I left her belly neck and insides of her thighs unpainted.  I then blended these parts in with a coat of Model Air Light brown (71.027).  Shadows were accentuated with Model Air Mahogany (71.036) and Model Air Black (71.057).  The spine was also painted in mahogany and dry brushed with progressively lighter shades adding a touch of light brown.

Each head was painted in the correct order; Black, Dark Green (72.028) , Red, White and then Blue (71.004).  I suck at painting white so I opted for a Model AIr Pale Blue Grey (71.046) which I think looks kind of cool.

Wash a Disaster!!

Calamity struck when I used a Vallejo Game Wash Umber (73.203) across all the wings and heads and it pooled in all the wrong places and dried a horrible sandy colour.  I was kind of expecting this to operate in the same way as the Army Painter Speed Paints.  My mistake and this was definitely a low point.
 
I soldiered on and tried panel lining the chest armour, but this didn't really give me the effect that I wanted so I tried some sketching with paint.  This is a technique I have seen Sergio Calvo use on many occasions to simulate a rough texture.  I painted each chest and neck armour section with little stripes of the light brown and bingo it was the effect I was after.  
 
I celebrated by painting each of the dragons eyes with a base coat of white and then a dot of Orange Fire (72.008) and a blended circle of Medium Yellow (71.002).  A vertical black pupil was added and then each eye glazed with the UV resin.  Have I told you how much I love this stuff?  

Teeth and horns, toes and claws were all finished in shades from mahogany up to white and the beast was finally done.
 
Tiamat - Dragon Heads

Big Miniatures can Become Boring

This was a classic example of the epic struggle we all face as painters when the job at hand becomes long drawn out and tedious.  I could have put another 20 to 30 hours into this paint job but I just don't have the patience.  I signed it off and you decide if I should put more effort in...
 
Tiamat - Front View

She is a big girl and measures; wingspan 14 inches, height 8.5 inches, length 9 inches.
 
Tiamat - Rear View

A Patreon Worth Joining

None of this would have been possible without the awesome modelling skills of MZ4250.

Miguel has a free Patreon subscription which I encourage you all to join.  He offers some pretty cool free minis and the sheer volume of his minis is frightening.  His work ethic is fantastic and he has some very cool little minis gems you will find nowhere else.

In fact this is not the first time I have printed an MZ4250 dragon.  I printed a version of the Chardalyn Dragon from the D&D Rime of the Frost Maiden campaign on my FDM printer.  I have also used Miguel's files in the past printing an Ancient Colossal Red Dragon and the famous Statue of Moloch from the cover of the AD&D PHB

Monday 8 April 2024

Jessie's Prints - Episode 41 - Daemon Damzels: Spider Princess

This week, I are mostly been printing... Big Booby Spider Lady

OK, I lied... I printed this off a few weeks ago for my clubmate Sam and had to wait till he painted it.

Daemon Damzels Spider Princess - Keta Minies via My Mini Factory

This is one of a series of minis that Sam asked me to print for him.  An amazing paint job and an amazing bit of basing makes this really pop as a mini.


Daemon Damzels - Spider Princess

and a side view...

Daemon Damzels - Spider Princess - Side View

I understand that she is some sort of Warhammer Slaaneshi demon but it's a cool mini nonetheless.

More minis to come from Sam in the very near future.

Monday 1 April 2024

Jessie's Prints - Episode 40 - Kobold Slackers and The Fear Smith

This week, I are mostly been printing... Slackers

I have so many projects on the go at the moment and one big one which I have started painting.  However, when you come across a model that just begs to be printed then you have to push the other projects to the side for a minute.

Kobold Slackers - by MX4250 on Printables 

Being a big Jay and Silent Bob fan I couldn't resist this pair when I saw them pop up on the MZ4650 Patreon blog.

Fear Smith and Kobold Slackers

Also pictured is

The Fear Smith - MZ4560 on Printables

This guy just oozes nightmarish horror and would fit well in almost any game. 

Monday 18 March 2024

Jessie's Prints - Episode 39 - Index Card RPG Card Back Stamps

This week, I are mostly been printing... Stamps!!

ICRPG CARD BACK STAMPS - Thing 6545499

My recent foray into the Index Card RPG system (ICRPG) involved a lot of DIY card making, which I love.

However, during play this presented a problem in that all my card backs where blank and indistinguishable from each other.  What I needed was a simple stamp which I could apply to my card backs.  

I find it useful to categorise my cards into one of 4 types:

  • People - NPCs, Villains, Bio-forms
  • Places - Locations, buildings, Landscapes 
  • Objects - Things, weapons, loot, traps and trinkets
  • Monsters - Stuff that wants to kill you

This would help me to keep my ICRPG cards organized and reduce seek times to a minimum and thereby make me look like a great DM.

Tinker Cad to the Rescue

My experiments making a plaque for my Cowboy Bebop Swordfish II model taught me that this was going to be easily achieved.  

Step 1 - Make a black and white image in GIMP where black is what you want stamped and white is what you don't want to stamp.  This image is then reversed and saved as a JPG or PNG.

ICRPG Card Back Stamp - Places

Step 2 - Use convertio.co to convert your JPG or PNG into an SVG which can then be imported into Tinkercad.

ICRPG Card Back Stamps - Tinkercad

Step 3 - Import your SVG into Tinkercad and scale it to fit inside your stamp pad.  Make sure that the stamp is at least 4mm high and that you create a backing plate at least 1mm high to connect all the pieces of your stamp together.  Position the stamp so that it intersects with the backing plate and then group the objects together.  Export this as an STL for your 3D printer.  

ICRPG Card Back Stamps - Ready to Slice

Step 4 - Make a wooden backing plate and handle for each of your stamps.  If you get into ICRPG you are going to be making a lot of cards and doing a lot of stamping so this step is essential for long lasting stamps.  I made mine out of some scraps of hardboard I had laying around and I glued some pieces of old broom handle onto the backing plates before supergluing my stamps together.  

You could of course model the whole thing in Tinkercad.
 
ICRPG Stamps - DIY Handles

Step 5
- Stamp Away!! - I bought some cheap stamp pads from AliExpress less than £1.50 each and they have lots of different colours to choose from so you can have a different colour for each card type.

 
ICRPG Card Back Stamps

Buy Me a Coffee

I have shared the stamp patterns on Thingiverse, so if you like them, download them and print your own card backs.  Support the channel and please leave a tip in the jar or use the paypal tip link.   

Monday 11 March 2024

Jessie's Prints - Episode 38 - Warduke

This week, I are mostly been printing... Warduke

Back to regular scale printing this week with a character from the early days of D&D and a firm favourite with all the fantasy damsels.

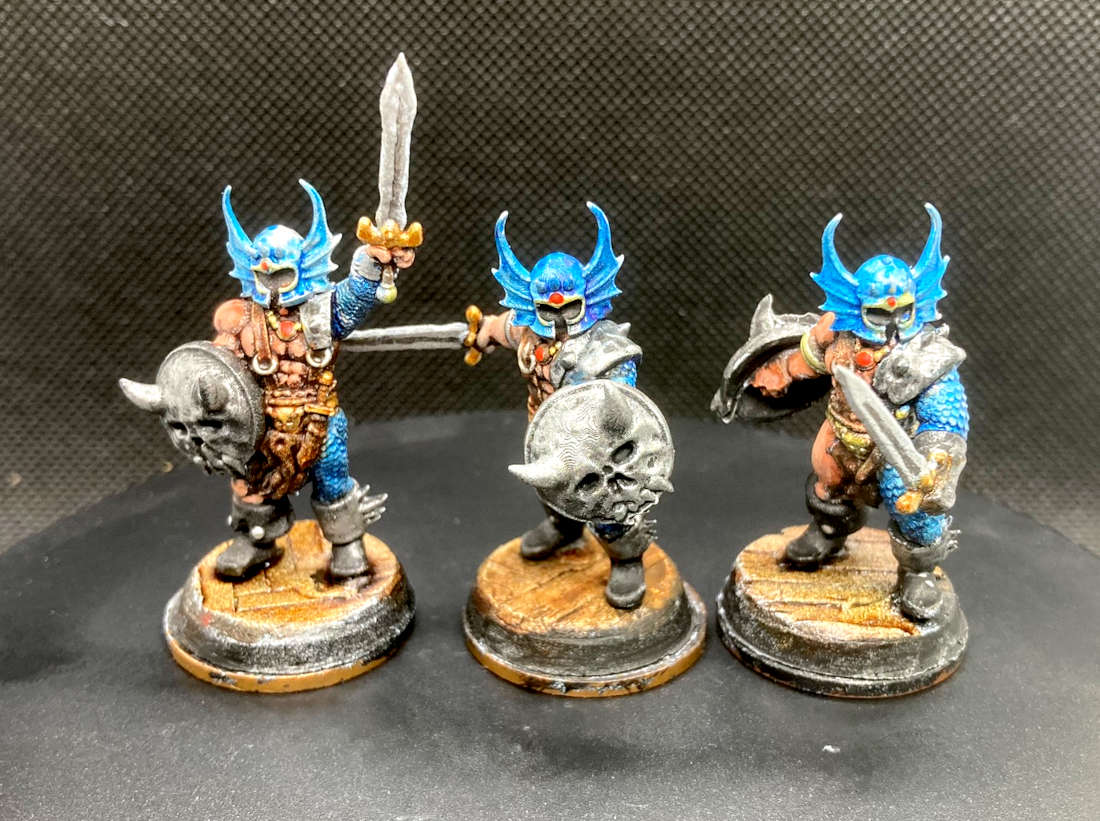
Warduke - Cults 3D

Warduke is an iconic fighter and in this printable version we have him as seen across three stages of his metamorphosis from journeyman fighter to outright blasphemous bad guy.  This totally reminds me of the Ral Partha 3 Level character minis for AD&D from back in the day.  Last time I painted up a set of these it was the Illusionist and I think they came out really cool.

Warduke - 3 Stages of character development

The Origins of Warduke

According to Dux Bellorum the first appearance of Warduke was on the cover of Dragon Magazine #17 (1978) before becoming the main protagonist in the LJN D&D action figure toy line. He is fully fleshed out in the XL-1 Quest for the Heartstone adventure module for Dungeons & Dragons BECMI.

Growing up in the UK in the 80s we never really had the LJN toys and I only occasionally managed to snag a copy of dungeon magazine as "official D&D" source material was fairly thin on the ground.  

We had White Dwarf instead, which back when the hobby was in its infancy and Games Workshop sold other games, they would support those games with scenarios and new monsters.  They did this for all the games they sold including Runequest, Call of Cthulhu, Paranoia, Car Wars to name just a few.  

They didn't stop this practice until September 1987 (WD Issue 93) when they printed the last AD&D Scenario "Getting Away With Most of It"  by James Wallis.  This issue was the one where they previewed the classic art from the Rogue Trader cover and explained what Warhammer 40K was. 

Painting Warduke

The coolest part of Warduke is of course his metallic blue armour and winged helmet.  This is an undeniable throwback to his 70s disco roots.  Back in the day, anything remotely sci-fi got painted in Humbrol (222) Moonlight Blue metallic paint.  In fact everything in the 70s was a coloured metallic.  The first car I ever owned, a 1975 4-door Mk2 Escort, came in a fantastic shade called Purple Velvet Metallic. 

Recreating that shade was easy with a silver base and a coat of Army Painter's appropriately named Highlord Blue Speed Paint.  His armour is deceptively weird being a mix of chain over bare skin and what look like an animal fur or leather loin cloth.

Warduke - 3 Character Levels


Equally bizarre are his boots, with one boot cuff in silver for some unknown reason and the other all black with two big silver studs.  You cannot deny he has a pretty awesome skull shield which just gets the dry brush treatment along with his trusty and utilitarian sword.  

A golden codpiece / underpants combo in the shape of some monstrous demonic visage and two red gems finish him off. 

Monday 4 March 2024

Jessie's Prints - Episode 37 - Epic Space Knights or Holocaust Squad Judges?

This week, I are mostly been printing... Teeny Tiny Space Knights!!

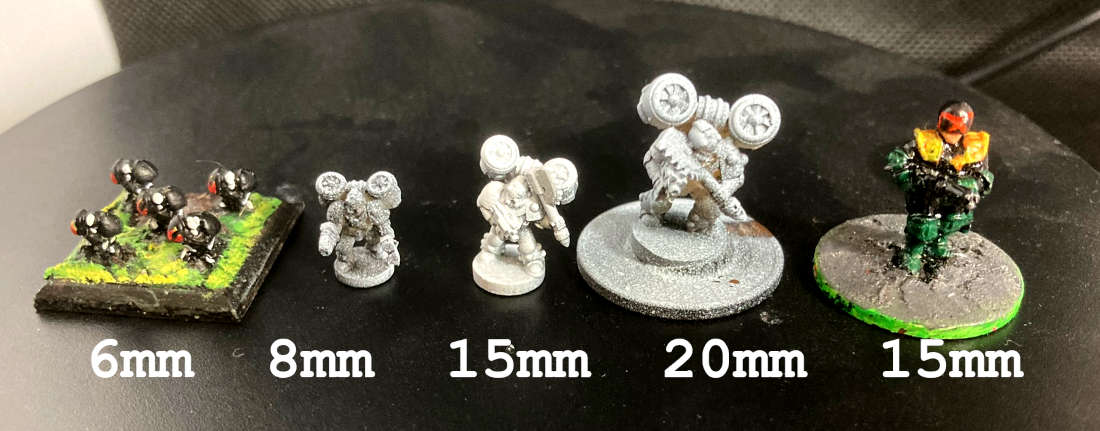
After last episode's commissioned print I wondered just how small can my 3D Printer print?  In particular I'm after some power armoured troopers to fill in as Holocaust Squad Judges.

Ball Bearing Galactic Crusaders with Chain Axes - Cults 3D

You have got to laugh at the names of some of these files.  These are epic scaled minis which come in a variety of poses and helpfully in groups of 3 & 5 so printing a whole squad is easy.  straight onto the build plate they are about 10mm so I scaled them up 125% to 15mm but they were still too small for my Judge Dredd miniatures which are about 17mm tall so I upped it to 20mm.

Epic vs 15mm scale comparison

These should work well in my games and I have some cool ideas for some encounters which require this type of armoured set up.  

Painting up a Holocaust Squad

Once I had superglued them to 1p pieces and primed them, I gave my squad a quick once over with Gravelord Grey Speed Paint from army painter.  Jet Packs were trimmed in yellow and I gave each one a different coloured helmet and shoulder pad to aid in discrimination on the field of battle.

Judge Dredd Holocaust Squad 15mm

Holocaust Judges are rarely seen in Mega City One, their deployment being reserved for those extreme moments when the ultimate sacrifice is required.  Their ranks are typically made up of those Judges close to retirement or have in some way disgraced themselves in the line of duty.  This final act of service is seen as a suitable punishment or alternative to the redemption of The Long Walk into the Cursed Earth. 

Epic Scale Imperial Heavy Tank - Cults 3D

I had a copy of the original Epic Space Marine game Adeptus Titanicus back in the days of Games Workshop Large Boxes.  So I wondered, just for funzies, how well these newfangled 3D prints would stack up against my vintage epic armour.

Epic Armour vs Tiny 3D Printed Armour

Pretty good me thinks.

Now I've got to find me a decent Epic sized Mek Quake model for those BIG JOBS! in Mega City One.   

Wednesday 28 February 2024

Jessie's Prints - Episode 36 - Itsy Bitsy Drop Pods

This week, I are mostly been printing... Teeny Tiny Drop Pods!!

Isn't it just the way you wait ages for a commissioned print and two come along at once.  This time it's my work chum Gary who needed some drop pods for an upcoming game of Adeptus Epicus or something like that.  You know the one, the latest hotness from Games Workshop.

StarPorts - P.O.D. (Print on Demand) Droplets - Cults 3D

I don't really have much to say about these other than I managed to get 5 Dreadnought sized pods on one build plate and eight of the smaller unit sized pods on a second.  Print time was about an hour and a half each.

Epicly Tiny Drop Pods

The models came well supported but the packaging of the files was a bit weird.  Extracting the zip file dumped 3 folders on my desktop; a Lychee scenes folder, a supported STLs and an Unsupported STLs.  I was not expecting this and so I thought that the zip file hadn't actually unzipped.  Weird.

I always opt for supported files and as I was leaving these on the support rafts for Gary to get the full experience of removing supports 😂 I didn't bother to check if these were hollow or not.  I assumed that they were solid.  To my surprise, and as you can see in the image above, these were actually hollow which explains why they came out of the wash & cure station a little sticky.  They had actually trapped a huge amount of resin in the hollowed out sections as it effectively formed a cup with nowhere for that resin to drain out of because they print upside down.

If I were printing again I would add my own supports and orientate them so that the unused resin can drain away whilst still being attached to the build plate.  A minor gripe I know but sometimes these things matter.

Anyway, as you can see these are considerably smaller than the full size drop pod for WH40K.  Aint they cute 😃

Wednesday 21 February 2024

Jessie's Prints - Episode 35 - 3 Goblins in a Trenchcoat

This week, I are mostly been printing... 3 Goblins in a Trenchcoat!!

3 Goblins in a Trenchcoat - MZ2450 Patreon 

Our Friday game at Dragons Keep Roleplay Club has seen us sucked through a portal onto one of the levels of hell called Las Infernalis.  Basically this is Disneyland for Demons and I'm sure is going to full of weird and deadly rides, games and equally weird characters.  

Having recently joined the MZ2450 Patreon, imagine my surprise when I stumbled on a recent post containing an STL for this guy!!

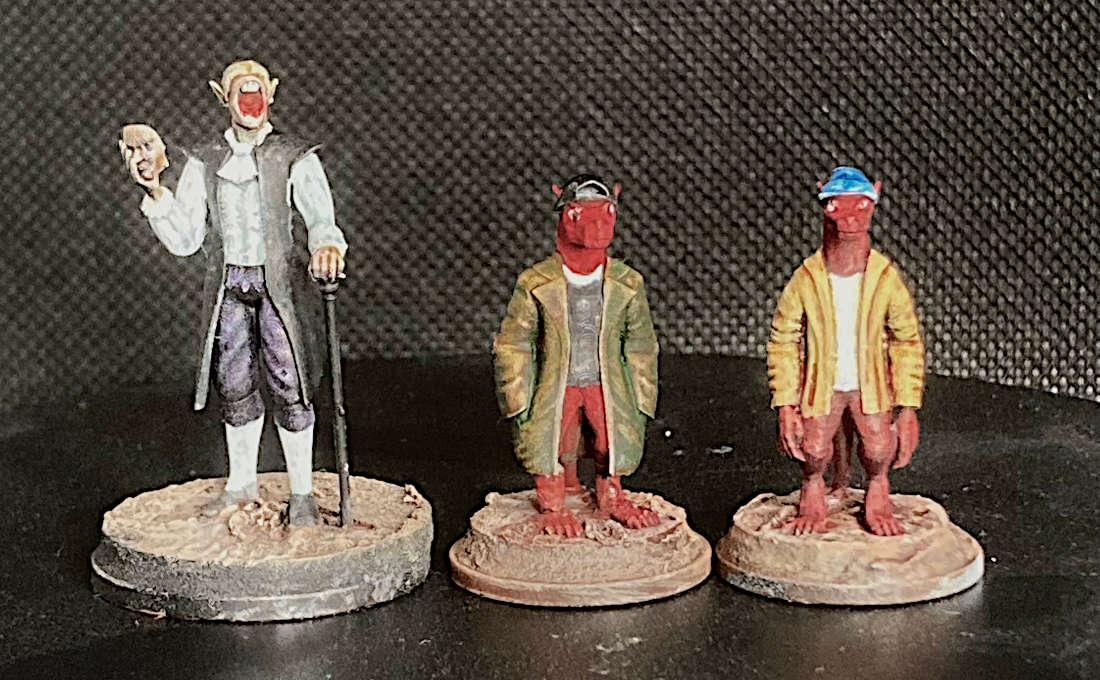
3 Goblins in a Trenchcoat

This is exactly the sort of mini that floats my boat and so I quickly printed and painted him and sent a photo off to Alex the DM.  He's a very amenable sort of chap and we share a love of weird cinema.  His reaction was classic and I expect to bump into this trio of ne'rdowells in the very near future.
 
Miguel also does a version with 5 Wyrmlings in a Trenchcoat which is totally not Tiamat!

Three Halflings in a Trencoat (D&D 5e)

A very creative Reddit user put up a statblock for the 3 Halflings in a Trenchcoat for D&D 5e games.  It would be a very challenging encounter and seems rather overpowered to me.  It is written more as monster statblock and perhaps something that occurs as a consequence of donning a cursed magical trenchcoat which must be filled with 3 of something... Mwahahaha  

Origins of the Totem Pole Trenchcoat Trope

This is one of those prints that irrespective of age we all seem to instinctively have a memory of it from our childhood.  According to TV Tropes this is known as the Totem Pole Trenchcoat but there is no reference to a historical origin.  I seem to remember an episode of Wacky Races or The Perils of Penelope Pitstop where the Ant Hill Mob used this technique.  
 
Fun Fact, the names of the members of the Ant Hill Mob are different in each show.  In Wacky Races they are: Clyde, Ring-a-Ding, Mac, Danny, Rug-Rug-Benny, Willy and Kirby.  Their car is number 7 The Bulletproof Bomb.
  
The Ant Hill Mob

 Whereas in The Perils of Penelope Pitstop they are called, Clyde, Dum-Dum, Softy, Yak-Yak, Snoozy, Zippy and Pockets.  Their car, Chug-a-Boom, is much more of a character in its own right in some episodes of this series,  It gets the classic headlight eyes and is voiced by the late great Mel Blanc  

Ant Hill Mob - Perils of Penelope Pitstop

If you know of any earlier uses of this trope, please feel free to comment in the box below.

Monday 12 February 2024

Jessie's Prints - Episode 34 - Teenage Mutant Sorceror Tortle

This week, I are mostly been printing... A Tortle!!

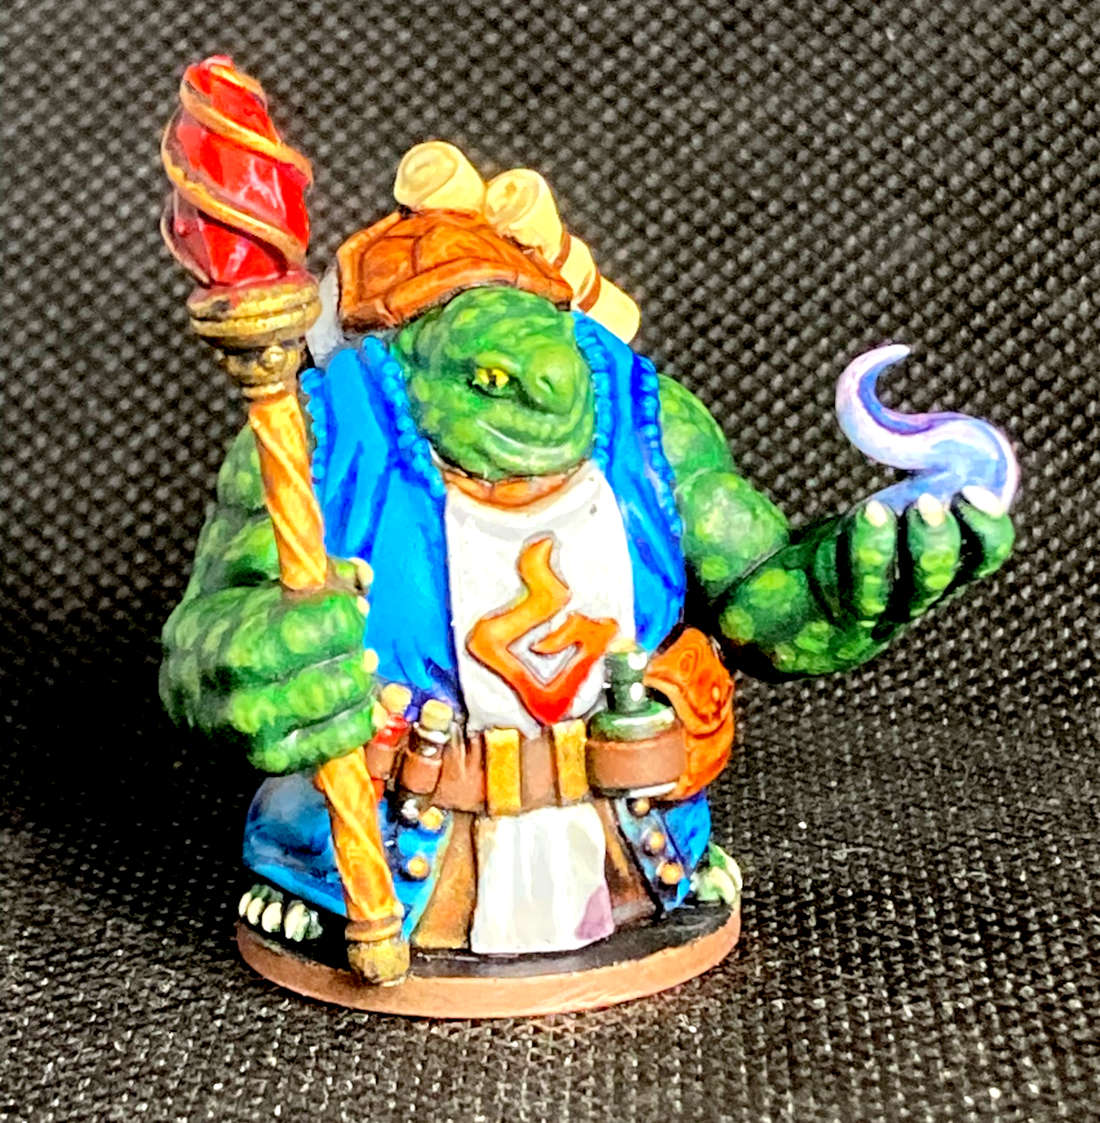
Epics N Stuff Tortle Sorceror - MyMiniFactory - 109539  

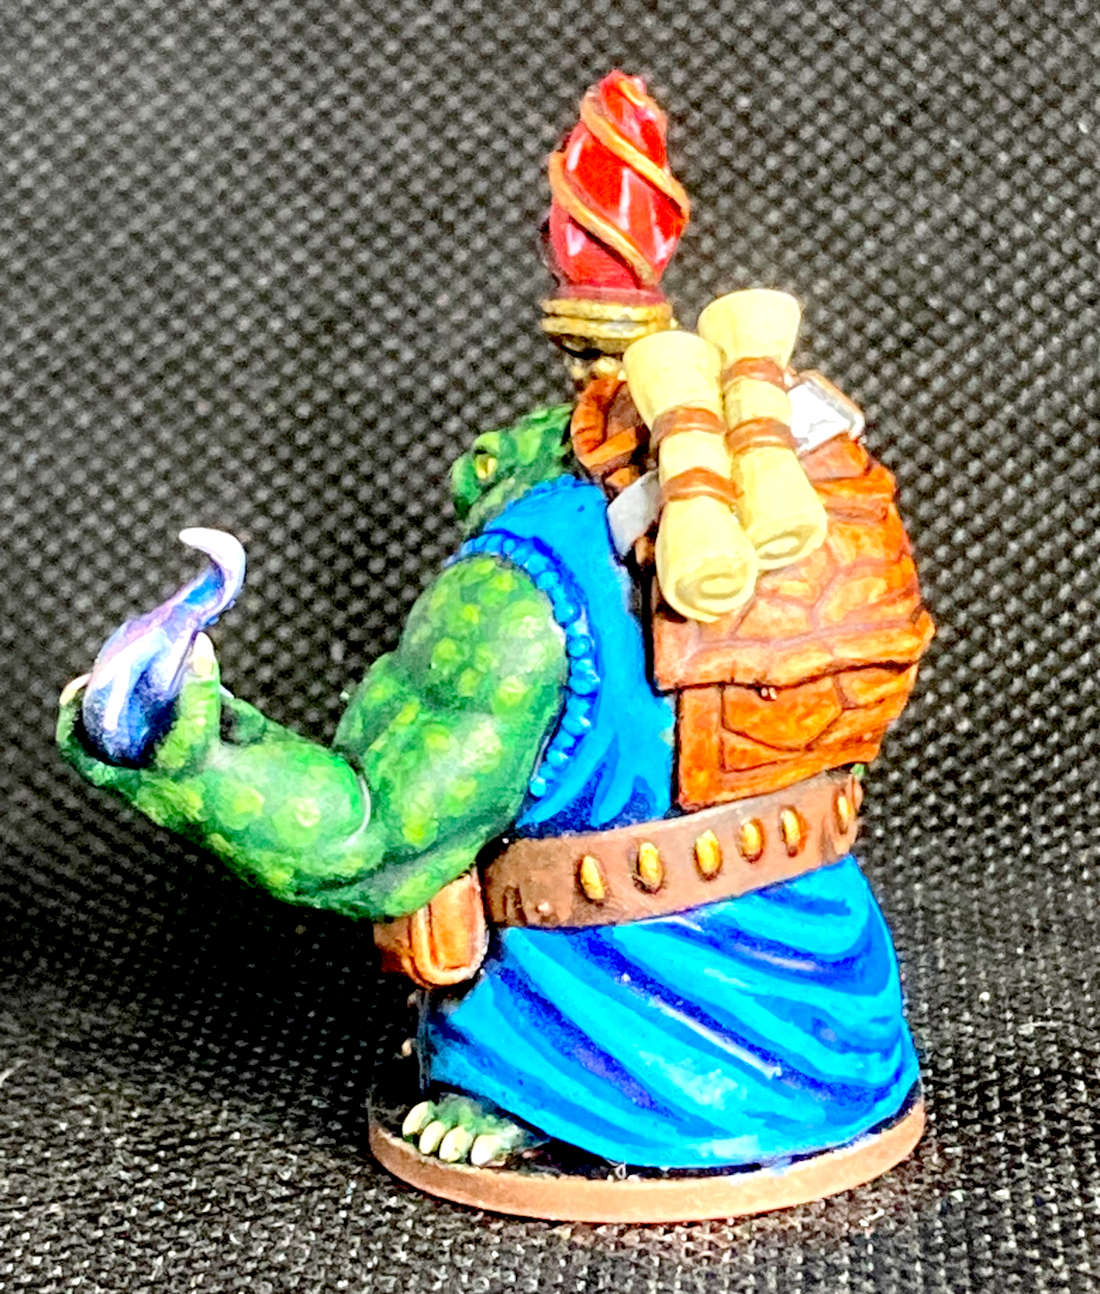
This week saw us return to The Rivenlands D&D Campaign at Dragons Keep Roleplay Club.  My clubmate and fellow founder Paul needed a mini to represent his Tortle Sorceror so he commissioned me to print and paint a supplied STL. 

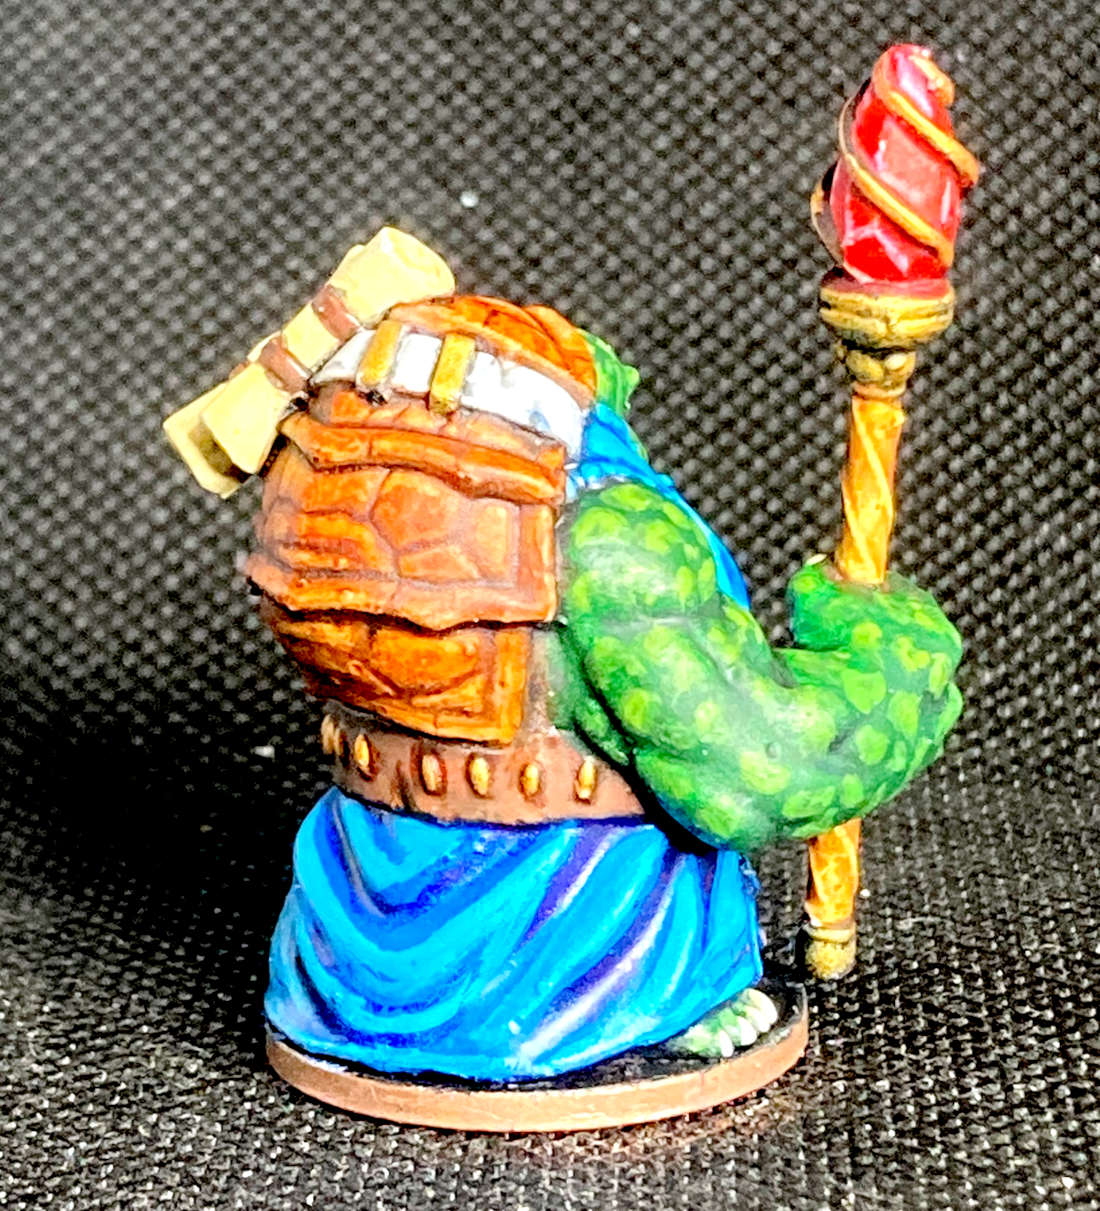
Tortle Sorceror

He's a chunky boy and basically pyramidal in shape.  The mini came both pre-supported and unsupported, as is common these days.  However, he also came as a pair of pre-hollowed out variants for those wishing to not waste resin or just wanting a slightly lighter mini.  

This is the first time I've seen this done on a 35mm single piece character mini, so I printed a hollow one for shits and giggles.  The only issue I had is that the wall thickness just wasn't thick enough to prevent the odd hole appearing when I removed the supports. 

Painting

The customary zenithal priming was done and mounted to my base of choice (a two pence piece).  I said he was chunky and barely any base was visible under his girthy feet.

Paul supplied me with a photo of a make by Empire of Minis so I didn't even have to make any colour choice decisions. 

Base colours were a mix of Vallejo Acrylics, with midtones dry brushed on before picking out the highlights.

Tortle Sorceror

Serious Skin Problems

I really struggled with the skin on this model, in fact it was practically the last thing that got painted.  The sculpt had no texture and yet he is supposed to be a tortoise like humanoid.  Last time I looked they had pretty scaly lizard like skin and his was as smooth as a baby's bottom.  I have a small collection of greens and they were covering really horribly over the zenithal, particularly where areas of shadow were converned.

Tortle Sorceror


I persevered though and resorted to mixing in a bit of some Crafter's Choice acrylic that I found in a Wallington "Arkwrights" shop.  

Arkwrights Store - Open All Hours
G.. G.. G.. Granville! Fetch me that tube of G... G.. G... Green Paint!

This stuff is so random it doesn't even have a paint name, just a number (PNTA-134) but it's made by Royal & Langnickel and it did the job where my specialist miniature paints could not.  
 
This just goes to show that when you are painting don't just dismiss your art materials because they aren't Vallejo or Games Workshop.  Try out lots of different paints and you just might hit on some secret sauce.

Thursday 1 February 2024

Jessie's Prints - Episode 33 - The Girl with the Robot Hand

This week, I are mostly been printing... A girl riding a robot hand!!

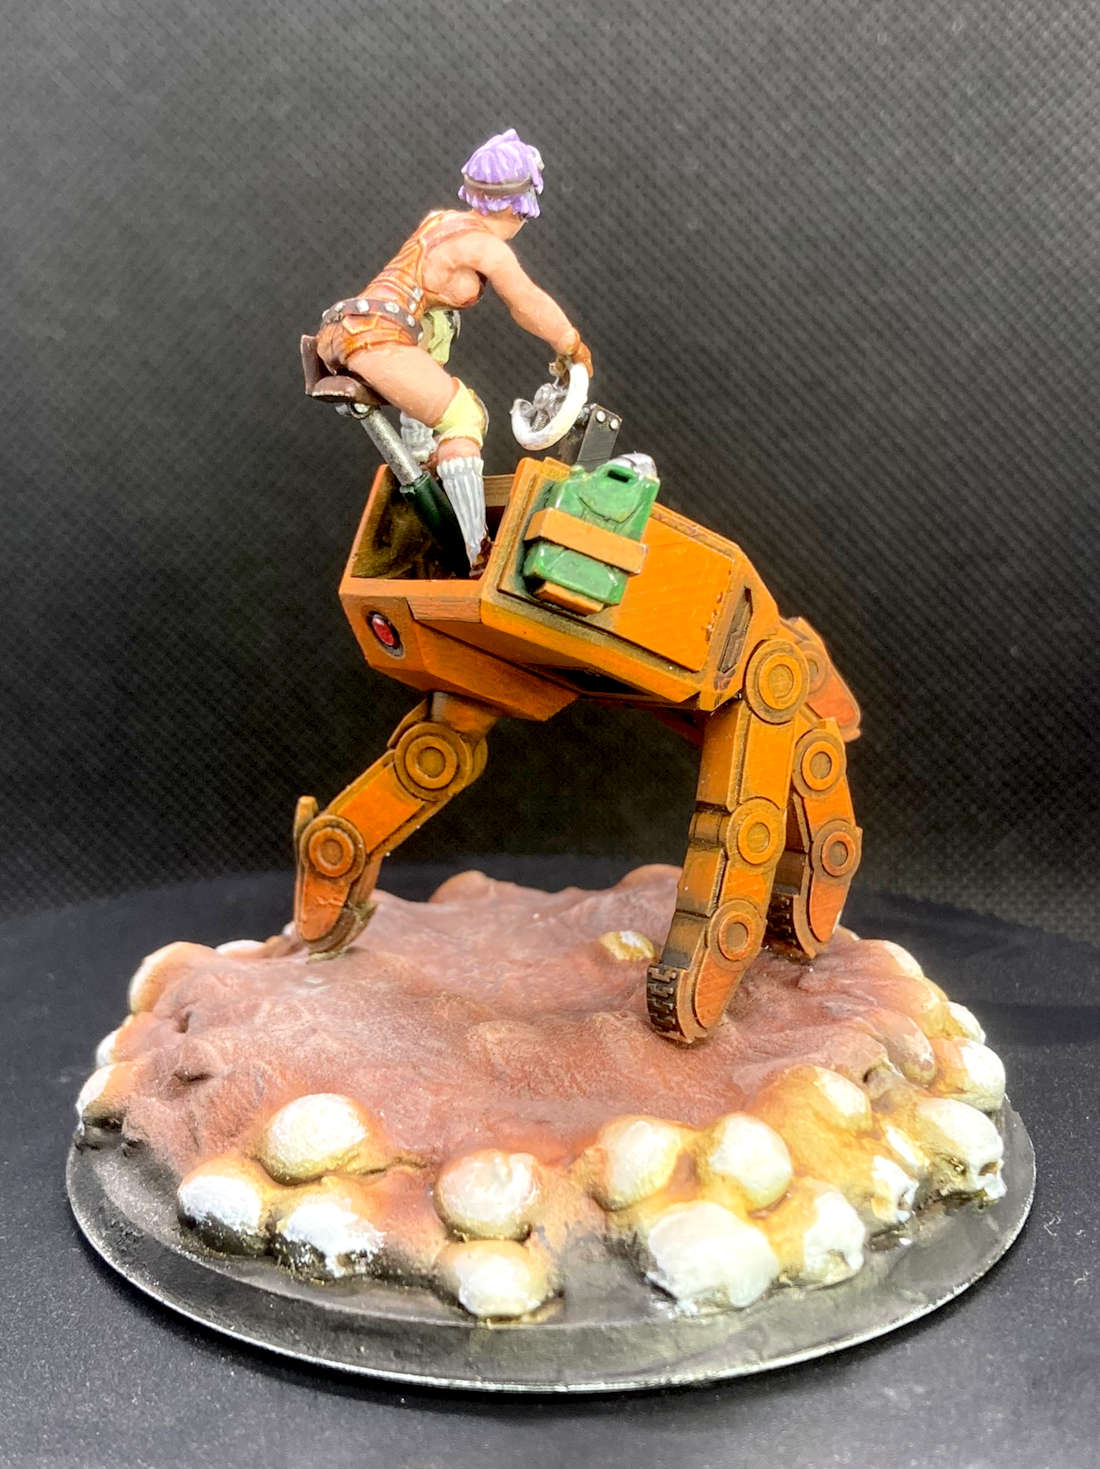
Trix Robot Rider - Cults 3D 

I found this on EthanTSavage's Cults 3D page and thought it was an awesome sculpt.

Trix Robot Rider

The aesthetic is undeniably Anime, and for me is reminiscent of the fabulous Tank Girl comic of the 80s.  Whilst the movie ranks as one of the worst in history, I am a big fan.

Trix Robot Rider

I love Giant Robot anime, my favourite being Giant Robo: The Day the Earth Stood Still.  If you haven't watched it you should it's just the right shade of bonkers to make a strange sort of sense and is a blend of diesel punk / magical superhero anime which is incredibly rare.

Trix Robot Rider

This was a very quick model to make taking me only a few days to complete.  I used a skull base which I had originally intended for my huge demon model and slathered on the old poundland polyfilla to form a crust over the skulls. 

Trix Robot Rider

This is my homage to the famous scene in Terminator 2 where the T800s are walking across the field of human remains crushing skulls underfoot.