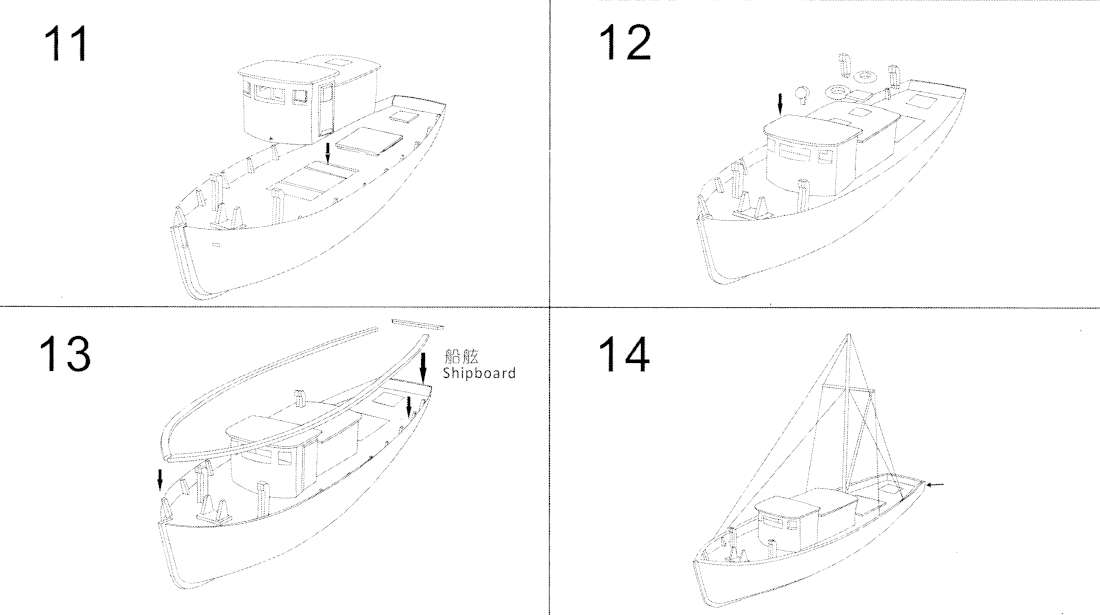
In Part Two of this mini series we managed to get the boat sanded, filled, painted and wired. In this episode we finish the model
Fitting the Accessories
Replacing some of the awful laser cut accessories has been a primary goal and now we get to fit those to the deck. In the photo below you can see the life preservers, anchors and vents which have all been painted and glued to their respective positions around the boat.
Some additional accessories were necessary though:
A deck winch - Cults 3D - This is apparently the upper deck crane winch for a Liberty Ship, but it looked suitably mechanical for my needs.
A light housing - Thing:6007577 - Not perfect but do you know how hard it is to find these sorts of objects from a description
Rigging the Mast
We are almost at the end of the build and this is where the quality of the instructions once again fails to clearly indicate what you are supposed to do.
I need a little bit more instruction given the limited amount of wood we have left. So I spent an hour or so studying the other Naxos fishing boat model reference photos I had collected and drew myself out a rigging plan.
Given that I had used some of the thin length of dowel for my prop shaft, I did not have enough left to do both the Spar and the crane Jib. I grabbed a BBQ skewer from the kitchen drawer and used that for the crane Jib. I chucked both lengths into my drill and game them a sanding, adding a
taper to both ends of the mast to ensure that it fitted into the deck
hole and also that it came to a rounded point at the top.
With no hardware (I believe is the appropriate term chandlery?) attaching these together was going to reuire some ingenuity. I grabbed the thin aluminium florist wire I use for pinning my miniatures and bent up a couple of hooks. I then drilled a hole into the mast and one into the end of the Jib supergluing the hooks so that they act as a rudimentary swivel.
Four more hooks were also made. Two fit into the gunwhales on either side of the mast and two in the rear corners of the transom.
I then laminated some plasticard and created a trapezoid shape which would act as a place to anchor the Jib Pulley.
Talking about Pulleys, I could have used 3D Printed parts for these but the kit actually came with some wierd figure of 8 shaped pieces of wood which may have been for the deck winch that I didn't end up using. These would do nicely as pulleys.
Some thin "straps" were cut out of the plasticard to add a little believeability to my scratchbuilt fittings and it was time to glue in the mast. I wish that I had spent a little more time on this as my mast ended up a bit cockeyed and listing to starboard. I tried to rescue this with the mast rigging on the port side but it was a little more adrift than the thin cotton thread could muster. Chalk that up to experience.
With the mast rigged it was a simple case of adding a length of thread to the end of the jib and looping it through a pulley and down the mast. This is when I realised I needed to tie it off somewhere and so I drilled a second hole into the mast for a tiedown. I left the end of the thread long so this can be the end of the rope used to raise and lower the jib.
The final part of the rigging was to add a length of thread between the the two aft hooks and wrapping it around the end of the jib. All the threads were superglued in place to stop them from ever coming undone.
And with that it's done, or at least as done as it can be for now. I will probably tidy up the paint and maybe add some more accessories some time in the future.
I was really impressed with what I was able to do given the limited nature of the materials and it was a real challenge of my modelling skills.
I really enjoyed my nautical adventure and it has spurred me on to try another more historic vessel and another cheap Aliexpress wooden boat kit.


