This week, I are mostly been printing... A Colossal Chromatic Dragon!!
Tiamat was a regular recurring character in the Dungeons and Dragons Cartoon back in the 80s and I have to admit that she never really did it for me. The rendering of her was always a bit pudgy and more like Pete's Dragon (1977) than a fearsome multi headed monstrosity.
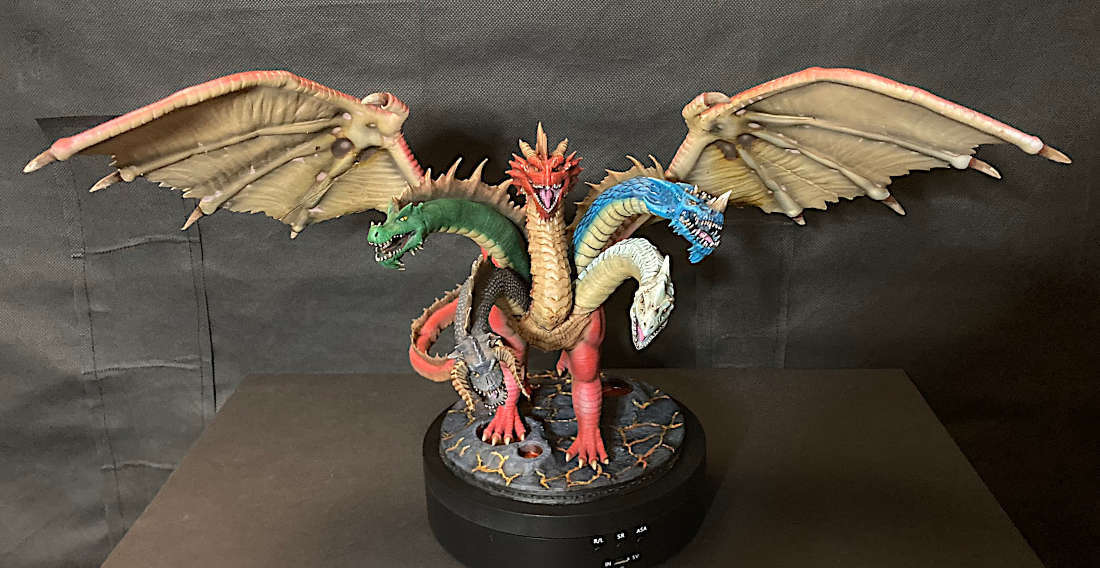
As can be seen in the image above, she is quite girthy about the shoulders and feet. Trust me it gets worse the further along her body you go. Her red head is considerably larger than the other four and it has a peculiar dog-like look to it. This might be deliberate as some say she is the progenitor of all Kobolds and
I do prefer a canine look to my kobolds.
Whilst I never noticed this at the time, the 80s was a long time ago and we've learned a few things about sculpting dragons since then.
It's another Multi-part Model
A model of a dragon of this size and stature can only be executed in a large scale multi part model, 13 parts in total. The great thing is that the designer Miguel Zavala (aka MZ4250) has supplied multiple variants of the model ensuring that it will fit on most smaller resin printer build plates like my Anycubic Photon Mono 4K.
However, there's only so much a designer can do and I still needed to split both the tail and wings in half and I also hollowed out Tiamat's body so I could save on resin.
All told (including the odd failure and reprint) this model was spread across a total of 7 build plates. Total printing time over a number of days clocked in at 29 Hours 47minutes... However, it still took less than a whole 1kg bottle of resin, meaning that this print cost less than £15. The official WotC Aspect of Tiamat miniature is currently going for ten times that price. If you don't have a 3D Printer a licensed version of this print will set you back about £70.
Hollowing out the Parts.
Some of the parts, like the body, were pretty substantial so I elected to save resin and hollow these out using meshmixer. I was most concerned about the wings and the necks as these would be the parts with the most angle of dangle and, as I experienced with my Demon Prince B'lakor model, the highest likelihood of not staying where I want them.
Pinning and gluing the meshmixed halves back together was essential. I managed a much better job of matching the two parts than on the previous wings I tackled. I sliced the tail at an odd angle a bit wonky but you can only tell if you look real hard.
Puttying the gaps in the seams was always going to be required and as they say "Milliput and paint make me the modeller I ain't"
It's Magnet Time Baby
The necks and wings were all sculpted with generous square keys and sockets but I wanted these to be removable for transportation. The keys needed to be sanded to ensure a slip fit and then the magnets installed in both socket and key to ensure that they stayed put.
A fiddly job but well worth it. In hindsight I should have hollowed the body out less, the shell really needs to be a bit thicker than the depth of each magnet. I ended up punching through the shell and having a hell of a time supergluing the magnets in. Lesson learned for next time.
I used 5mm x 1.5mm magnets which, whilst not immensely powerful, are strong enough to keep things reasonably well attached given the weight of each neck and wing. Some of the necks were incredibly tricky to magnetize and I had to add a couple of pins as guides.
Painting
I always use a zenithal prime of matt white over a black base. I opt to go cheap and cheerful with some auto paint I found in Poundland at only £2.50 for a large 400ml can. They also do matt silver, gold, grey and white and black gloss. Honestly, I can't see why anyone would use anything more expensive unless they were entering a Golden Demon painting competition.
The zenithal on this model I did with all the necks and wings connected this would produce reasonably realistic shadows where one neck blocks the light from another. Similarly you want a nice zenithal gradient going down the wing as the model is posed with wings outstretched.
In the cartoon Tiamat's heads were ordered from left to right; White, Green, Red, Blue, Black but in MZ2450s model they are Black, Green, Red, White and then Blue. Being slavishly canonical has never been my thing, but making sure that I know which head is which is fairly critical when it comes to painting each one.
A Colossal Base
According to the her stat block Tiamat is COLOSSAL which deserves a 120mm round base or even larger. This is where my FDM printer excels and, when it works, can spit out a base in next to no time.
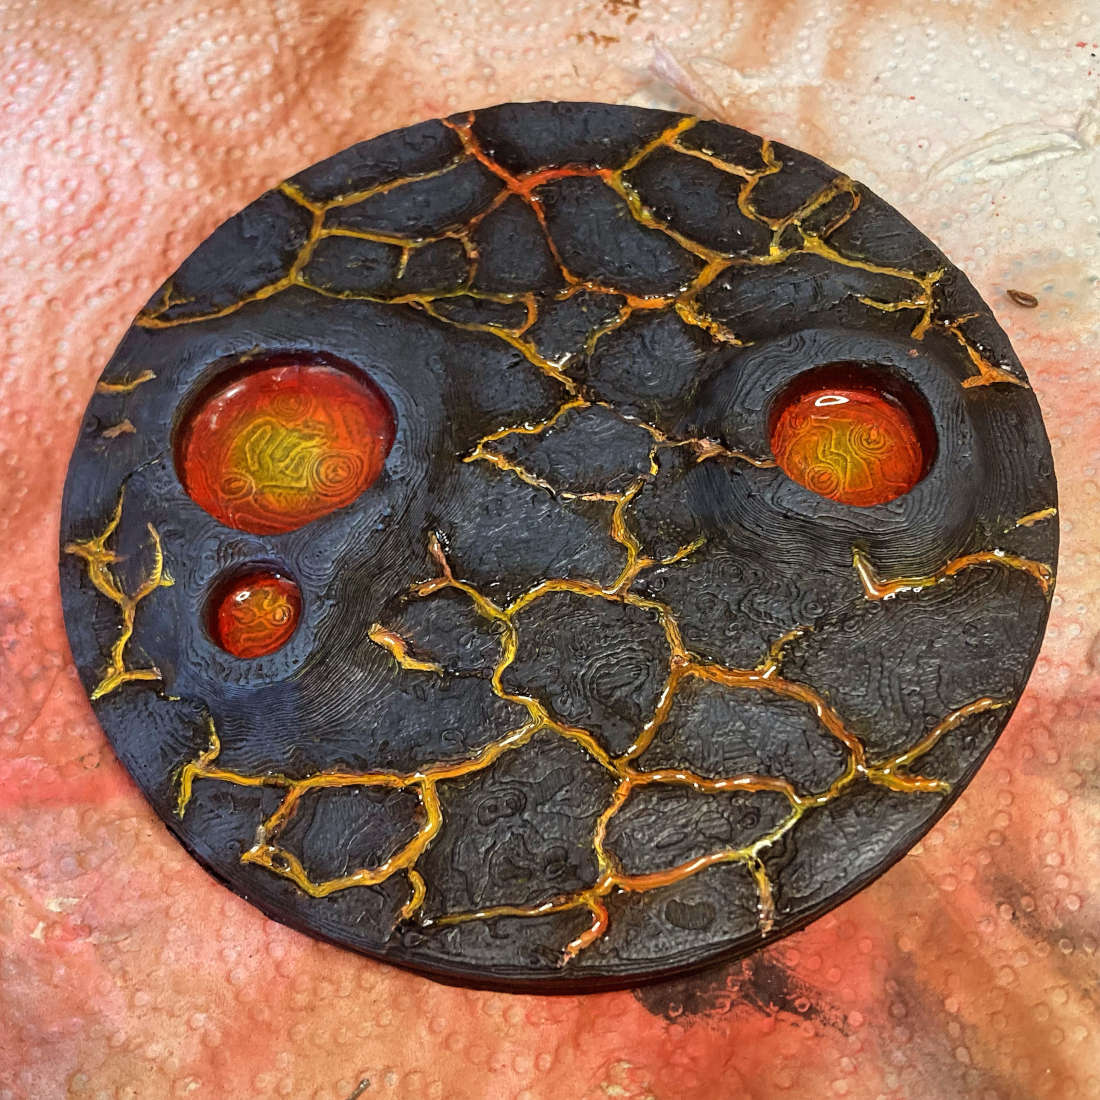
I have a stock of cool bases which I can just scale as necessary and I opted for a cracked lava with vent holes. The model is so huge that Tiamat can only fit on it in one or two spots with either a front or a back leg in the large lava vent. I think that this is quite a cool idea as it makes her look even more powerful, having no fear of injury from boiling lava! Miguel has to be applauded for sculpting the tail sweeping around and pointing forwards like a spear. This is way better than the comical dinosaur tail of the cartoon Tiamat.
I opted for a black basalt colour scheme accented with yellow thru orange to red lava effects. The black areas were given a dry brush with Vallejo dark grey. The cracks and lava vents were then painstakingly filled (using a needle and syringe) with the UV resin I got from my recent
Wish Hobby Haul. Wow this is amazing stuff.

Colouring A Colossal Chromatic Dragon
I cannot tell a lie this was a monster painting project mostly because she is so intimidating a miniature to paint. I rattlecan primed and zenithal highlighted her back in mid february and she just sat there glaring at me.
Eventually I summed up the courage to shoot her with a coat of Vallejo Game Air Bloody Red (72.710) across all the exposed skin of the body making sure that I left her belly neck and insides of her thighs unpainted. I then blended these parts in with a coat of Model Air Light brown (71.027). Shadows were accentuated with Model Air Mahogany (71.036) and Model Air Black (71.057). The spine was also painted in mahogany and dry brushed with progressively lighter shades adding a touch of light brown.
Each head was painted in the correct order; Black, Dark Green (72.028) , Red, White and then Blue (71.004). I suck at painting white so I opted for a Model AIr Pale Blue Grey (71.046) which I think looks kind of cool.
Wash a Disaster!!
Calamity struck when I used a Vallejo Game Wash Umber (73.203) across all the wings and heads and it pooled in all the wrong places and dried a horrible sandy colour. I was kind of expecting this to operate in the same way as the Army Painter Speed Paints. My mistake and this was definitely a low point.
I soldiered on and tried panel lining the chest armour, but this didn't really give me the effect that I wanted so I tried some sketching with paint. This is a technique I have seen Sergio Calvo use on many occasions to simulate a rough texture. I painted each chest and neck armour section with little stripes of the light brown and bingo it was the effect I was after.
I celebrated by painting each of the dragons eyes with a base coat of white and then a dot of Orange Fire (72.008) and a blended circle of Medium Yellow (71.002). A vertical black pupil was added and then each eye glazed with the UV resin. Have I told you how much I love this stuff?
Teeth and horns, toes and claws were all finished in shades from mahogany up to white and the beast was finally done.
Big Miniatures can Become Boring
This was a classic example of the epic struggle we all face as painters when the job at hand becomes long drawn out and tedious. I could have put another 20 to 30 hours into this paint job but I just don't have the patience. I signed it off and you decide if I should put more effort in...
She is a big girl and measures; wingspan 14 inches, height 8.5 inches, length 9 inches.
A Patreon Worth Joining
None of this would have been possible without the awesome modelling skills of MZ4250.
Miguel has a free Patreon subscription which I encourage you all to join. He offers some pretty cool free minis and the sheer volume of his minis is frightening. His work ethic is fantastic and he has some very cool little minis gems you will find nowhere else.
In fact this is not the first time I have printed an MZ4250 dragon. I printed a version of the Chardalyn Dragon from the D&D Rime of the Frost Maiden campaign on my FDM printer. I have also used Miguel's files in the past printing an Ancient Colossal Red Dragon and the famous Statue of Moloch from the cover of the AD&D PHB


