Work on my Mobile Painting Workstation continues
Installation of the Flap
The bottom section of the box is pretty innacessible and therfore lends itself to long term storage of the compressor, rotary sander, hot glue gun and other larger items such as brush boxes and palettes. I also wanted a second shelf so the obvious answer is to make a flap.
Keeping the cost low, I used some sections of laminate flooring made from Medium Density Fibreboard (MDF). This is good enough.
A little pull tab cut from an old lanyard was glued to the bottom of the flap with some 5 minute epoxy.
More Exterior Decor
As I mentioned in Part 1, Aliens Day is just around the corner (April 26th) and I wanted to get the iconic
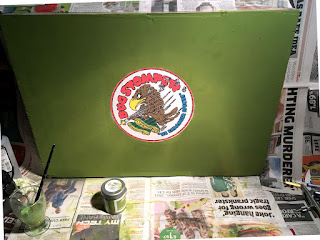
Bug Stomper noseart added to the rear of the box. I found a suitable graphic but I didn't like the black centre so I fired up GIMP and removed it. This is now my stencil.
The paint scheme of the UD-4L Cheyenne Dropship is a predictable military green. However, you can't get a tester pots of emulsion in military green so I went for the nearest I could get,
Wilko's Jungle Green Emulsion.
I didn't have a reference image to hand and this colour in hindsight is way too light but that can all be fixed later.
This was liberally applied to the back of the box in two coats. Coverage was surprisingly good. When I painted the sides of the box with automotive paint there was some kind of chemical reaction and it didn't want to stick to certain parts of the box. No problems with the emulsion and it went on quickly.
Next job was to cut out the badge from the center of the paper giving me 2 masks. One to paint the white circle backgound and one for the details inside the badge.
Careful measuring and marking in pencil will ensure that the outer mask is aligned so that the hole is directly in the centre of the box. I used some
Repositionable Mounting Spray to affix the mask and the newspaper but you could use a gluestick at a push.
This is then liberally coated in white spray paint,
Removing the mask and the newspaper leaves a neat white circle the exact same size as the badge. Take more care than me when masking and you won't end up with annoying bits of overspray like me. A quick touch up with some Jungle Green and all is well.
The it's time to add the noseart circle. Same drill, spray on the adhesive and align with the white circle.
I'll be covering the hard part, cutting out all the different areas of colour, in the next gripping installment


