Wednesday 15 October 2014

DIY Tournament Dungeon Boardgame

24 Cheap and easy 2.5D Dungeon Tiles
My RPG club, The Hobbit's Hole, runs an annual memorial tournament in honour of one of its founding members called the Manic Trophy.

This year it's my turn to host the game and I'll be putting on a simple dungeon crawl game.  I'm musing over the rules at the moment but here's my outline: 

PREMISE
My aim is to have a 3 to 5 player competitive dungeon crawl lasting no more than 45 minutes, in the style of the boardgame Dungeon Quest.  Players start on the same tile, like in Drakon, each time they move they reveal a new tile and orient it as they see fit discovering the dungeon as they go.  The final tile holds the great treasure and the Boss Monster.

I'm going to be using a version of the 9 inch cavern geomorph tiles as popularised by YouTubers TheDMGInfo / TheDM'sCraft / DM Kaydons Kastle, where each tile contains an encounter, be it a trap or a monster (or maybe both).  This also gives me a chance to use the cards from the Inkwell Ideas Creature Decks.  

I like the idea of having a finite number of "moves" to a game, everyone has an equal chance the player skill element comes from trying to push your luck or deciding to flee.  I've played  games like Lost Cities which use this sort of "push your luck" mechanic and enjoyed them immensely.

I need quick and dirty "trump" style resolution so I'm going to base everything around a regular deck of playing cards.  Players get to choose their card whereas the DM draws randomly from a deck.

To represent levels of the dungeon the DM deck is divided into 3 stacks; Level 1(cards numbered 2 to 6), Level 2 (cards 7 to J) and Level 3 cards (Q to A).  I have 24 tiles in the game so the first 10 tiles represent Level 1, the next 10 Level 2 and the last 4 are Level 3.

STATS & CHARACTER GENERATION

Looking at the card suit symbols we have:
  • HEARTS - Look like a heart so should represent life force or vitality, these cards are used for all tests of strength and stamina.
  • CLUBS - Look like a tree and sort of like a brain so these represent knowledge and intelligence.
  • DIAMONDS - Looks sharp like a sword so these cards are used to represent Melee combat ability.
     
  • SPADES - Look like an arrowhead so these cards are used for all Missile attacks and Dexterity based skill checks.
  • JOKERS - Each player gets one of these to use during the game to automatically succeed at a challenge or to inflict an instant kill.  However, Jokers cannot be used to defeat the BOSS MONSTER, unused jokers are worth 15 points at the end of the game.
Players get to choose their class and pick up the relevant 2 suits of cards as follows:
  • Warrior - (Strength) and (Melee)
  • Wizard - ♣ (Intelligence) and ♠ (Missile)
  • Thief - ♠ (Dexterity) and ♣ (Intelligence)
  • Ranger - ♠ (Missile) and (Melee)
  • Cleric - ♣ (Intelligence) and (Melee)
Additional Character Classes contributed by Stu Rat
  • Barbarian - (Strength) and ♠ (Dexterity)
  • Bandit - (Strength) and ♣ (Intelligence)
  • Monk - ♣ (Intelligence) and (Strength)
  • Archer -  ♠ (Missile) and (Strength)
  • Warlord - (Melee) and ♣ (Intelligence)
  • Gladiator - (Melee)  and (Strength)
  • Swashbuckler - (Melee) and ♠ (Dexterity)

The first suit is their PRIMARY stat, e.g. Warriors (Strength) and is used to break ties.
ENCOUNTERS

Each time players move onto a new tile they will encounter either a monster, a trap or need to search for a treasure.

MONSTER ENCOUNTER: Players may either FIGHT using (Melee) or ♠ (Missile) or EVADE using ♣ (Intelligence) or (Stamina).  If a player succeeds in a fight the monster is killed and a treasure awarded.  If a player succeeds in evading the player can move to the next tile but the monster remains and no treasure is awarded. 

TRAP ENCOUNTERS: Players may either DISABLE using ♣ (Intelligence) or ♠ (Dexterity) or EVADE using (Strength) or (Melee).  If a trap is disabled it is removed from the game and the player gets a reward otherwise the trap remains.

NO ENCOUNTER:  Empty tiles can be searched by any player using any card. So there is merit in just following the first player and scratching around in the room once they've defeated all the monsters.

As detailed above, players resolve encounters by choosing a card and comparing it with the DMs Card, whichever is higher wins.  Players who fail an encounter must discard an extra card at random from whichever suit they used in the encounter.  In the event of ties a player who used their primary stat always wins, if they used their secondary stat they always lose.
I'm going to decide monster or trap based on a coin flip.  Heads it's a Monster, tails its a Trap, but you could design specific traps for each tile design you have.

TREASURE

Treasures are awarded for defeating monsters, disabling traps or succeeding in search rolls.  They are either drawn randomly from a seperate deck or if you want the rewards to increase in level as the challenges increase you can just award the challenge card.

THE BOSS MONSTER

When the last tile is drawn, the players have reached the end of the dungeon.  Any players who can move their character onto this tile in their next turn can attempt to defeat the boss monster either collectively as a group or try it on their own.  Players are reminded that the boss monster is an instant kill event and failure will result in death.  There's no such thing as a dead Hero in this game.

In either case they choose a card as normal, excluding Jokers.  However, the boss monster gets to  shuffle all the remaining challenge decks together and draws 1 card plus 1 card for each party member in the combat and discards the lowest card.

Players are awarded 2 treasures each for defeating the boss monster.

FLEEING

Players can FLEE the dungeon before drawing a new tile and keep any treasure cards they have amassed so far.  If their route out of the dungeon is blocked by a monster they must discard a card at random as they flee.

TURN ORDER 

Players determine their Initiative order by choosing one card from their hand.  Highest goes first, in the event of ties the player who used a primary stat card wins, all others discard and redraw.

1.  FLEE - Players may decide to flee the dungeon or continue exploring.

2. MOVE - Move through an open exit and reveal the next tile.

3. ENCOUNTER - Each player resolves the encounter as outlined above.

4. NEXT TURN - Play moves to the player with the next highest initiative.

SCORING

Once the boss monster has been defeated (or all players have fled the dungeon) the game is over and scoring occurs.

1.  DEAD players score 1 point for each unused stat card in their hand (+ 15 points for an unused joker).

2.  SURVIVING players score 1 point for each secondary stat card (+ 15 points for an unused joker) + the face value of any primary stat cards remaining + the face value of any treasure rewarded.

3.  The winner is the player with the most points

Wednesday 27 August 2014

French Space Opera - Time Jam: Valérian and Laureline

I've mentioned several times on this blog that Luc Besson is one of of my favourite directors/producers/writers and I always keep up to date with what projects he is involved with.  Back in 2012 he announced he was working on a Valérian movie, which for those who don't know, Valérian is a French graphic novel first published in Pilote magazine (Nov 1967) and written by Pierre Christin with art by Jean-Claude Mézières.

A few of the many aliens in the Time Jam universe
Just a few of the many aliens from the Time Jam universe (centre: Valerian and Laureline)
Besson has always been a fan of the original comicbook and so he hired Mézières and Jean Giraud Moebius to do the concept art for a little sci-fi project he was putting together which ended up being "The Fifth Element".  Besson's production company, Europacorp, also colaborated on a 40 episode anime series loosely based on the comic book, first aired in 2007.  Besson is not the only fan to be inspired by and some of the original comicbook has bled through to Star Wars.  Jeffrey Willis has a good write up of some of these on his blog The Geek Flag

The series follows the adventures of junior Space Time Agent Valérian, voiced by Nigel Greaves, who travels back to medieval France to undertake cultural observations for the Oxford Intergalactic University.  Needless to say his first mission goes spectacularly wrong and he ends up escaping feudal justice with a headstrong peasant girl called Laureline, voiced by Alison Dowling.  When they time jump back to 2417 they discover that the Earth has disappeared and they spend the rest of the series as the only humans in the galaxy trying to find out what has happened to it.  

The universe features a plethora of alien species, cultures, planets and technology, most notably the insectoid Vlargos who are intent on dominating the Galaxy.  Valérian and Laureline have to constantly thwart their devious plans as they ply their trade as space adventures.  One of their patrons are a trio of weird small winged entrepreneurs with trunks know as Shingouz.  Much like Star Trek's Ferenghi they are always in search of profit and end up sending Valérian and Laureline on quite a few dangerous missions to retrieve various objects. 

Their encounters often occur on weird planets that try to kill them or have been rendered dangerous by some legendary artefact they must recover and they are assisted by ship's computer "Rondha" which fills in some of the blanks for them and the viewer.  There's plenty of variety in setting and plot for each episode as the pair embark on various missions for their different patrons and they end up making just as many friends as enemies.

With the exception of the bizarre "Space Dandy", it's been a while since I've seen anything that I would class as "Space Opera".  By this I mean in the spirit of of E.E. "Doc" Smith's classic Lensman, a light hearted, galaxy hopping tour of the universe with only a laser blaster and a well timed one liner for defence.  It's pitched at an early teens audience, the tone is firmly in the "mild peril" zone, but it's good inspiration fodder for any Space Opera RPG and could be easily "hardened" up for more engaging adult sessions.  I would recommend using it as an alternative setting when you want to drop your players in at the deep end and watch them gradually learn about the universe as they play.

Wednesday 13 August 2014

5 Things I'd Love to do with RPG Props

Here's a bucket list of things I'd like to do with props have effects in a game world. 

Fortune Cookie (may include game content) 
1.  Fortune Cookies - Imagine a game where the PCs have just polished off a nice celebratory chinese meal, when the DM/waiter hands out a plate of fortune cookies.  Each of the players takes one and discovers a clue or instruction to their next adventure inside.

2.  Defuse the Bomb - Make a prop bomb complete with digital timer and hand the players a screwdriver and a set of wire cutters.  I'm going to need to trap them in a locked room so they have no choice but to defuse it.  This is probably the trickiest of the lot as I'd have to find a good timer circuit which I can use. 

3.  SMS Patron - Have a game where all the instructions coming from the patron are delivered to the characters via SMS text to the players mobile phones.

4.  Amaretti Scroll of Raise Dead - This is something I'd like to do when playing a magic user.  When a party member dies, I'd like to pull out a piece of amaretti paper covered in symbols claiming it's a Raise Dead scroll.  Read out some incantation and then roll it up into a tube and set fire to it.  At the last moment the paper will fly into the air (just like in the video) and the character is back from the dead.


5.  Crossword from Beyond the Grave.  Give one or more PCs a half finished crossword puzzle as a clue, preferable found near the body of someone they wanted to interrogate.  The players must complete the crossword to reveal a message from the victim.

Monday 11 August 2014

Astropia - RPG Advocacy in movies

Last night caught me flicking through the free movie content on my WD TV Live, where I stumbled across a Norwegian language film called Astropia.  Also known as Dorks & Damsels it was an indie film released in 2007. Given the subject matter, it was surprising that I'd never heard of it, but I've had good experiences with Norwegian films in the past so thought I'd give it a go.    

aka Dorks & Damsels
In a plot borrowed heavily from the classics such as "Oliver" and "Pygmalion", socialite Hildur (), is living the life of a minor celebrity when her wealthy boyfriend Jolli, a shady car dealer, is suddenly arrested and jailed.  The confused society girl is thrown out of her home and hounded by the paparazzi, so goes to live with her sister Bjort and 10 year old Nephew Snorri.

She struggles to complete even the most basic tasks and come to terms with her new station in life when, by chance, she lands a job at "Astropia" the local "Nerd Store" as their RPG salesperson.  She knows nothing about roleplaying and her colleagues and customers are initially hostile until she joins her first game session run by store owner Goggi.  

RPG portrayals in mainstream media fall squarely into two camps for me, you're either condescendingly laughing at the nerds (Big Bang Theory) or knowingly laughing with the nerds (Robot Chicken) and this one falls squarely into the latter.  In fact the only condescending character in the movie is the villain Jolli and although Hildur is treated with a bit of suspicion and sexism by her co-workers, she wins them over quite quickly.

The movie does a good job of parodying some of the stereotypical nerd subdivisions and there are some great little moments like DVD salesman Floki trying to sending young Norri off home with copies of "The Exorcist" and "The Shining" as educational movies.

Importantly this movie has has an engaging convential plot centered around Hilda's and Jolli's abusive relationship.  It does a great job of portraying the members of the games group as odd, but likeable and fully functioning adults and the "normal" people as monsters.  The use of LARP costume action is sparing, but serves as an effective mind's eye view inside a game session and is sympathetic.  It explains the core functions of characters and GM well and demonstrates how RPGs have the power to unlock imaginations and how people can often have surprising hidden talents or skills and the determined Hildur also manages to knock some of the sexism for six in her first session.

If you don't mind watching subtitled movies this is definitely well worth a look and I'd definitelty recommend it to anyone trying to explain RPGs to a non playing partner or friend.

Wednesday 6 August 2014

Revisiting Teenage Mutant Horror Comet Zombies

Had some down time last week and decided to revisit one of those 80s movies which I raved about after seeing it on Alex Cox's "Moviedrome".  For me it was seminal TV and regularly showed cult movies I had heard of but never seen.  Good Times.

They Came They Shopped They Saved The World
"Night of the Comet" (or as it was known in the UK "Teenage Mutant Horror Comet Zombies") was a relatively low budget (£3million) sci-fi movie released in 1984.  Written and directed by Thom Eberhardt it stars Catherine Mary Stewart (Weekend at Bernie's) and Kelli Maroney (Fast Times at Ridgemont High) as Regina and Samantha, as sassy valley girl sisters who end up missing out on the greatest spectacle of their lives, a comet passing Earth.  Does this sound familiar? (Day of The Triffids anyone...)

When morning comes they discover that everyone they ever knew is missing and a dusty red smog has filled the air.  Enter Robert Beltran (ST Voyager's Chakotay) as Hector, the mexican truck driver, an unlikely but entertaining hero who tries to help the girls come to terms with the new world order.

Meanwhile the saviours of humanity in the form of a bunch of "Apocalypse Nuts" led by Geoffrey Lewis are emerging from their underground bunker to start afresh by gathering up all the survivors.

Without giving anything away it's an entertaining slice of 80s L.A. teen culture, deely boppers, rampant consumerism and zombies.  It's got a few great one liners like "Daddy would have gotten us Uzi's" and "The legal drinking is ten... but you will need ID, lets be real".  The two girls are the absolute stars and strong female characters are hard to come by in any post apocalypse movie.

Great inspiration particularly in the case of the two strong female characters, and as a genre setting for an apocalyptic game when you're bored with "The Walking Dead",

Friday 1 August 2014

Ennie Award for Best Cavern Map goes to... Fire Ants.

One of the staple RPG tropes is the "Bug Hunt", we've all done them.  There are some pretty cool bug hunt tunnel maps out there, but even the best human cartographers can't come close in complexity to these real world Fire Ant Colonies.  These stunning aluminium casts are the work of anthillart.com

Fire Ant Colony #45 - 18.5"x12.5"x13" (HxWxL)
Carpenter Ant Colony #31 - 16.5"x4.5"x8" (HxWxL)
The artists YouTube channel has some interesting videos showing the whole casting process which inevitably causes the destruction of the colony.  I'm rooting for Hicks and Hudson on this one and prefer to immortalize the work of these pests rather than go down the "nuke it from orbit" route.

Wednesday 30 July 2014

More uses for those pesky Loom Bands?

If you've got a child aged between 10 and 15 you will have probably been unable to avoid the current craze of "Loom Bands".  These tiny multicoloured rubber bands are intended to be woven together, in a form of phsychedelic macrame, to make friendship bracelets and other strap like objects.

But they have a far more useful use...  as wound markers for your tabletop miniature games!!

Loom Bands make great wound markers
They're stupidly cheap (1000 for about £3), you can find them just about everywhere at the moment and come in an astonishing array of colours. 

I'm going to throw down the gauntlet and challenge you crafty readers to weave up a set of spell effect templates.  Post links to your achievements in the comments below.

Tuesday 29 July 2014

Mad Max 4 - Fury Road Comic-Con Trailer

There's only one word for it...


Awesome!!!!!!!

Dazzle Camoflague for the Future

Back in WW1 artist and Naval Reservist Norman Wilkinson came up with the idea of covering ships in bizarre geometric paint schemes to make it harder enemy submarines to target them.

HMS Kildwick in Dazzle Camoflauge
Fast forward a hundred years and we are fast approaching a minority report scenario where we are all subjected to face recognition scanning to some degree as we pass through public spaces.  We even carry these devices with us every day (it's in the software of most digital cameras in our smartphones). 

Thankfully we're not at the stage where you are scanned by GAP as you walk past their billboard at the tube station, but I'm sure that I'm not alone in thinking that things like facebook's face recognition software are a bit creepy, So here's a free app idea for some enterprising mobile developer.
 
Muppet face recognition

Enter the guys at CV Dazzle who are developing simple makeup and hair techniques to fool facial recognition software.  The only downside is that it makes you look like some uber futuristic cyberpunk cosplayer or Lady Gaga fan depending on your perspective (and age).


CV Dazzle Makeup and Hair Techniques

Which brings us back to Sci-Fi and RPGs in particular.  The most common party concept for Sci-Fi games is the band of misfits sticking it to the empire/corporation/man and engaging in lots of covert ops where your ability to hide your identity is crucial.  Unless there's been some sort of utopian revolution there is likely to be some form of mass surveillance at work. 


R Talsorian's Cyberpunk 2020 had a plethora of fashionware items such as light emitting tattoos, colour changing hair and contact lenses squarely pitched as mere character affectations.  The 2006 adaptation of Philip K Dick's "A Scanner Darkly" had undercover cop Keanu Reeves in his hi tech "Scramble Suit" to prevent his identity from being revealed.  Even Milla Jovovich got her identity fooling fashion camo together in the visually entertaining "Ultraviolet".

Put these all together and you've got a really sweet combo which should keep those algorithms busy.


Monday 7 April 2014

International Tabletop Day 2014

Last Saturday was the second International Tabletop Day and unfortunately it wasn't possible for my regular Friday night group The Hobbits Hole to host an event this year.  So a bunch of us did the next best thing... we went to someone else's event.

The Role Play Haven RPG Club are based inside Lewisham Hospital at The Lewis Club and they were a very friendly bunch.  They meet on Wednesday nights for RPGs and Monday nights for Boardgames.  

Game of Thrones - House Stark on the move
I got to play a couple of games, namely:

The Quiet Year

A free form drawing game based around a year in the life of a post apocalyptic community.  Players draw cards to determine what random events affect the community and then choose to either discover something new or plan a project.

Of course the temptation with this sort of game is for it to go totally gonzo and we ended up having Ninja Rabbits attacking a Nazi Zeppelin whilst a party of explorers went to the mysterious pyramid and discovered the ark of the covenant.

A Game of Thrones

With season 4 of the TV series just around the corner I couldn't resist playing Fantasy Flight's epic game of royal houses fighting for control of the Iron Throne.  I was playing House Tyrell and although the lack of any court influence at the beginning was a bit of a pain, I had a fantastic tussle with House Martell.  Sadly I couldn't stay to find out how it all turned out, but I will definitely play this again.

Thanks guys it was a lot of fun and roll on 2015 when we can "Play more Games!!"
 

Monday 3 March 2014

Retroblasting Explain the Evolution of Adventure Heroes

I'm a big fan of the Adventure Hero / Pulp genre of 80s films like Indiana Jones, Goonies and even Romancing the Stone and I've always know that their origins lay in the Saturday matinee serials of the 20s and 30s.

But for those of you who love the genre and want to know more, here's an interesting video taken at Pensacon 2014 where the Retroblasting team (Melinda Moch and Michael French) explain the history and influences behind them.


I'm going to look at Indiana Jones and the Temple of Doom in a different light now. 

Friday 28 February 2014

I know what you did last Summer!

Okay I admit it...

I was kindly asked by Joe Wetzel of Inkwell Ideas to contribute some random maps for his successful Creature and Encounter Decks Kickstarter project (I did the spaceship deck plans in Encounter Deck 2).  Joe sells these decks on his website which also contains some of the best RPG random generators the internet has to offer (like the amazing hexographer I reviewed in my mapping mini series) and comes highly recommended.

So What the Heck is an Encounter Deck?


Card #06 from Encounter Deck 2
(featuring map by me)
It's a deck of 56 cards containing ideas for DMs to use either during play to add a little randomness or spice to their game.  They can also be used during scenario or campaign preparation as a random idea generator.

Each card has on one side:
  • A Map - this could be a room, a building, an outdoor space, a map of a region or even a section of spaceship deck plan.
  • A Trap Idea - something to throw at your players in game if they're having it too easy.
  • A Twist - Something to stir up the plot
     
  • A Trivial item or Treasure - Something to reward your players with, it could be inconsequential or it could become the focus for an entire game.
and on the reverse side a generic scenario idea split into:
  • Title and Outline - A brief synopsis of the scenario with some keywords to get you thinking about where to take the plot.
  • Getting the PCs Involved - a couple of plot motives for your PCs.
  • Encounters - A bunch of potential encounters you might want to throw at your PCs in line with the overarching plot outlined above.
  • Conclusion - A couple of ideas on how the scenario might pan out for the players.

Example of their use as an Idea Generator


Here I've simply taken 7 different cards and selected one item from each category to use to generate my scenario.  I could have just used the entire scenario idea from the reverse of the same card, but my objective here is to generate something really random and get those creative juices flowing.  I've used cards from Encounter Deck 2 and referenced the card number next to each item for those of you who want to recreate my steps. 
  • #46 The Hunted - (Protection, Battlefield) - The refugees approach the city with tight lips and haunted eyes.  The lord cannot turn away his charges in their time of need, but what drove them from their homes may hunt them still.
  • #55 Getting the PCs Involved? - The PCs stumble across the gypsies at dusk.
  • #05 Encounters - The would-be interlopers (The PCs) are offered information by a diviner, but at a hefty price.
  • #16 Trap Idea -  The slime on the walls and floor of a corridor has been deliberately cultivated, conducting the energies of an attack spell throughout the area.
  • #32 Twist: A group of mercenaries mistake the party as searching for the same treasure that they are.
  • #56 Trivial? Treasure - A small one foot cubed metal box with a door on one side.  Inside the temperature is always just below freezing.
  • #47 Conclusion - With the troublesome cult revealed, the news must be spread and the panic halted.

My Adventure Outline (as outlined using the cards above)


An evil plague is spreading over the land, leading to an influx of refugees into the capital city.  This plague is a magical slime whose epicentre is a town some twenty leagues from the capital.  The PCs have been passing a steady stream of refugees all day as they head in the direction of the town.  That night as they search for a likely looking camp spot they encounter a band of Gypsies. 

The gypsies agree to let the PCs stay the night in their camp, which is unusually subdued, and during their conversations learn that the Gypsies have been blamed by the locals for the outbreak of this slime.  The Gypsies have nothing to do with it, but one of their number is a fortune teller who predicted that they would meet the PCs.  The Gypsies insist that one of the PCs must have their future foretold, during which they must forfeit some item of great value (or a lesser body part like a finger, toe or earlobe).

During the divination the gypsies reveal that they must retrieve the mystical cube from the shrine of St. Haute Pointe and take it to the slime infected town.  Once there, they will know what to do.

On the way to the shrine of St. Haute Pointe the PCs are ambushed by another adventuring party who are also heading to the shrine (but they are after a legendary chalice said to be able to restore missing minor body parts, observant PCs will notice that their leader has lost one of her ears).  There will most likely be a stand-off, a chase, another stand-off and the final realisation that the two parties are after entirely different things and either leave on good terms, or not.

After recovering the cube, the PCs finally arrive at the town.  From a hilltop vantage point they can see that the town is dotted with patches of this slime and overtime they will notice brown robed riders arrive in town on horseback and then leave shortly afterwards carrying a cylinder on their backs.

If they venture into town they will observe a cult of brown robed human monks congregating around the towns municipal water well.  They are decanting slime and something like frogspawn from the well into these cylinders and handing them to the dispatch riders who arrive in town.  All the while chanting some eldritch verse.

The solution to the PCs problem is to slay the monks and venture down the well where they discover some small innocuous looking creature the monks have chained up, laying its eggs.  If they capture one of the monks, preferably the leader, they can transport him and a frozen sample of the eggs back to the capital for the Lord's apothecaries to inspect.

To Adventure and Beyond 

Naturally, the Lord rewards the PCs for their heroism and then mention that he has another problem of a delicate nature.  He explains that as a young man he had an unfortunate hunting accident and now the kingdom (and his wife) is pressing him to sire an heir.  He's heard that there's a fabled chalice, located somewhere in the kingdom, that is rumoured to have the power to restore minor body parts...

Wednesday 26 February 2014

99 Problems but the Pole ain't One

My regular gaming group are currently experiencing the Liberation of the Demon Slayer an old school gonzo module by Venger Satanis with maps by Dyson Logos.

Liberation of the Demon Slayer cover image
Liberation of the Demon Slayer
The beginning of the module has them preparing to delve into the caverns outside the village of Clear Meadow in search of a fabled magic sword, the villagers kindly provide 3 days rations, 30 foot of rope and a 10 foot pole to each brave soul willing to enter.  My players are unfamiliar with old school dungeoneering so I've taken the liberty of preparing a short list of things they can do with their pole in the style of popular urban troubadour Jay Z...

99 Uses for a 10ft pole

  1. Poke things that are ten feet away.
  2. An improvised measuring stick for things like the depth of water or the width of a crevasse.
  3. Tie two together with a sack in the middle and you have a stretcher.
  4. Tie two together at one end and you have a travois, you can drag your loot behind you.
  5. Use it to carry your pack on the end like some kind of hobo.
  6. Tie a white flag to the end and you can surrender to those bandits.
  7. Trigger a trap from a safe distance.
  8. Tie two together at one end and you have an A-frame (That's half a crane to you and me).
  9. Cut it into sections and you have several improvised clubs.
  10. Cut off sections can be used to wedge doors closed if you don't have spikes.
  11. Jam the end into a doorway to keep it open.
  12. Use it to improve your balance when making those tightrope walking checks.
  13. It's a lever.
  14. It's a great punt pole when rafting. 
  15. It's an improvised tent or pole.
  16. Tie a noose to one end and you have a snare for handling wild dogs. 
  17. It's a walking pole. 
  18. Use it to testing the snow for hidden crevasses in the arctic north.
  19. Tie two together (at both ends) and you have an improvised bridge. 
  20. Stick a mirror on the end and you can see out of trenches or around corners. 
  21. It's one third of a ladder. 
  22. Stick two in the ground with string or rope between them and you can hang your wares at market. 
  23. Jam it into the mouth or eye of a Tyrannosaur / Rancor / Kraken / Terrasque.
  24. Wedge it between the floor and the descending ceiling.
  25. Add some ribbons and you've got a may pole. 
  26. Knock down that wasps nest.
  27. Use two or three to make a tiger trap, just cover them with big leaves. 
  28. Cut them up and sharpen the ends, hey presto… vampire stakes! 
  29. Tie the stakes to a springy tree limb, instant punji stick trap. 
  30. Tie a knife to the end, go spear fishing. 
  31. Trim it to 6ft and use it as a fighting staff. 
  32. It's an improvised lance. 
  33. Make a pair of garrotte handles. 
  34. Jam 2 halves in the ground on either side of a track with a wire between them it's a nasty trap. 
  35. Use it to complete your staff of Ra and find the burial site of the Ark of the Covenant.
  36. It's something to lean against when on guard duty. 
  37. It's for dancing around, apparently. 
  38. It's a fishing pole. 
  39. Use two as improvised stilts.
  40. Use it to push prisoners (or animals) about with.
  41. It's a yoke for carrying two heavy things.
  42. It's a truss rod for two people to carry one really heavy thing.
  43. It's a balance beam for weighing things.
  44. Tie three together at one end to make a tripod to suspend your cooking pot.
  45. Chop it up for fire wood.
  46. Stick to snake spell needs a stick.
  47. It's a wizards staff if the wizard loses one.
  48. It's a bunch of torches when you run out.
  49. It's a stirring stick for really big cauldrons. 
  50. Test the water to see if it's really acid. 
  51. Tie two short lengths together, it's improvised nunchucks.
  52. Tie three together in a triangle it's a coat hanger.
  53. Stick meat on the end and feed your pet tiger or other ravenous beastie. 
  54. Use it as a trail or claim marker. 
  55. If you have enough you can stick them in the ground a make a temporary fence or cage.
  56. Cut notches on it to keep count of your conquests (or kills).
  57. Whittle on it around the camp fire to pass the time. 
  58. Cut a few in half and sharpen the ends, stick them in the ground at 45 degrees, you've got a horse proof barrier. 
  59. Tie helmets onto it at regular intervals and you've got an instant army of friends. 
  60. Make a scarecrow.
  61. With a little craft and string you have improvised snow shoes.
  62. Tie a shield to it and stick it in the ground, instant archery target. 
  63. If your shields big enough, hide behind it for that all important cover bonus. 
  64. Bang it on the ground to call attention to yourself. 
  65. Tie a torch to the end to ward off really dangerous animals.
  66. Tie a sling to the end and use it as a catapult arm. 
  67. Use it to push away siege ladders.
  68. Capture several prisoners, tie their hands and feet to the pole. 
  69. A stake to tie the virgin/witch to. 
  70. A limbo pole.
  71. A replacement axle for your wheelbarrow. 
  72. A handle for a windlass.
  73. Use it to break out jail Jackie Chan style (it also involve weeing on your shirt though).  
  74. Tie some rushes to the end and make a broom to sweep away your tracks. 
  75. Use it to spin plates or bowls and entertain the tribal chief. 
  76. Chop it up into lengths and jam in the walls to make improvised steps.  
  77. Wood to metal spell needs some wood.
  78. Make a yoke for your oxen.
  79. Use it to spit roast a pig.
  80. Make foucault's pendulum and test the Coriolis Effect.
  81. It's a makeshift pull-up bar.
  82. Add weight's It's a weightlifting bar.
  83. Add rope, It's a trapeze handle. 
  84. It's a lightweight caber.
  85. Spin around it when your drunk its a party game.
  86. You can hang tapestries, or curtains with it.
  87. It's a flag pole.
  88. It's a sundial.
  89. It's for knocking down fruit or coconuts.
  90. Charge a line of enemies and knock them over clothes line style.
  91. It's for jamming in the wheels of Nazi motorbikes.
  92. You can tie your horses together with one. 
  93. For rescuing people from quick sand.
  94. An improvised holy symbol.
  95. Tie a pigs bladder to the end and go wassailing.
  96. It's several baseball bats.
  97. Use it to make a corracle.
  98. It's one third of a poor man's bass guitar (add wire and a box).
  99. Add a hook it's a fisherman's gaff (for landing big fish).

Sunday 23 February 2014

Codex Nordica - Castles and Crusades Kickstarter

I'm doing plenty of new things so far this year, and one I can now cross off the list is to back a kickstarter and so I pledged my support for Troll Lord Games latest project for their rules light OSR style system Castles and Crusades. 

The Codex Nordica is a 128+ page book filled with all manner of content, from a complete guide to Viking Mythology for everyone's use, from new spells for characters to monsters for Castle Keepers/Game Masters.  The great thing about these OSR modules is that they're easy to repurpose for other Fantasy RPGs so even if you're not a fan of C&C, you can easily add some Vikings into your campaign setting.

The stretch goals already include 3 bonus adventures and Odin's Rune Tiles and if it gets to 300 backers, they'll throw in some custom C&C dice made by Crystal Caste.

The great thing is that they've already hit their funding goal so this can only get better.

For more details go to the Codex Nordica Kickstarter page.

Thursday 5 December 2013

Space Hulk on iOS - A first impressions video review

David Neumann's iOS News Blog on Boardgame Geek is a must read if you're an iPad owning boardgamer and I was over the moon when I read that Games Workshop had signed a deal with Full Control to develop an iOS version of Space Hulk.

12 months later...

It's finally here.


Available to download from the iTunes App Store

Reaper Bones #8 - Flaming Sphere LED Tealight Hack

As some of you may know my Dwarf Ranger Shadrain Coppervein is uncovering the horrors that lie deep in the Temple Elemental Evil at the moment.  Our 6 strong group is ably assisted by one of the scenario supplied NPCs, a female human sorceror, who I also play from time to time.  She recently levelled up and acquired a new Flaming Sphere spell, which has to some degree supplanted Magic Missile, as the "go to" spell for her combat casting.

Tired of using a red d6 to mark the spell's position, I decided it was high time I rectified this by hacking an LED tealight into the Burning Sphere mini which came in my Bones Kickstarter box.

Burning Sphere x3 (Kevin Williams SKU: 77081)

This video goes out to fellow mini hacker, Peter Cruickshanks (aka Uber-Mensch on the Reaper Forum) who, after seeing my recent success with the Fire Elemental LED Hack, wondered what I could do with LED Tealights.

No full blow by blow this time as all you need to know is in the video below.

UPDATE: The Burning Sphere base can also be downloaded as a free printable model just don't forget to Like, Post a Make and throw a Tip in the jar.

Enjoy


Bones Progress 


Reaper Bones: 245 - Painted: 34

Related Posts:


  • Reaper Bones #1: The Marathon Begins - Where I paint a dozen Giant Rats
  • Reaper Bones #2: Kobolds, Are They Dogs or Dragons? - Where I paint a dozen kobolds. 
  • Reaper Bones #3: A Carcase of Skeletons - Where I paint a half dozen skeletons
  • Reaper Bones #4: A Shuffle of Zombies - Where I paint five zombies.
  • Reaper Bones #5: Introducing Shaina Coppervein, Dwarven Orc Hunter - First PC mini
  • Reaper Bones #6: Mimic, Treasure Chest and How I re-base my Bones - Where I paint furniture
  • Reaper Bones #7: Fire Elemental Meets Novelty Lamp - Where I hack a mini with LEDs
  • Sunday 24 November 2013

    Reaper Bones #7: Fire Elemental meets Novelty Lamp

    One of the standout pieces from the Bones Kickstarter has to be the big translucent Fire Elemental and it was always going to get some special treatment from me.

    Large Fire Elemental (Julie Guthrie SKU: 77082)

    Reaper Bones Fire Elemental


    Xanderhook on the Reaper Forums got there before me and his post comes highly recommended as an excellent tutorial in painting the transparent bones.  I chose a slightly different route for my LEDs which required drastic plastic surgery!

    Disco Inferno

    I picked up a fibre optic novelty lamp in the pound shop some weeks earlier, for another project, which I discovered had a neat design.  3 coloured LEDs (blue, green and red) mounted on a tiny circuit board with a momentary switch feeding a pulse to a chip which regulated the power from the 3 AA batteries to the LEDs.

    The plan was simple:
    1. Extricate the board from the housing.
    2. Swap the batteries for Dry Cell (watch batteries) - as AAs are too big for the base.
    3. Swap the 3 colour LEDs for Red ones with long wires which can be inserted into the mini. 
    4. Add a longer throw momentary button switch.
    5. Pack it all into a custom 40mm MDF (Medium Density Fibreboard) base. 

    Tools and Supplies

    To complete this project you'll need:
    • 1 x translucent miniature
    • 1 x base 
    • 3 x bright LEDs (I used red ones) 
    • 3 x dry cell batteries (I used 3v CR 2032) and holders
    • 1 x momentary button switch (I got 20 on eBay for £1.50)
    • component wire
    • solder and flux
    • soldering iron
    • dremel hobby drill
    • craft knife
    • superglue
    • milliput or similar modelling putty
    • hot glue gun or insulation tape

    Where to Drill and Cut


    I wanted to embed 3 LEDs, one in each hands and one in the head, a scan of the mini showed that it was possible to drill holes from the elbow to the end of each hand and down between the shoulder blades and into the head area.  Getting the wires through the mini was going to be difficult, but cutting the mini in half across it's waist meant I could get the wires up through the middle and out about half way up the back.  This left the three pairs of wires branching out in an inverted arrow on the surface, untidy, but easily concealed with a bit of milliput.

    Cut along the white line, Drill in the yellow direction
    Cut along the white line, Drill in the yellow direction

    The Base


    I made the base from three discs of 2.5mm MDF which I cut out roughly with the dremel and then mounted each disc to an arbour and sanded into a circle.  The three rings were then cut out using a file to score the surface of the MDF as it spun on the arbor (WARNING... only use this method if you are using a dremel which spins at a slow speed otherwise you are highly likely to either fire the file into your hand or get an MDF frisbee in the head!!!).  The safe method is to drill lots of holes around your inner ring and then join them up using a file.  Once you have 4 parts glue together with super glue as in the diagram below.

    Base Dimensions and Construction
    Base Dimensions and Construction

    Of course if you don't want to go through the hassle of making your own base out of MDF you could just use something like a coffee jar lid.  Anything will do as long as it has enough space underneath for you to cram in all the components, like the battery holders wires and circuit board.

    Keep Calm and Solder On 


    A soldering iron is a must have for this great little circuit bending project but they are a handy tool to have for those odd bits of electrical DIY and can be bought pretty cheaply these days. 

    Here's a closeup of the circuit from  my fibre-optic lamp.  You'll need to connect a pair of wires of appropriate length to each of the LEDs and work out (through trial and error) which leg needs to be soldered to which spot on the board, fortunately they are very close to each other so its not too tricky.

    Fibre-optic Lamp circuit
    Fibre-optic lamp circuit showing major components

    Once you've done that you can connect your batteries together in series to give yourself enough voltage to light all of the LEDs at the same time.  There are plenty of videos on YouTube which show beginners how to solder so I won't go into any specifics other than a few directions and top tips.
    • Soldering LED legs neatly is tricky, I straddle the LED over a metal ruler (as a third hand and then solder the wires on top.  The ruler dissipates the heat quite effectively and you get straight joints.
    • Use a hot glue gun to insulate your LED legs from each other other wise they won't light up.
    • Flux is a necessity, don't solder without it.
    • tin your wires before attempting to solder them to the circuit board.

    Construction Video

    Here's a video of the construction and more importantly the illumination effect.


    Bones Progress 


    Reaper Bones: 245 - Painted: 33

    Related Posts:


  • Reaper Bones #1: The Marathon Begins - Where I paint a dozen Giant Rats
  • Reaper Bones #2: Kobolds, Are They Dogs or Dragons? - Where I paint a dozen kobolds. 
  • Reaper Bones #3: A Carcase of Skeletons - Where I paint a half dozen skeletons
  • Reaper Bones #4: A Shuffle of Zombies - Where I paint five zombies.
  • Reaper Bones #5: Introducing Shaina Coppervein, Dwarven Orc Hunter - First PC mini
  • Reaper Bones #6: Mimic, Treasure Chest and How I re-base my Bones - Where I paint furniture
  • Tuesday 22 October 2013

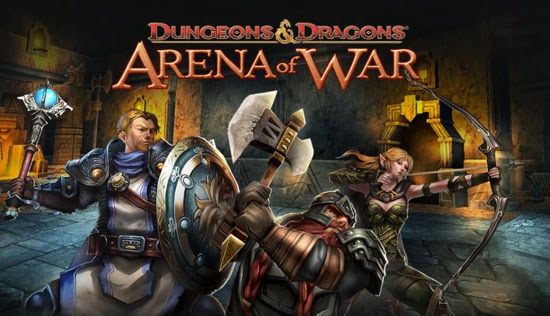
    Review: Dungeons & Dragons: Arena of War (iOS)

    Bob Dylan sang "Oh the times, they are a changing..." and never a truer word was said about how the advent of tablets has changed the fortunes of boardgame and RPG companies.  As a long time Mac user I'd long since accepted my platform as an afterthought from games companies like Wizards of the Coast when making e versions of their popular products so you can imagine my surprise when bumbling around on the App store I found a new official Dungeons & Dragons game!!  Minutes later the download was done and I was ready to get my dungeon bash on...

    D&D Arena of War


    NOT WHAT I WAS EXPECTING...

    I'll get this out there at the beginning of this review. If you want a like for like simulacrum of a D&D encounter, this app is not for you as once you're past the initial character generation screens and into your first "tutorial" adventure, your carefully imagined plans of strategic movement go out of the window when you realise that this is ANGRY BIRDS D&D!!. Yes that's right, the only way you interact with your character is by using a bizarre slingshot technique to fire yourself at random monsters dotted around an arena.  However, as this is WotC's first iOS release I'm going to give them the benefit of doubt and delve a little deeper. 

    CHARACTER BUILDING & DEVELOPMENT

    You get a nice selection of characters to begin with which cover the usual spectrum of races and classes with options to change clothing and gender.  The main thrust of character development is reserved for a system of powers much like 4th Edition D&D.  These powers can be enhanced to increase damage (and oddly HP) and you can swap powers between quests to take full advantage of each new ability or upgrade. 

    QUESTS

    There are 3 Quest Books to begin with (Baldur's Gate, The Trade Way and Northern Sword Coast) each of which you will unlock as you progress through the game.  You will be also be rewarded with Daily Quests for levels you've already cleared and for two days of the week you get to have a crack at the Undermountain quests (a sort of ranking tournament).  Each quest costs Quest Energy (QE) to join and you have 100 QE to begin with which recharges on a timer system.  You can also use Potions to recharge your QE instantly and each time you level up it automatically recharges to full.

    Each Quest is essentially an encounter in a single location comprising of a bunch of monsters which attack you in waves.  The locations are nicely rendered but a little monotonous and reflect the overall theme of the Quest level you are on, so dungeon quests are inside rooms and wilderness quests are in forest glades.  The edges of each location have features like walls, teleportation portals, gas vents or spring traps which you need to utilise (or avoid) in order to maximise your combat potential.

    The reward for completing quests varies but essentially is a combination of powers, enhancement scrolls or potions of Quest Energy.

    COMBAT

    As I mentioned earlier you use the slingshot interface to fire your character into monsters with a charging attack. As soon as you start to drag backwards (ie away from your intended target) a small power bar will start to extend from the circle to indicate how far you will charge. Whilst this is fine when your characters are in the middle of the screen, if they are close to a wall you can end up being restricted in the amount of power you can apply and coming up too short. When using Heroes with a missile attack you need to pull back only slightly, they will then move forward a small amount (or not at all if you're really good) and fire off an arrow, thereby stopping them charging across the room straight into danger.

    Although this is a weird (and to be honest a little random) interface it does force you to use a few interesting techniques:  

    Ricochet: When you charge (or shoot an opponent) they get pushed back into another hero, enemy or bomb. When it's pushed back into a hero, they suffer an attack of opportunity, if it's another enemy then they both take additional damage; if it's a bomb it explodes damaging anyone in it's blast radius.

    Rebound: A variation on the ricochet occurs when an enemy is pushed back into a wall and rebounds into the original attacker who then automatically attacks again.

    The real trick in the game is to strategically chain these two techniques together to clear each wave of monsters as efficiently as possible.  On occasion I've manged to wipe an entire waves of enemies with just one move, but it was more luck than any type of strategy.

    POWERS

    Each basic character comes with two power slots which you get to use during combat to cause effects or heavy damage, additional slots are unlocked as you progress through the game and unlock the Tier 2, 3 and 4 characters.

    Powers are ranked from Common (C, C+), Rare (R, R+), Ultra Rare (UR, UR+) to  Legendary (L, L+) and can be enhanced by fusing identical lower level cards to them with the Fuse Power option.  Scrolls or different powers can also be fused, but are less effective.

    You can then use the auto equip button to assign the strongest powers to your character and increase their Attack and HP values to take on tougher monsters in higher level quests.  Whilst this is a simple enough mechanism, it is a little obtuse and I have yet to understand how to get the best out of my upgrades.

    OVERVIEW

    The graphics, animations and interface are all flawlessly rendered and very reminiscent of other WotC products.  The quirky catapult mechanism is fun once you get the hang of it and whilst this will leave most experienced role players left wanting, it is quite a fun use of the D&D brand and has potential to bring younger players into the hobby.  It has some of the iconic elements of D&D such as monsters like the Gelatinous Cube and Beholder, a turn based combat system which feels like initiative and a simplistic system of character progression. 

    However, I still yearn for an experience closer to a simulation of an actual game, so come on WotC you've given me a taste of what you can do on iOS, I'm salivating to see some real D&D.

    8/10 - Can't wait to see what else you've got in store.

    VIDEO REVIEW OF ACTUAL PLAY

    You can also check out a video walk through showing some actual game play on my new You tube channel Roleplay Geek TV.

    Tuesday 13 August 2013

    Reaper Bones #6: Mimic, Treasure Chest and How I Rebase my Bones

    There are a handful of miniatures from the Vampire Kickstarter that I've been looking forward to painting, and this mimic is one of them.

    I've never used one in a game, but now I have one in my arsenal you can bet you're bottom dollar I'll be throwing it at my players.

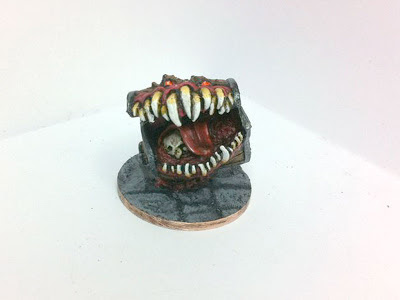
    Mockingbeast (Julie Guthrie SKU: 77048) 
    Reaper Bones Mimic (Front)
    Reaper Bones Mimic (Front)
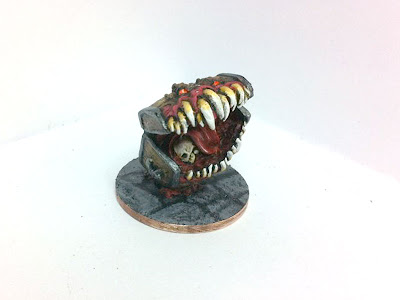
    I really struggled with the eyes, I tried several different paint combos until finally settling on fluorescent orange with a dab of white for the reflection.
    Reaper Bones Mimic (3/4)
    Reaper Bones Mimic (3/4)

    Reaper Bones Mimic (Back)
    Reaper Bones Mimic (Back)

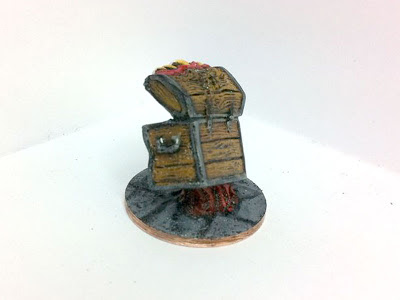
    Of course you can't have a mimic without having the treasure chest it's mimicking.

    Chest - Crypt of the Vampiress set (Bob Ridolphi SKU: 02990)

    Reaper Bones Treasure Chest and Mimic
    Reaper Bones Treasure Chest and Mimic

    How I Rebase My Bones


    All Purpose Filler and a Craft Knife
    In comments Welleran asked, "When you rebase these, how are you cutting off the old bases? Are there any tricks to it?".  The simple answer is no I'm not cutting off the bases and there are no tricks, just a tried and tested method I've used for years.

    For this you'll need a scalpel or craft knife and some all purpose quick drying wall filler, the sort of thing you use to hide cracks in plasterboard (aka gyprock or rockwall) you should be able to buy some in the discount shop for about £1.

    Tutorial


    1. Superglue your miniature to your chosen base material, for me that's old 2p pieces.  As you can see in the photo, the miniature's base stands proud of the new base and we need to hide that cliff edge.

    2. Dab on small amounts of the filler and use the craft knife to smooth it out in a nice transition from  the base edge to the height of the miniature's base.

    Smooth out the filler to transition from the miniature's base
    to the edge of your new base.
    1. Use the blade of the craft knife (or other implement) to texture the filler to taste, or to extend the existing base style if it had one.  I like to give dungeon dweller bases a paved look, which is easy to recreate by gently pressing a blade into the filler before it dries.  Wilderness creatures get a mud base which is just dimpled with the end of a paintbrush as the surface is going to be hidden with flock.

    Texturise your base before the filler dries

    Bones Progress

    Reaper Bones: 245 - Painted: 32

    Related Posts:

    Thursday 11 July 2013

    Reaper Bones #5 - Introducing Shaina Coppervein, Dwarven Orc Hunter

    Last Friday saw a new campaign start at the Hobbits Hole with Andy donning his DM's hat (truly a thing of majestic beauty which I will have to snatch a photo of) whilst I assumed the role of Shaina Coppervein, Female Dwarven Orc Hunter.  Of course a freshly minted PC needs a freshly painted mini and the Vampire Kickstarter came to rescue in the form of

    Freja Fangbreaker, Dwarf Sergeant (Werner Klocke SKU: 14085).

    Reaper Bones Freja Fangbreaker
    Shaina Coppervein (aka Freja Fangbreaker)

    I found her incredibly tricky to paint for some reason, I guess I'm just getting old and my eyes and technique are getting long in the tooth.  However, she turned out okay and this will be the first mini that is used in actual play so we'll see how she stands up to everyday wear and tear.

    I also have to own up to having given one of my bones minis away to fellow club member Stig, who deserved a nice new gnome rogue more than I had the desire to paint it.

    Bones Progress


    Reaper Bones: 244 - Painted: 36

    Related Posts:

    Tuesday 2 July 2013

    Reaper Bones #4 - A Shuffle of Zombies


    It's zombie time at roleplay-geek as more undead Bones miniatures got finished today.

    Zombies x3 (Bob Ridolfi SKU: 77053)

    Zombies x3 (Stefan Niehues SKU: 77014)

    Reaper Bones Zombies Front
    Reaper Bones Zombies (front)

    Reaper Bones Zombies Back
    Reaper Bones Zombies (back)

    Bones Progress


    Reaper Bones: 245 - Painted: 35

    Related Posts:


    Wednesday 19 June 2013

    Reaper Bones #3: A Carcase of Skeletons

    The Reaper Bones Painting Marathon continues, this time I have a carcase of skeletons.

    So far I've been pretty impressed with the PVC material the bones minis are made from.  It's much more robust than the plastic that the WotC D&D or Paizo Pathfinder plastic miniatures are made from and the sculpts have been intentionally strengthened in some areas to ensure that they don't break or bend excessively.

    The skeletons are a prime example of this as during transit they tend to get a bit bent, particularly in the polearm and base/ankle areas, which means when you unbox them they can have some weird lean angles. I had to use the hot water / cold water dipping technique on a few of them to refresh the plastic's memory and return them to their intended poses.  If you want to change a pose slightly you can, you just have to overbend them slightly as the plastic really wants to go back to its original shape.   

    DHL Classic Skeletons x3 (Ed Pugh SKU: 03467)

    Six skeletons (Front)

    Six skeletons (Back)
    From the pictures you'll see that these are the first Bones I've tried to mod.  I was pretty unhappy with the flexibility of the upper bow limbs, so I decided to string them to give them a bit of extra realism and to give the bow limb a bit of support. This involves a few steps:

    1. Heat a thin guage sewing needle over a naked flame until it glows cherry red, then pierce the miniature between the bottom limb of the bow and the skeleton's leg.  This will create a hole through which you can feed your bow string. 
    2. Cut a suitable length of solid thin wire to form your arrow and glue this between the drawing hand and the thumb with small dabs of superglue.  My knocked arrows are way too long to fit into the skeleton's quiver and I should really cut them down, but I like the way that they fit the skeleton's half draw pose so I'll leave them for now.
    3. Take a length of sewing thread and knot one end.  Then thread it through the hole you made in the bow in step 1 and set with a dab of superglue.  Stretch the thread in as straight a line as you can to the flight end of the arrow (ie the bit the skeleton is pulling) and set with a dab of superglue.
    4. Make a loop in the end of the thread and hook it over the topmost bow limb.  Tighten this thread until both bow limbs are symetrical and then set the knot with superglue.
    5. Coat the thread in superglue on both sides.  Once the superglue dries, the string becomes rigid and supports the upper bow limb and prevents any excessive flexing.
    6. The final stage is to cover up the drawn end of the bow with a flight.  Make this by pressing a small amount of modelling clay (milliput or green stuff) into a thin diamond shape on a cutting mat.  Whilst still pliable cut the diamond into two triangular halves and then stick one to the end of the bow.  You don't have to be too great at modelling to do this, just patient.

    Bones Progress

    Reaper Bones: 245 - Painted: 30

    Related Posts: