Tuesday 13 August 2013

Reaper Bones #6: Mimic, Treasure Chest and How I Rebase my Bones

There are a handful of miniatures from the Vampire Kickstarter that I've been looking forward to painting, and this mimic is one of them.

I've never used one in a game, but now I have one in my arsenal you can bet you're bottom dollar I'll be throwing it at my players.

Mockingbeast (Julie Guthrie SKU: 77048) 
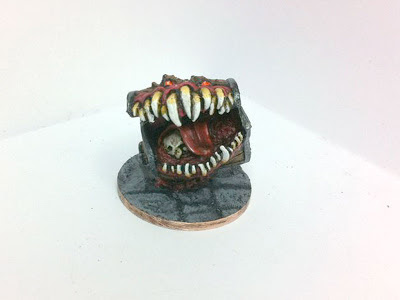
Reaper Bones Mimic (Front)
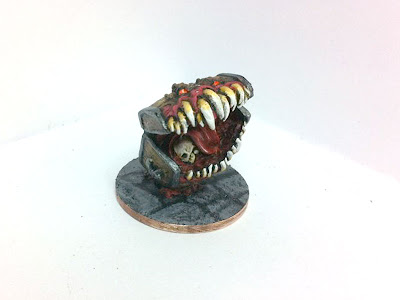
I really struggled with the eyes, I tried several different paint combos until finally settling on fluorescent orange with a dab of white for the reflection.
Reaper Bones Mimic (3/4)

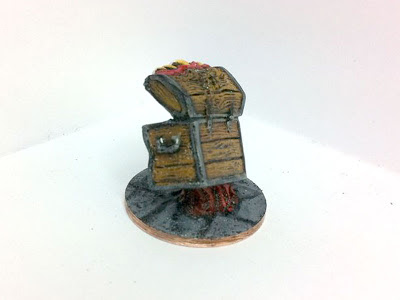
Reaper Bones Mimic (Back)

Of course you can't have a mimic without having the treasure chest it's mimicking.

Chest - Crypt of the Vampiress set (Bob Ridolphi SKU: 02990)

Reaper Bones Treasure Chest and Mimic

How I Rebase My Bones


All Purpose Filler and a Craft Knife
In comments Welleran asked, "When you rebase these, how are you cutting off the old bases? Are there any tricks to it?".  The simple answer is no I'm not cutting off the bases and there are no tricks, just a tried and tested method I've used for years.

For this you'll need a scalpel or craft knife and some all purpose quick drying wall filler, the sort of thing you use to hide cracks in plasterboard (aka gyprock or rockwall) you should be able to buy some in the discount shop for about £1.

Tutorial


  1. Superglue your miniature to your chosen base material, for me that's old 2p pieces.  As you can see in the photo, the miniature's base stands proud of the new base and we need to hide that cliff edge.

  2. Dab on small amounts of the filler and use the craft knife to smooth it out in a nice transition from  the base edge to the height of the miniature's base.

Smooth out the filler to transition from the miniature's base
to the edge of your new base.
  1. Use the blade of the craft knife (or other implement) to texture the filler to taste, or to extend the existing base style if it had one.  I like to give dungeon dweller bases a paved look, which is easy to recreate by gently pressing a blade into the filler before it dries.  Wilderness creatures get a mud base which is just dimpled with the end of a paintbrush as the surface is going to be hidden with flock.

Texturise your base before the filler dries

Bones Progress

Reaper Bones: 245 - Painted: 32

Related Posts:

Thursday 11 July 2013

Reaper Bones #5 - Introducing Shaina Coppervein, Dwarven Orc Hunter

Last Friday saw a new campaign start at the Hobbits Hole with Andy donning his DM's hat (truly a thing of majestic beauty which I will have to snatch a photo of) whilst I assumed the role of Shaina Coppervein, Female Dwarven Orc Hunter.  Of course a freshly minted PC needs a freshly painted mini and the Vampire Kickstarter came to rescue in the form of

Freja Fangbreaker, Dwarf Sergeant (Werner Klocke SKU: 14085).

Reaper Bones Freja Fangbreaker
Shaina Coppervein (aka Freja Fangbreaker)

I found her incredibly tricky to paint for some reason, I guess I'm just getting old and my eyes and technique are getting long in the tooth.  However, she turned out okay and this will be the first mini that is used in actual play so we'll see how she stands up to everyday wear and tear.

I also have to own up to having given one of my bones minis away to fellow club member Stig, who deserved a nice new gnome rogue more than I had the desire to paint it.

Bones Progress


Reaper Bones: 244 - Painted: 36

Related Posts:

Tuesday 2 July 2013

Reaper Bones #4 - A Shuffle of Zombies


It's zombie time at roleplay-geek as more undead Bones miniatures got finished today.

Zombies x3 (Bob Ridolfi SKU: 77053)

Zombies x3 (Stefan Niehues SKU: 77014)

Reaper Bones Zombies Front
Reaper Bones Zombies (front)

Reaper Bones Zombies Back
Reaper Bones Zombies (back)

Bones Progress


Reaper Bones: 245 - Painted: 35

Related Posts:


Wednesday 19 June 2013

Reaper Bones #3: A Carcase of Skeletons

The Reaper Bones Painting Marathon continues, this time I have a carcase of skeletons.

So far I've been pretty impressed with the PVC material the bones minis are made from.  It's much more robust than the plastic that the WotC D&D or Paizo Pathfinder plastic miniatures are made from and the sculpts have been intentionally strengthened in some areas to ensure that they don't break or bend excessively.

The skeletons are a prime example of this as during transit they tend to get a bit bent, particularly in the polearm and base/ankle areas, which means when you unbox them they can have some weird lean angles. I had to use the hot water / cold water dipping technique on a few of them to refresh the plastic's memory and return them to their intended poses.  If you want to change a pose slightly you can, you just have to overbend them slightly as the plastic really wants to go back to its original shape.   

DHL Classic Skeletons x3 (Ed Pugh SKU: 03467)

Six skeletons (Front)

Six skeletons (Back)
From the pictures you'll see that these are the first Bones I've tried to mod.  I was pretty unhappy with the flexibility of the upper bow limbs, so I decided to string them to give them a bit of extra realism and to give the bow limb a bit of support. This involves a few steps:

  1. Heat a thin guage sewing needle over a naked flame until it glows cherry red, then pierce the miniature between the bottom limb of the bow and the skeleton's leg.  This will create a hole through which you can feed your bow string. 
  2. Cut a suitable length of solid thin wire to form your arrow and glue this between the drawing hand and the thumb with small dabs of superglue.  My knocked arrows are way too long to fit into the skeleton's quiver and I should really cut them down, but I like the way that they fit the skeleton's half draw pose so I'll leave them for now.
  3. Take a length of sewing thread and knot one end.  Then thread it through the hole you made in the bow in step 1 and set with a dab of superglue.  Stretch the thread in as straight a line as you can to the flight end of the arrow (ie the bit the skeleton is pulling) and set with a dab of superglue.
  4. Make a loop in the end of the thread and hook it over the topmost bow limb.  Tighten this thread until both bow limbs are symetrical and then set the knot with superglue.
  5. Coat the thread in superglue on both sides.  Once the superglue dries, the string becomes rigid and supports the upper bow limb and prevents any excessive flexing.
  6. The final stage is to cover up the drawn end of the bow with a flight.  Make this by pressing a small amount of modelling clay (milliput or green stuff) into a thin diamond shape on a cutting mat.  Whilst still pliable cut the diamond into two triangular halves and then stick one to the end of the bow.  You don't have to be too great at modelling to do this, just patient.

Bones Progress

Reaper Bones: 245 - Painted: 30

Related Posts:

Monday 10 June 2013

Movie Watch: The Brass Teapot

I love indie films, they can often get away with things that Hollywood wouldn't or couldn't get through its exhaustive audience testing process.   

The Brass Teapot is one such film, it's essentially a morality tale disguised as a comedy with a supernatural focus in the form of a magical teapot which gives you money in exchange for pain.


The tale follows the likeable, but struggling young couple, Juno Temple (Atonement, Killer Joe) and Michael Angarano (The Forbidden Kingdom, Sky High) who discover a magical, money producing teapot and set about using it to change their lives.  The pair are likeable although a little stereotypical, and are surrounded by a plethora of family, friends and enemies who are all exploited by the pair as they gradually fall under the spell of the teapot. 

Add in the pair of Jewish grandsons and the strange Chinese Professor of Antiquity who both know the true power of the teapot and things turn comically dark. 

What's in it for role players

Well obviously it's the magic teapot.  I loved the way the story of this cursed item played out for the couple and it would pose a challenge to any greedy character in your game.   Essentially the teapot rewards you financially in exchange for experiencing pain but the longer you use the teapot more it's power grows, and it moves on to the next stage of its reward structure.
  • Stage 1: Accidental Injury to oneself. 
  • Stage 2: Self Inflicted Injury
  • Stage 3: Injury inflicted by another
  • Stage 4: Injury to a stranger
  • Stage 5: Injury of a friend
  • Stage 6: Death of a stranger
  • Stage 7: Death of a friend
  • Stage 8: Death of a thousand
  • Stage 9: Death of a town
  • Stage 10: Death of a Nation
  • Stage 11: Death of a species or race.

I'd make sure that it was found as a side treasure in a tomb and be pretty but mundane looking, either functional or at best semi-valuable, so as not to become an instant trade. 

Have the items power hidden for a time and only revealed to one or two characters (preferably a thief) who can keep a secret.  Allowing them to gradually discover the teapot's secret should add some interesting side story to your party.  As the owner becomes blasé about using the teapot's power, it should start paying less, or stop altogether.  They won't get a similar payout again until they find a new way of causing pain, which could be fun in it's own way.

Enjoy...